Walkthrough for Zelda: Tears of the Kingdom provides a detailed step-by-step guide on how to complete various Locations and Dungeons, as well as presents information regarding helpful details about specific Enemy and NPC encounters, and helps in discovering hidden items placed around different locations in the game. This page aims to guide all players through their gameplay and not miss any important factors of the game while accomplishing the main story, it will also highlight all important items, weapons, armor, and special encounters that can be found in the game.
Zelda: Tears of the Kingdom Temples Walkthrough
Within the Legend of Zelda: Tears of the Kingdom, you will discover a compilation of all the Shrines and Temples accessible in the game. Each page offers an extensive walkthrough encompassing puzzle solutions, strategic approaches, noteworthy rewards, and additional valuable information.
Zelda: Tears of the Kingdom Temples
Zelda: Tears of the Kingdom Walkthrough Helpful Pages
- Locations: Learn more about how to navigate the world and other points of interest.
- Weapons: A list of all available weapons in the game.
- Game Progress Route: A recommended progression route through each location of the game.
- Endings: Learn about the different endings of the game.
- Side Quests: Know all the available side quests in the game
- Side Adventures: A complete list of side adventures in the game.
- Shrine Quests: List of all Shrine Quests in the game.
- Enemies: List of all enemy encounters in the game.
- Bosses: List of all boss encounters in the game.
- Trophy & Achievement Guide: Provides guides to help you collect every trophy and achievement for the game.
Zelda: Tears of the Kingdom Walkthrough
Zelda Tears of the Kingdom Prologue Walkthrough
Objectives To Complete in this Part
- Traverse Hyrule Castle Ruins.
- Reach Great Sky Island.
- Meet the Steward Construct.
Temples To Explore in this Part
- No notable Temples to explore in this part.
Shrines To Explore in this Part
- No notable Shrines to explore in this part.
Notable Items or Abilities To Pick Up
- Decayed Master Sword
- Archaic Legwear
- Purah Pad
Prologue
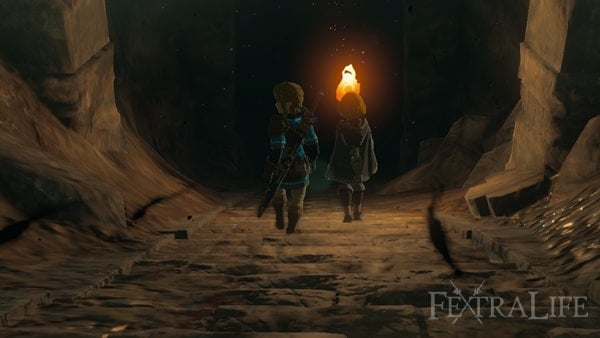
Welcome to our walkthrough page for The Legend of Zelda: Tears of the Kingdom. This overall guide focuses on providing clarity on how to progress effectively on its main quest. In the game's opening, Link and Princess Zelda embark on an exploration of the subterranean ruins located beneath Hyrule Castle. Your initial path is preordained, and you must advance by navigating through the tunnels directly ahead. Soon you will know the reason why you and Zelda went to investigate these Ruins.
Hyrule Castle Ruins
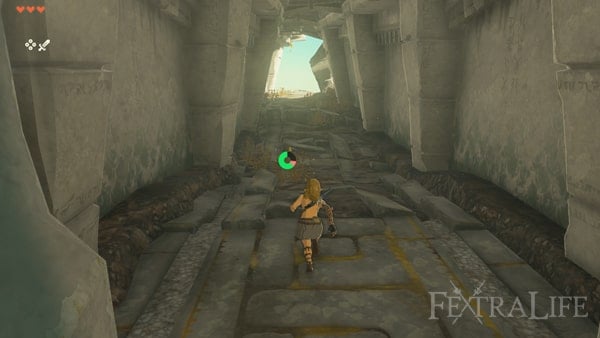
Embark on your journey through the Hyrule Castle Ruins, following a straightforward path within the tunnel. Along the way, expect to experience engaging cutscenes and engaging dialogues. At one point, you will face a minor confrontation against three bats. Fret not, as Link wields the powerful Master Sword, making short work of these enemies due to their relatively low health. Dispatch them swiftly, and your progress should continue without significant delay.
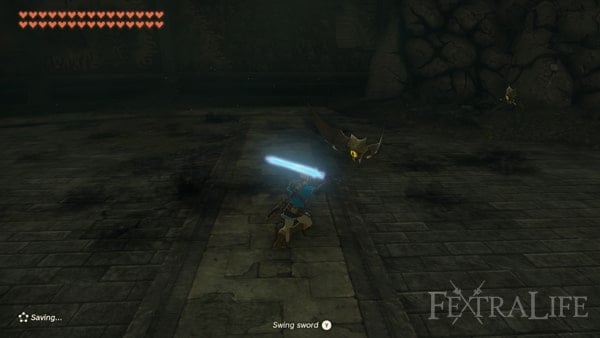
After defeating the bats a cutscene will play, and Zelda will inspect the murals. After this, there's a pathway on the side of this room leading to an old prison. Pretty straightforward path. In this old prison, Zelda and Link will find a mummy, and prepare for a cutscene. In this event, Link will lose all of his powers and the Master Sword will break. This is where Zelda and Link will be separated as well.
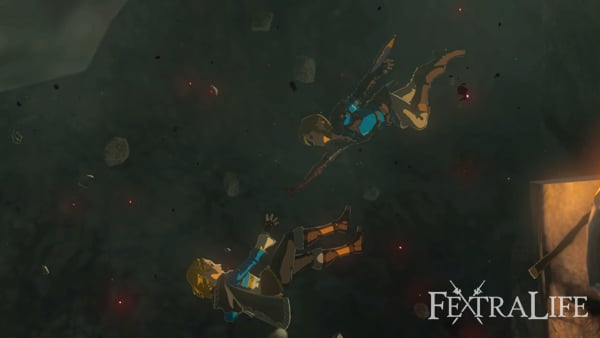
Link is alone in a cave and receives a message that his arm has been lost but replaced with a new one. Move ahead and get the Decayed Master Sword which situates in the corner before the exit, which has been damaged but still works. Press the + button to access the inventory and equip the sword. Clear the path blocked by vines using the Y button.
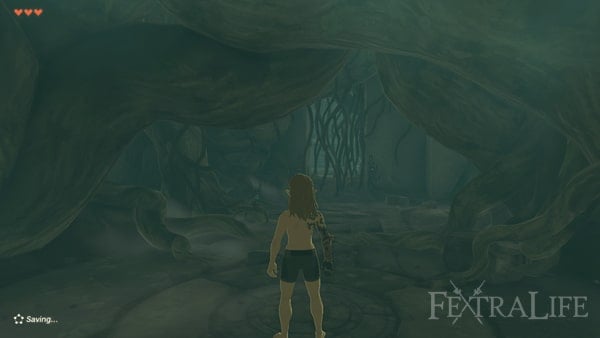
In the next room, examine the green Shrine to open the forward door. Follow the straightforward path here and dive into the next two pools of water, with the game teaching you that water will protect you from fall damage. To the left, there is a chest containing Archaic Legwear which can be equipped from the inventory for a defense boost. Proceed toward the light at the end of the tunnel and discovered that Link is on Great Sky Island.
Great Sky Island
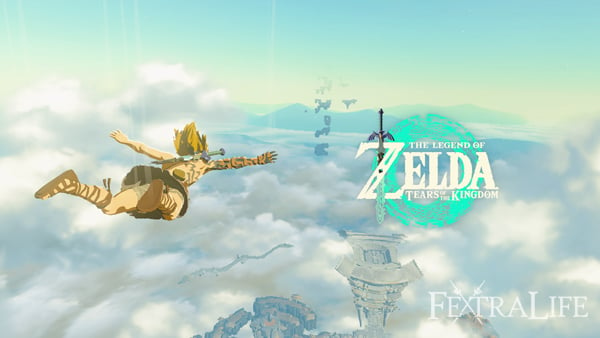
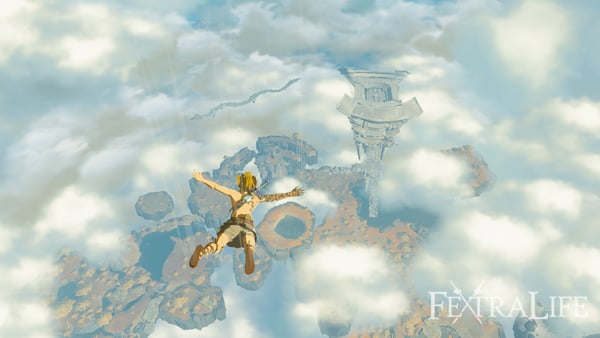
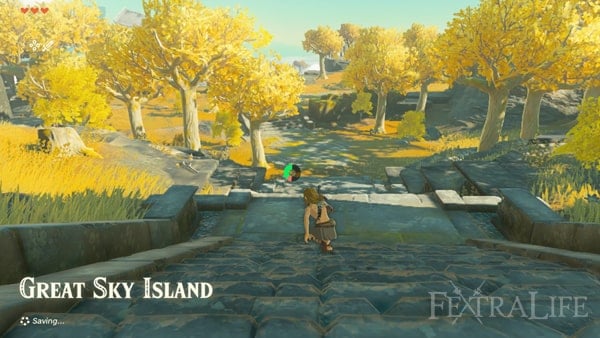
Prepare for a grand intro and upon descending, you'll have your initial view of the Great Sky Island, the first location in the game. You will automatically land in the water. Swim directly forward towards the stone stairs, which are located in the direction of a flying dragon in the sky. Obtain a Tree Branch as a weapon and equip it by using the ▶ directional button" and navigating with the " Right Stick " to select a weapon from the inventory. Continue moving forward and get At least x3 Apples from the nearby tree.
Along the way, you'll encounter a Soldier Construct, the game's first enemy. Defend yourself by striking it with your tree branch, and quickly grab another one if the first one breaks. You can also heal by eating apples from the inventory. Don't forget to loot what the enemy drops. Common Constructs usually drop x1 Construct Horn and x1 Zonai Charge. You can get more Tree Branches for spare lying around here as well. In a nearby gazebo, you can find x1 Wooden Stick. Turn back and follow the stone pathway in here and eventually find ruins that contain another x1 Wooden Stick.
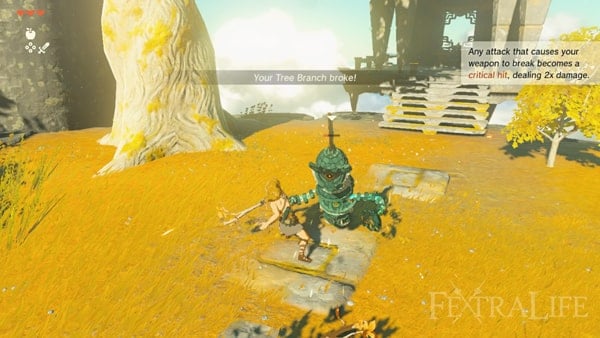
Continue in the direction of the flying dragon until you reach a broken stone bridge with a green metal object on the left. Engage with it to discover that it is actually a Steward Construct, a friendly robot that offers tips and clarifies gameplay mechanics. This specific Steward Construct explains that Princess Zelda has left behind a Purah Pad for Link, which unlocks the World Map by pressing the - button.
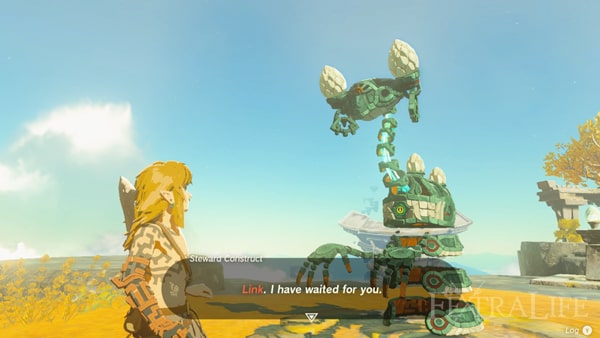
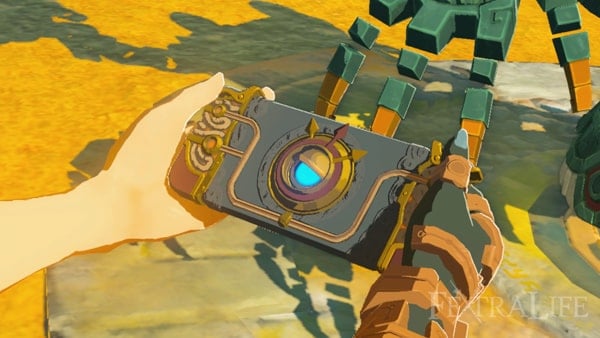
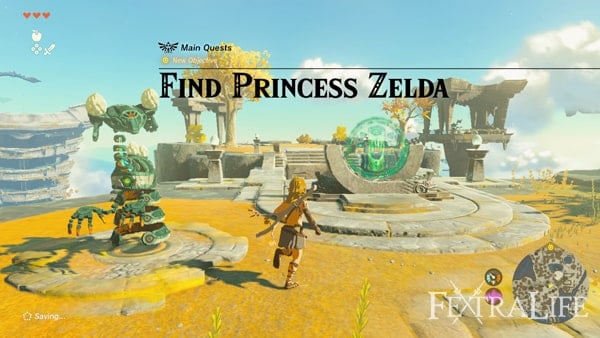
This officially signifies the beginning of the initial Main Quest titled Find Princess Zelda. To see the yellow waypoint indicating the Temple of Time in the northern part of the map, access the Adventure Log by pressing the - button.
Zelda Tears of the Kingdom Great Sky Island Walkthrough
Objectives To Complete in this Part
- Reach Temple of Time.
- Locate and complete Ukouh Shrine.
- Locate and complete In-Isa Shrine.
- Locate and complete Gutanbac Shrine.
- Return To The Temple of Time.
- Locate and complete Nachoyah Shrine.
- Open the Inner Door in Temple of Time
Temples To Explore in this Part
Shrines To Explore in this Part
Notable Items or Abilities To Pick Up
- Ultrahand Ability
- Ascend Ability
- Fuse Ability
- Recall Ability
- Light of Blessing x4
- Energy Cell
- Archaic Tunic
- Archaic Warm Greaves
Reach Temple Of Time
Link will now be tasked to look for Princess Zelda and the Steward Construct will direct him to visit the Temple of Time. We will be exploring the main section of the Great Sky Island. Touch the green shrine to activate the bridge so you can cross over. Pass the bridge and another non-hostile Construct and warn you about the hostile ones. Get at least x3 Apple hanging from the tree. Turn back and stand on the ledge and dive into the pond to access the lower grounds. Your goal is to reach the Temple of Time.
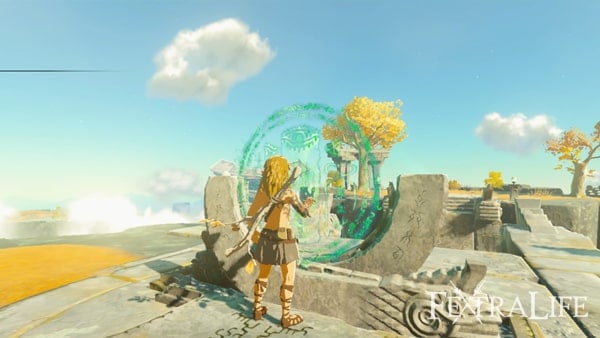
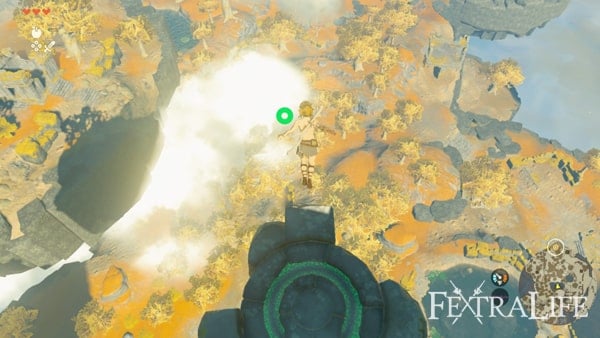
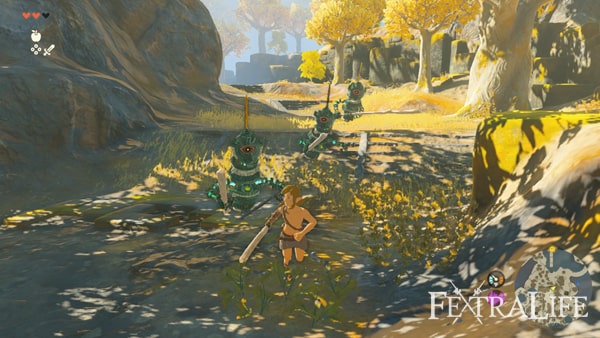
Swim to the shore and another Soldier Construct situates nearby. Deal with it and receive its loot. Follow the stone pathways and later on, find x3 Soldier Construct guarding the road. Deal with them by concentrating on one target at a time. There will be Tree Branches lying around, just in case the one that you are using breaks. Despite their numbers, time in your attacks and wait for them to move and then you counter with attack combinations. The fight will eventually end leading you to continue to the next path. If you run out of health, eat your apples accordingly. Replenish your apples by picking new ones near the area.
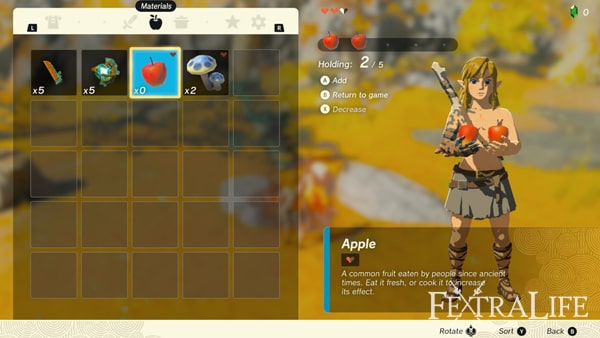
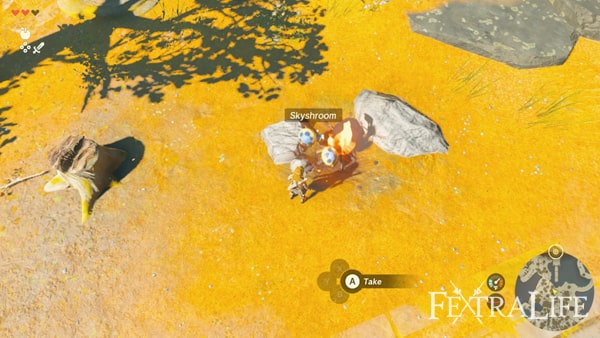
Continuing the path here will let you encounter the Construct that will teach you how to cook. Take the Skyshrooms near the area and cook them by holding and dropping them into the fire. Cooking is very useful since this enhances the potency of each material in restoring Link's health or granting him other useful buffs. Cook all the materials that you have currently, especially apples and shrooms so you can use them for later. This is an unconventional way of cooking since you only have a fire. Later on in the game, you will be properly known to cook on pots.
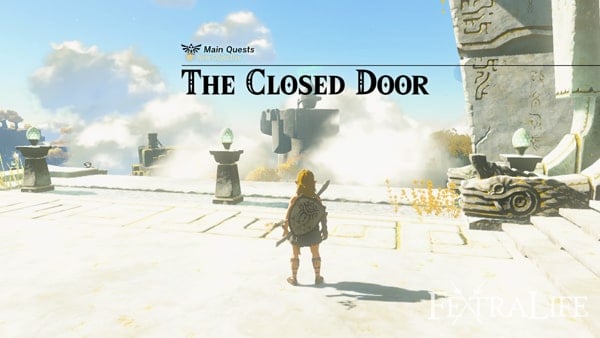
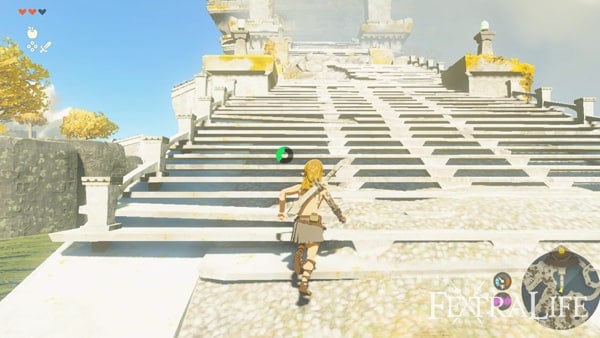
Proceed by swimming to reach the Temple of Time's stone staircase. Traverse the staircase and find a Soldier Construct guarding the entrance. Deal with it and proceed to the main gate. Touch the gate and the cutscene will trigger. You will meet Rauru and he will tell you that your powers are not enough to open this door hence, you need to recover your hand's lost powers by visiting and completing all of the three shrines located in Great Sky Island. Hence properly, starting the next main quest.
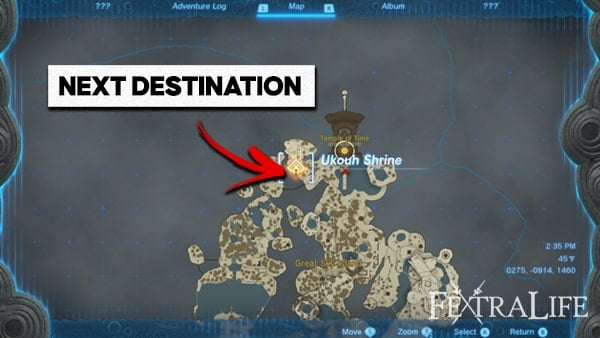
Locate Ukouh Shrine
The Closed Door Quest commenced and as mentioned, you need to locate and complete all three shrines to proceed. Gutanbac Shrine, In-Isa Shrine, and Ukouh Shrine. First, we will be locating Ukouh Shrine first and complete it. It is the nearest after all. Head west and jump down to reach the lower part of the area and soon find another Soldier Construct, watching the area. Deal with it quickly and get your first bow and move forward. Pick up all Skyshrooms and Arrows that you can find lying around so you can use them later. A reminder, use the bow sparingly, especially in combat. Do not rely on it since it should be better saved for flying targets, emergency situations, or when solving puzzles. Climb the stone staircase and eventually, you can do a surprise attack on a Soldier Construct below to gain the upper hand. After the battle pick up any melee weapons that you can find and it should already be your routine to stock up weapons as much as you can since weapons can break easily in this game. Swim across the pond here and eventually reach the stone staircase leading to Ukouh Shrine and you can pick up Rushroom while on your way. Note that you can climb these stone walls just in case you need to reach high places.
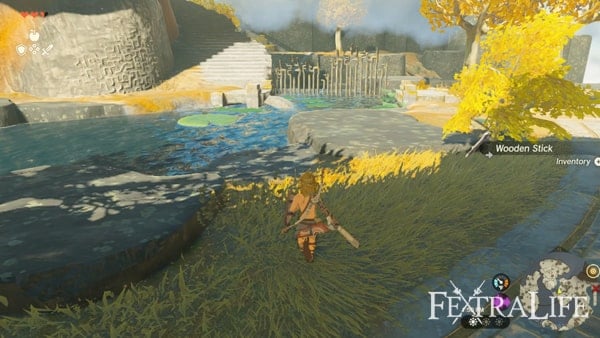
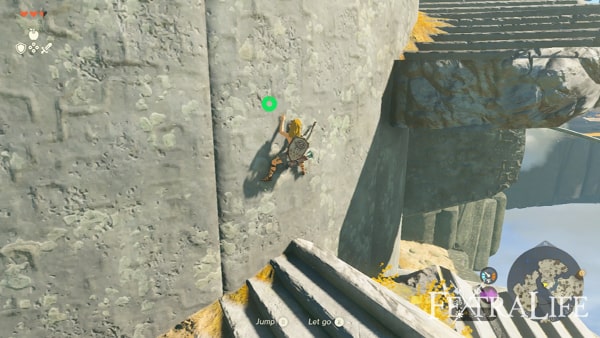
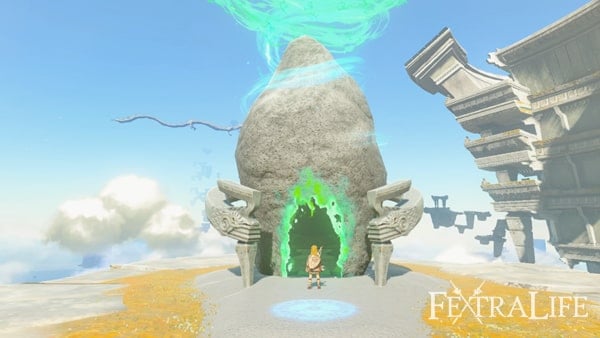
Complete Ukouh Shrine
Welcome to your first shrine. Shrines are brief but fun levels to explore. Your main objectives while inside a Shrine are simple. Solve its puzzles to progress, and eventually reach the end and get Light of Blessing. As simple as that. Note that your first three shrines will be easy ones as you get new abilities and explore its basics capabilities. Rauru will bestow you the Ultrahand Ability and you will need it to complete this shrine. The game will inform you of the basics of how to use it, study it, and move forward. I will be dividing each Shrine section according to its puzzles for a much clearer progression.
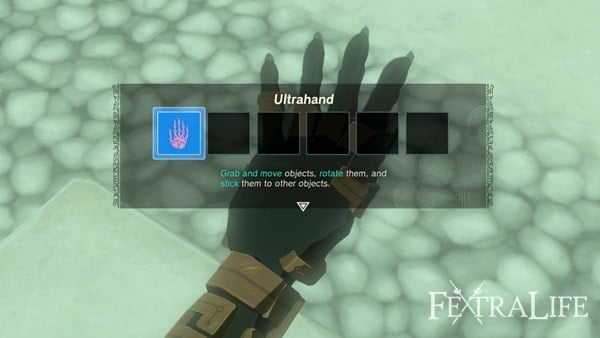
Ukouh Shrine Puzzle Number #1
To proceed, use the Ultrahand in lifting the nearby stone plate and placing it before you, and use it as a bridge to reach the other end. Every time you successfully complete a puzzle, you will hear an upbeat tone.
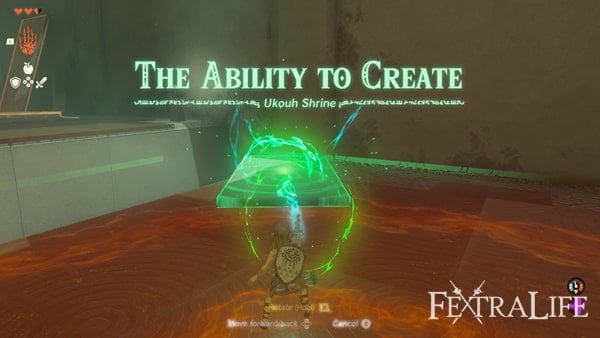
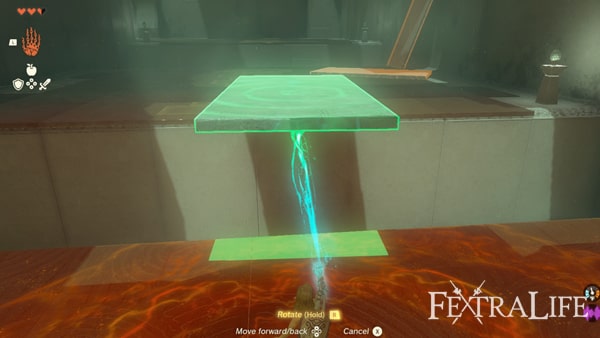
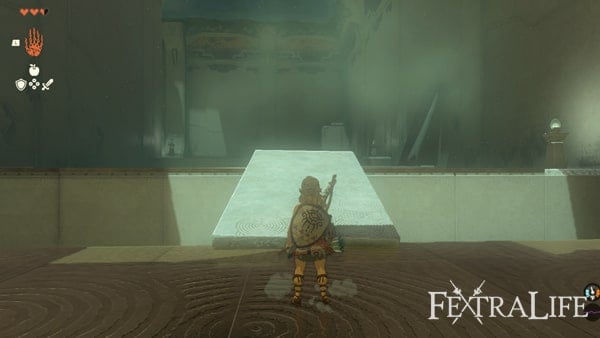
Ukouh Shrine Puzzle Number #2
There are two stone planks here, your goal is to line up and combined these two so you can form a much longer bridge to cross to the other side. You will know if the objects will stick to each other when you see a greenish glue-like substance forming between the objects. After forming the bridge, line it up and cross over.
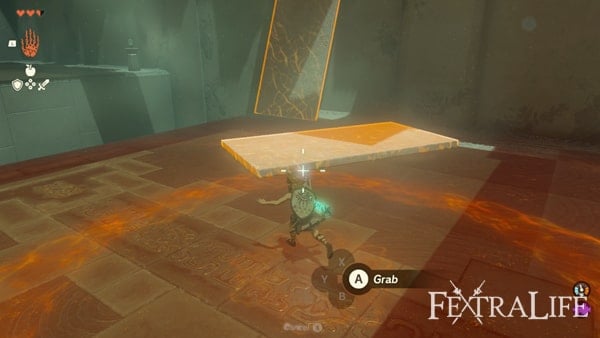
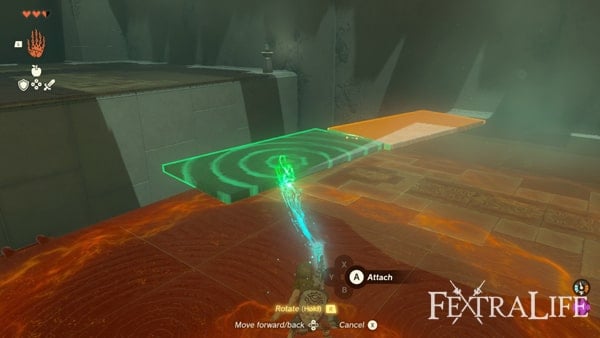
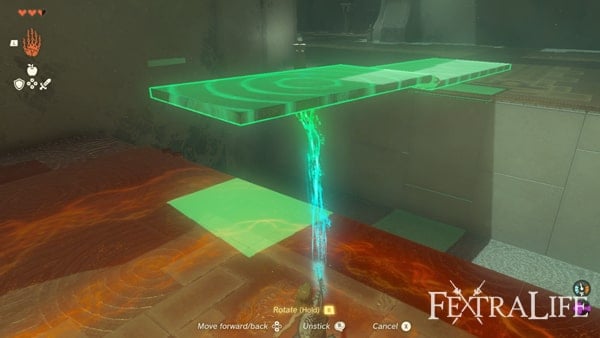
Ukouh Shrine Puzzle Number #3
To solve this puzzle, observe the metal pipe extending from the platform where you stand to the next. You need to create a gondola from the materials available around. Get the wooden plank and the free hook lying around. Then combine them together to form the gondola. Use the Ultrhand to place the gondola to the over-extending metal pipe. As it moves, quickly hop in to cross over.
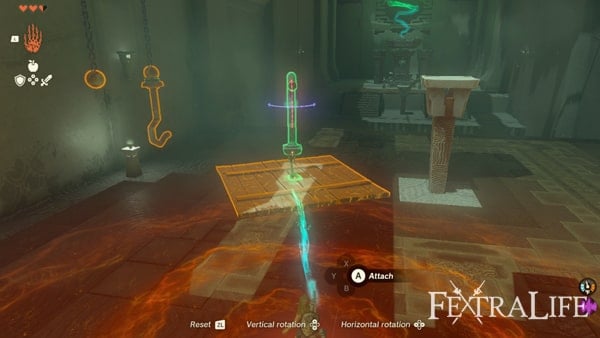
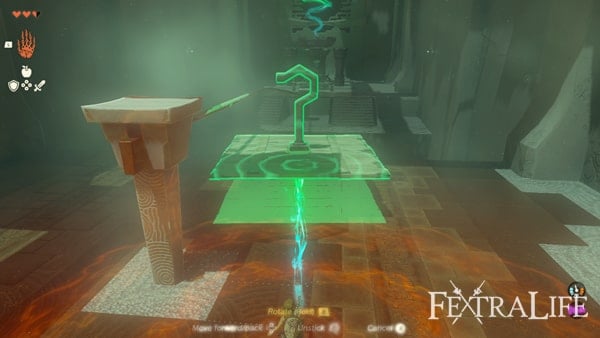
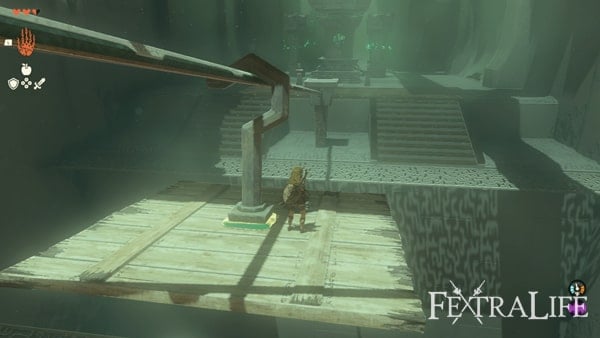
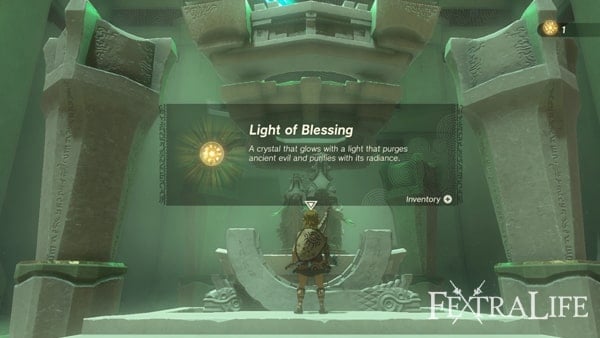
That is all for this shrine and approach the altar to receive your reward, which is a Light of Blessing. I will explain the use of it. Take note that how I presented the Shrine progression guide as this structure will continue to the next one. After receiving the Light of Blessing, you will be teleported to the Shrine's entrance.
Locating In-Isa Shrine
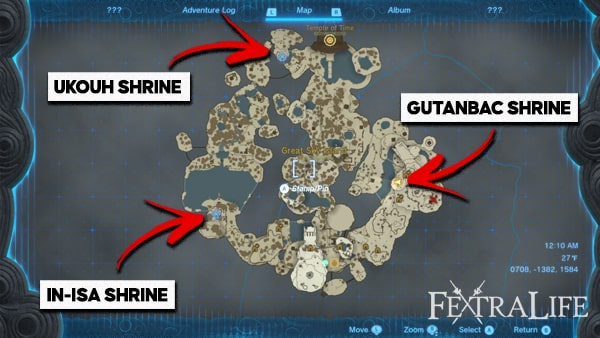
Two more Shrines to go. The next one is In-Isa Shrine. At Ukouh Shrine's entrance, Rauru will teach you how to mark locations on the map by using the scope of the Purah Pad. you can see both temples from your location but you can check the map posted here. Near your location, you will be able to see the same metal railings that extend to the next part of the island. Like in the Ukouh Shrine puzzle, you need to build the gondola to get to the other side. Jump to the pond below and start climbing the staircase. As soon as you reach the top, build the Gondola and ride it.
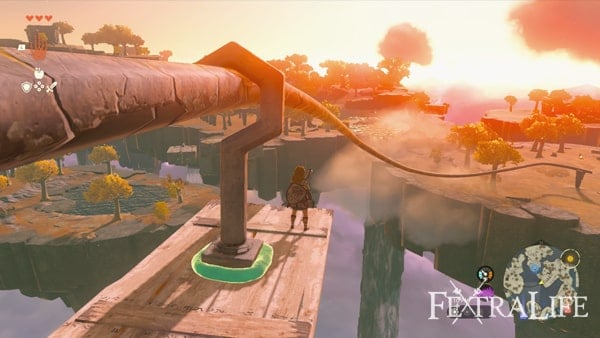
In the next island section, another non-hostile Construct will teach you how to chop trees and turn them into logs that you can use when building structures or vehicles. Simply get the x1 Stone Axe nearby and chop the trees in here to test the feature. Get also the x1 Wood in the nearby ruins. Here, you need to create a bridge that you can use to cross the other side. But to quicken the process, attach x4 logs to the gondola that you made previously to make a long bridge.
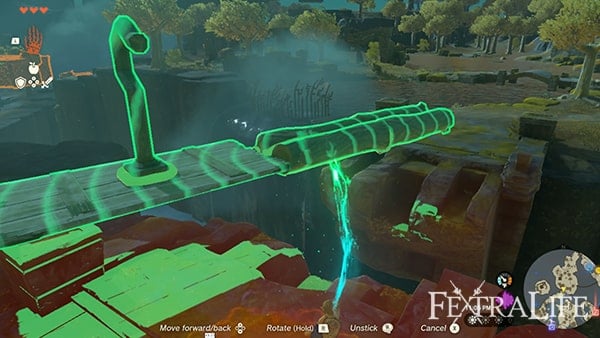
In the next section, notice the floating platform. You can control and place this platform to your liking especially when you need something to step on when reaching elevated or disconnected areas. Head back to the original path that you took and proceed, there's a bonfire with a Construct nearby. You can stop and cook here if you want or proceed. Continue to the location of the next shrine, and pass the ruins, notice there's Cooking Pot available for use. The Construct here will teach you the basics of cooking. Cooking is essential for your travels as it increases the potency of the raw materials that you used. As mentioned, it can provide more health and buffs. So always stack up cooked food rations.
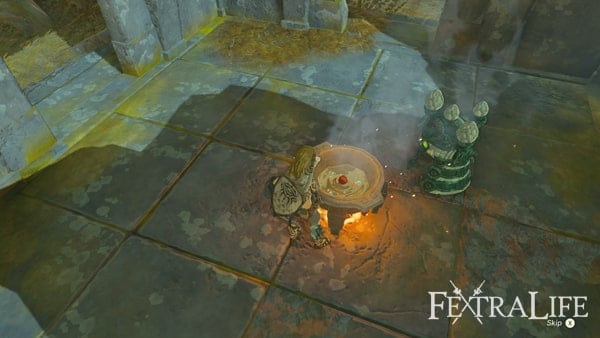
When you are done with cooking, proceed and you will stumble upon an outpost. Three Soldier Constructs are guarding this outpost. Deal with the first two near you and the one using a bow last. Get all the loot and open the treasure chest to receive an Opal. Head west and another set of metal railings can be found here. Make another gondola cross the islands.
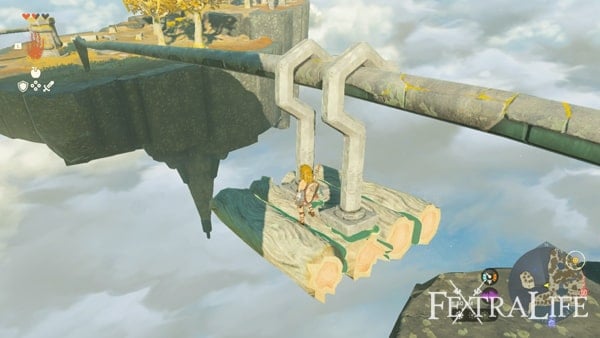
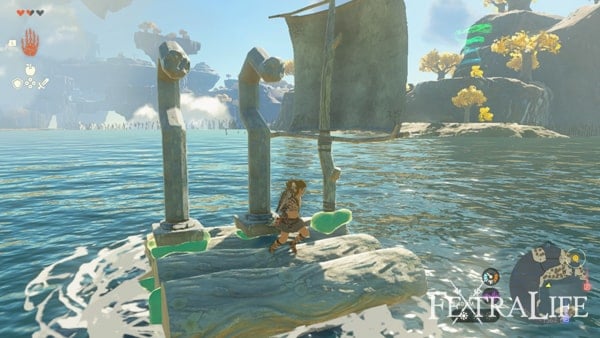
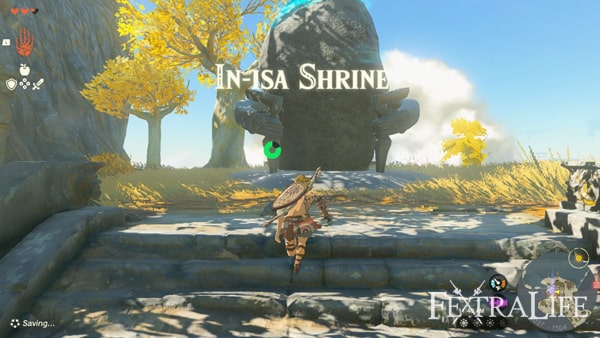
If the logs around are not enough, always remember that you can chop trees around. When you were able to cross, on the next island, there is a sail that you can use for later. Attach it to your gondola before traversing the next rail. Notice a lake that you need to cross and it would be hard for Link to swim across it. This is where your gondola combined with a sail will shine. Place the vehicle on the lake and use it as a raft. Upon reaching the other side, prepare for the next Shrine and enter it.
Completing In-Isa Shrine
Rauru will gift you the Fuse Ability. With this ability, you fuse weapons and materials around Link and alter the weapon's utility. Not only its possible use will change, but most of the time it increases the range, power, or affinity. This is an essential Ability that is always being used not just in battle but in solving puzzles as well.
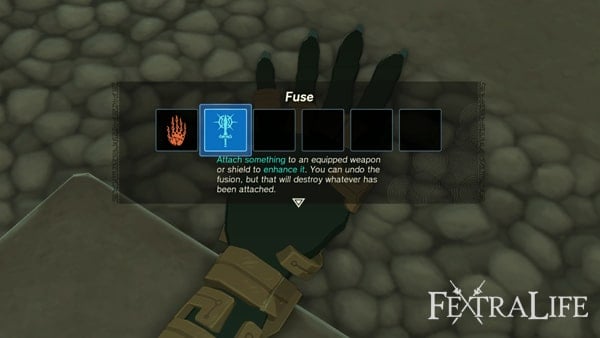
In-Isa Shrine Puzzle #1
You need to destroy the stone blockade ahead. To do this, simply fuse your weapon or the x1 Rusty Claymore nearby with the rock boulders available nearby. This will serve as a hard-hitting harmer that can destroy stone blockades or rock formations. Take note of this feature as you will be using this a lot.
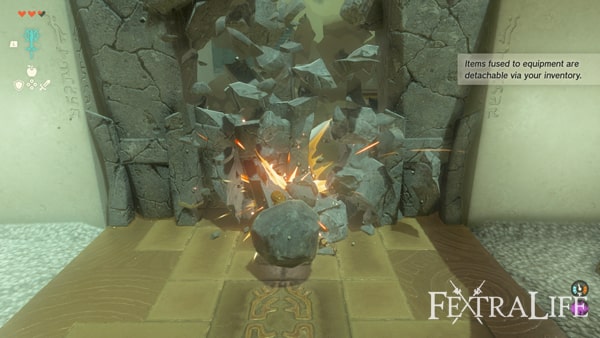
In-Isa Shrine Puzzle #2
In the next area, hammer down the stone pillar to get the chest and get x5 Arrow. Go to the next available space and gather all the fire fruits here. The game will also teach you that you can fuse materials to your arrows before firing them. Our goal is to make all the vines along with the platform where the treasure chest is situated. Aim at the vines and fuse a Fire Fruit in an arrow and fire away. When the treasure chest drops get the x1 Small Key and unlock the previous door to proceed.
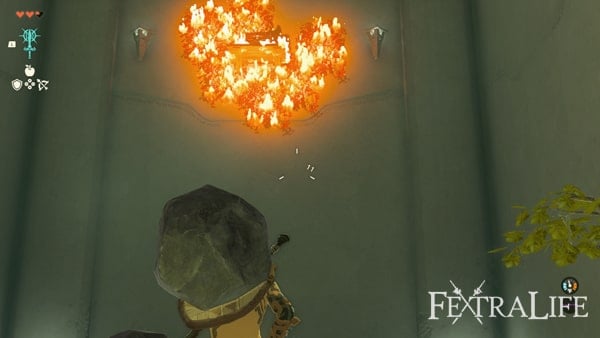
In-Isa Shrine Puzzle #3
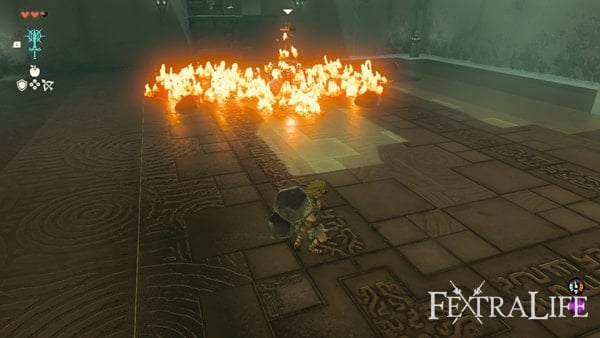
Pass the ladder, a Captain Construct I is waiting for you. Be careful as they can hit Link hard. To alleviate this danger, you can use your bow and arrow fused with Fire Fruit to ignite vines on the floor. This will deal damage over time to the Construct. After the flames went out, if the Construct is still standing, put it out of its misery. Then destroy the stone blockade again with your rock-infused weapon to complete this Shrine. Receive an x1 Light of Blessing.
Locating The Gutanbac Shrine
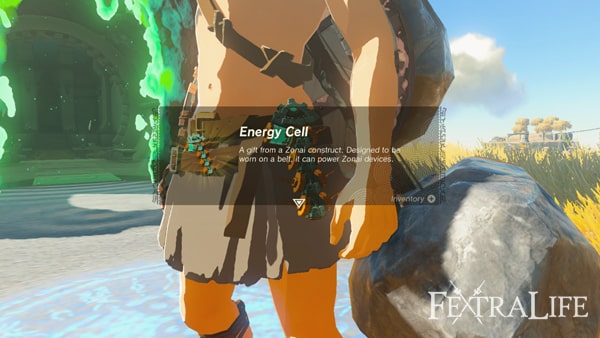
Down to the last Shrine. After being teleported to the Shrine entrance, a Steward Construct will provide you with an Energy Cell and provide a brief explanation of its uses. This is the battery of what we call Zonai Devices which I will dive into later.
The Construct will also instruct you to go into a cave, located southeast from your direction. Along the way, you will encounter a brawl that involves x2 Chuchu and x2 Soldier Construct. Take advantage by surprising them by joining the fight. After the fight ended, head to the cave entrance with an x2 Soldier Construct guarding it. Beat them and get the treasure chest near the Cooking Pot to receive an x1 Soldier Reaper. You can cook and restock your available food before heading into the cave.
Pondside Cave
Inside the Ponside Cave, this cave is straightforward with minor enemies along the way like Keese. But there's a rare enemy here the Bubbul Frog. Nothing that you can handle, simply shoot it so it will fall into the ground and beat it. Receive a Bubbul Gem as a reward. This is a rare monster so make sure to kill it every time you encounter them just in case you want to collect Bubbul Gems later on.
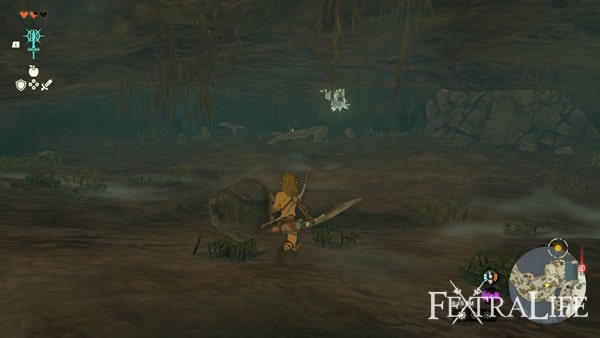
Destroy the stone blockade with the Fuse ability and find more breakable concentrated gem pillars. Break them all and get precious stones such as Rock Salt, Ruby, Flint, and Amber. Flint is valuable since you can make fire with it with Wood. Just in case do not have a Portable Pot which will be introduced later. Proceed to the inner section of the cave and find an Archaic Tunic. Wear it for additional stats. Exit the cave and notice that there are a lot of materials lying around.
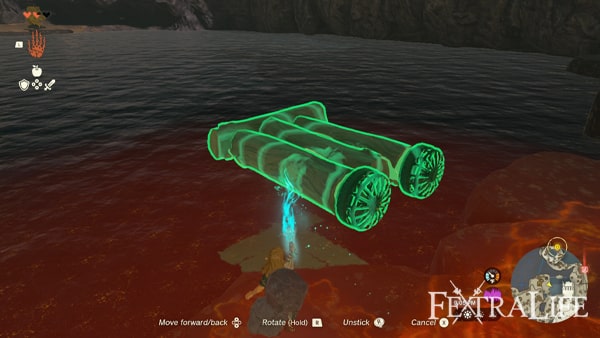
To cross the river, you need to create a raft again with the materials available. The two non-hostile Constructs here will provide you with a hint about it. Assemble a raft with x3 Log, and x2 Fan. Once done, put the raft into the water and hit the fans with your melee weapon and the raft will start to move. To turn off the device, just hit it again. Near the shore, a Steward Construct will give you guidelines on how to make a fire with a Flint and Wood. You can cook here as well if you want to before proceeding. Follow the stone staircase while dealing with Chuchus along the way.
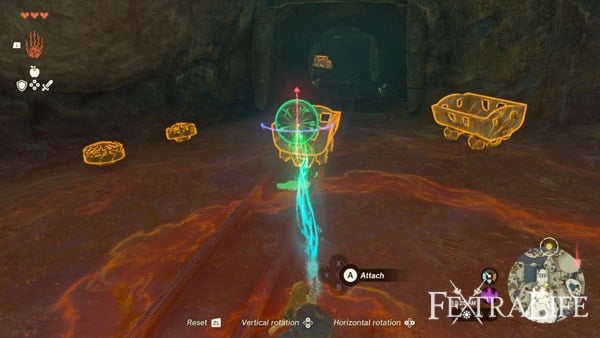
Near the cave entrance, you will notice an outpost. with x2 Soldier Construct and an x1 Captain Construct. Fight them strategically by fusing the surrounding materials into your weapon. After beating the trio. as open the treasure chest and receive an x1 Opal. Near the cave, attach x1 Fan on one of the available mining carts here. Proceed inside the cave by making the Fan work.
Mining Cave
While inside, the game will teach you how to use Bright Bloom Seeds. They glow upon impact, you can fuse them with your arrows, or simply, drop them into the ground, and hitting them with a melee weapon will do the trick. Very useful in dark areas. Be sure to destroy those concentrated gem pillars to get Zonaites. In the next area, the construct near the refinery will teach the concept of Zonai Charge and Crystallized Charge. Basically, Zonai Charge can replenish the charge of your Energy Cell while Crystallized Charge is used to create more Energy Cells. I advise you to halt producing any of the two for now. Take advantage of the concentrated pillars around you, loot them, and proceed. Near the cave's exit, another construct is waiting for you.
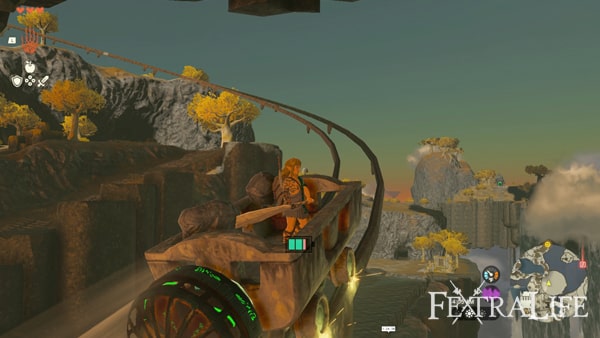
Examine the Zonai Device Capsules near it and he will give them to you. Open your inventory and open at least one capsule of x1 Fan and attach it to the mining cart to proceed. The game is introducing you to how capsules work by the way. Essentially, you can bring different kinds of Zonai Devices in the form of capsules. Like in this instance, the Fan that you just used.
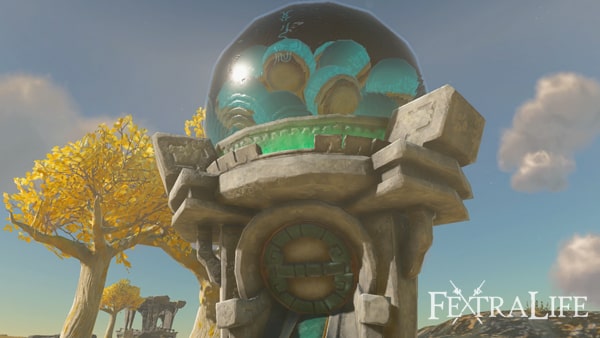
As soon as you reach the end of the railway, unmount from the mining cart and notice a capsule-like structure. This is a Zonai Device Dispenser. This is where you get your Zonai Capsules. One Zonai Capsule requires x1 Soldier Construct Horn. Use at x5 horns in exchange for x5 capsules and save the rest for later. It is worth noting that Dispensers are scattered across the world and each of them provides different types of capsules. On the other side of the Dispenser is the next cave that we will go through.
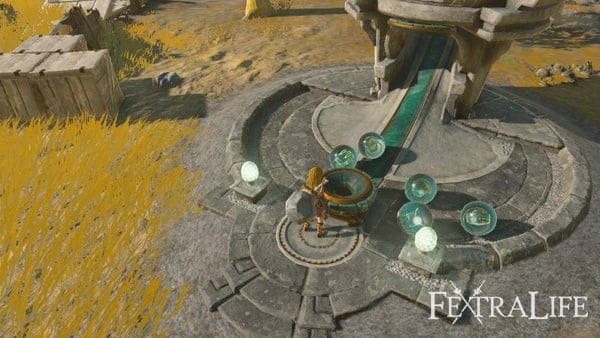
Pit Cave
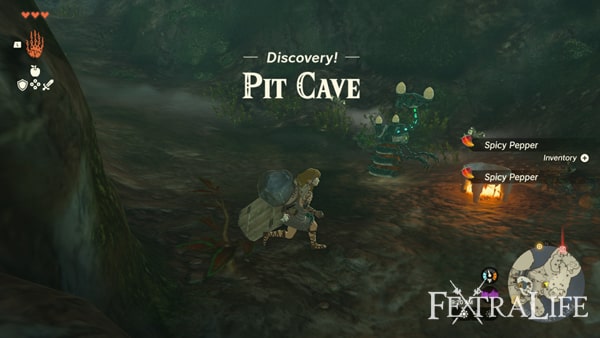
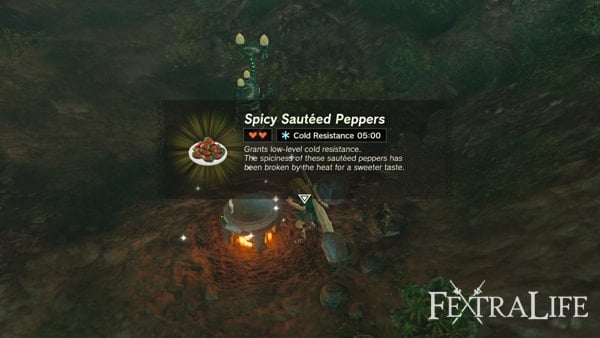
This cave is straightforward and its sole purpose is to ready you from a snowy region right beyond the exit. Get the x2 Spicy Pepper near the entrance. Place it in the Pot and cook it. This will provide the dish, Spicy Sauteed Peppers. Take note of this dish as you will be making a lot of these to last in snowy regions. It will increase your Cold Resistance for 2:30 minutes. To increase its potency or prolong the cold resistance duration, put x2 Spicy Pepper in the pot to have at least 5:00 minutes worth of Cold Resistance. There is a stone blockade near you, so be sure to destroy that, to get precious gems as well. While if you want more Spicy Peppers, there are still more that you can gather near the exit. Take note of this area as you can return here if you need Spicy Peppers. The search Continues for Gutanbac Shrine
After exiting the cave, the snow region is up next. Eat your prepared Spicy Sauteed Peppers to increase your Cold Resistance. If you suffer from extreme cold, Link will experience damage over time. Head north and stumble upon an Ice Chuchu, Hit it with arrows as it explodes before dying. x2 Soldier Construct can be found in the vicinity, you can do a surprise attack from above to gain the upper hand.
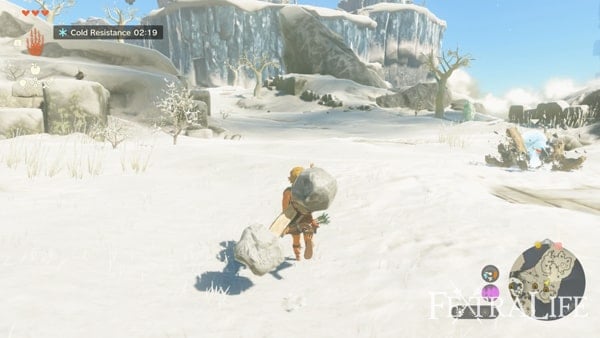
If you need to use the Pot for creating more Spicy Sauteed Peppers to survive in this region. Head north and more Ice Chuchus will appear. Beat them and get their loot. Continue the path and notice that a Captain Construct I and an Ice Chuchu that are fighting each other. Near the cave entrance. Concentrate your attacks against the Captain and be very careful when dealing with it as flame attacks can incapacitate Link in a short period. Use bows if necessary. Head inside the cave and continue.
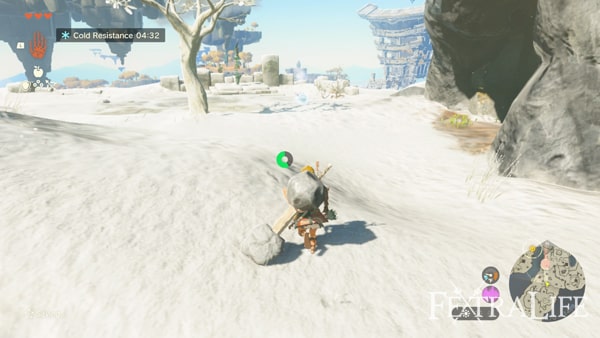
Bottomless Cave
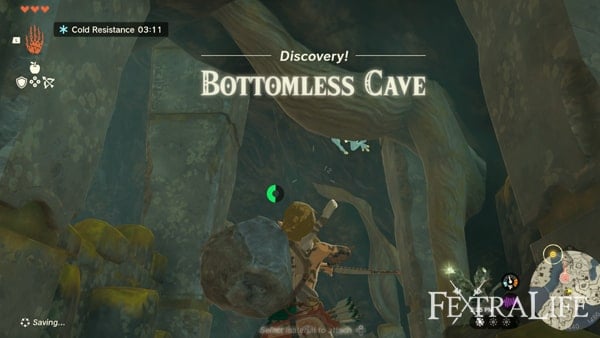
Near the cave entrance of Bottomless Cave, a Bubbul Frog is waiting. Kill it for a Bubbul Gem. Make sure to pick up x2 Bomb Flower and save it for later. This is a powerful material so it is advisable to save it for special encounters such as bosses. Head to the upper part and pick another Bomb Flower and open the treasure chest at the end of the stone bridge and receive an x1 Amber. Head back go into the higher section of the cave and find a worm-like beast called Like Like.
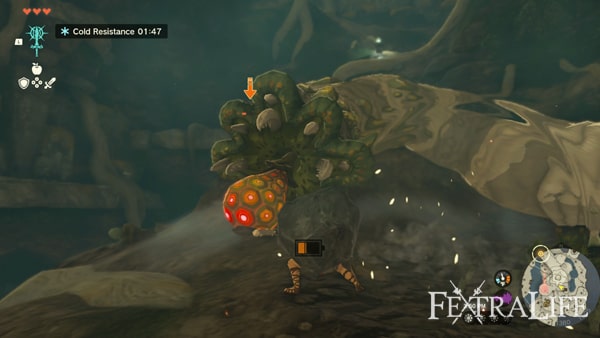
To beat this monster, before it attacks, it will show its weakness, the orangy sack in the center of its mouth. Wait for it and hit it and it will be staggered, making it open for more damage. Receive an x1 Opal for beating it. Proceed and do not forget to gather all the raw materials around like Bomb Flowers. and Brightbloom Seeds. Near the cave's exit, There's another Like Like that we need to take down. Receive an x1 Opal again from it and a Flame Emitter Capsule from the treasure chest behind the Like Like.
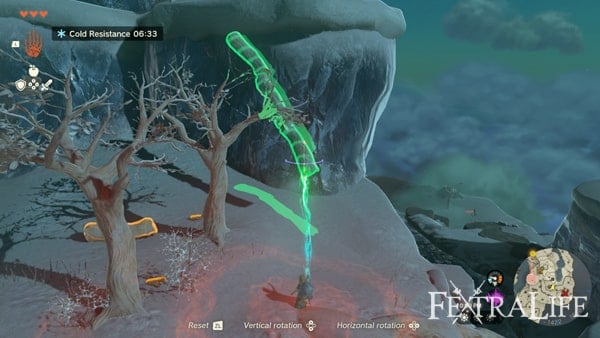
From the cave's exit, head left and the Shrine is not that far now from our location. You can see the Shrine as well in your minimap if you marked it previously so you can determine where to climb. It is just above the cave's exit. To reach it, chop the trees around to create a wooden pillar that you can climb to reach where the Shrine lies. Link can't climb icy surfaces unless wearing a special armor later in the game. So the pillar is essential to your progression. There are ruins here with a Cooking Pot. Take out a Flint to start a fire if you need to. Just in case you need to make more food to replenish your hearts or make more anti-cold dishes. head back and enter the last Shrine.
Complete Gutanbac Shrine
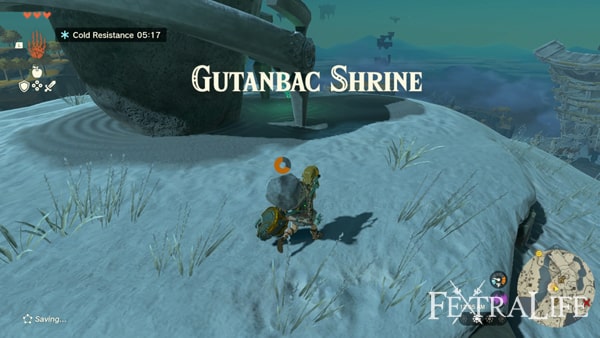
In Gutanbac Shrine Rauru will give you the ability to Ascend. This is one of my favorite abilities in the game, especially when reaching high places. Essentially, Link can get through to places above him as long the range is reasonable. This shrine is a perfect training ground for this ability. Proceed ahead and solve the first puzzle.
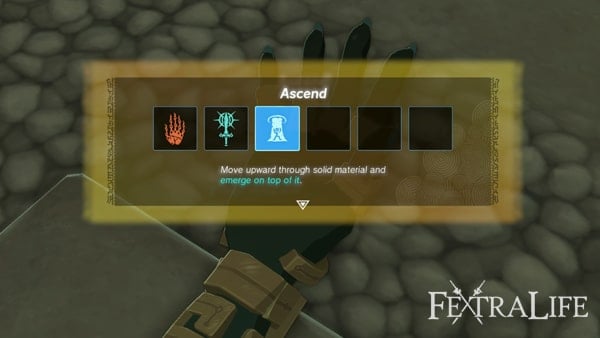
Gutanbac Shrine Puzzle #1
Use the Ascend Ability and aim it at the ceiling. You can easily determine if you can use the ability if the ability's marker turns green. Simple as that.
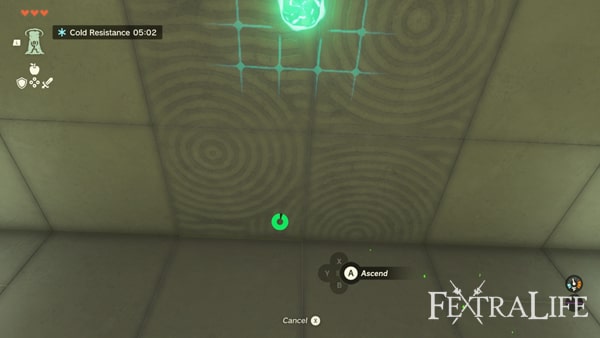
Gutanbac Shrine Puzzle #2
Ascend first on the pillar where a treasure chest is located. Receive an x1 Stone Axe from it. Now, jump down and Ascend again to the next pillar this time. Solving the second puzzle. There's Soldier Construct in here, deal with it and move on. Near the previous construct, there are boxes that you can destroy so you can Ascend and get the treasure above. Get an x1 Construct Bow from this. Jump down and move forward.
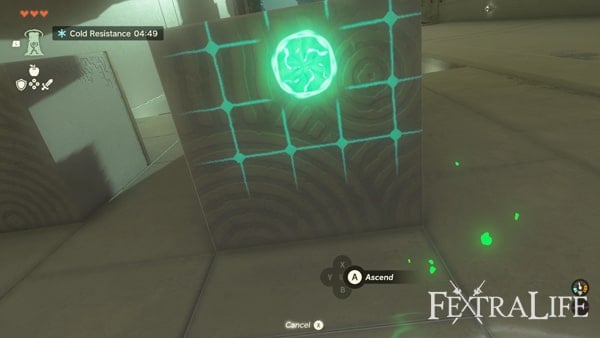
Gutanbac Shrine Puzzle #3
There's a stone plank here that needs to get loose and position itself correctly. Simply cut the ropes tied to it and use Ascend underneath the stone plank. While you just need to time your Ascend Ability to the moving platform above you and do the same in the long pillar. This will solve the third puzzle.
Return to Temple of Time
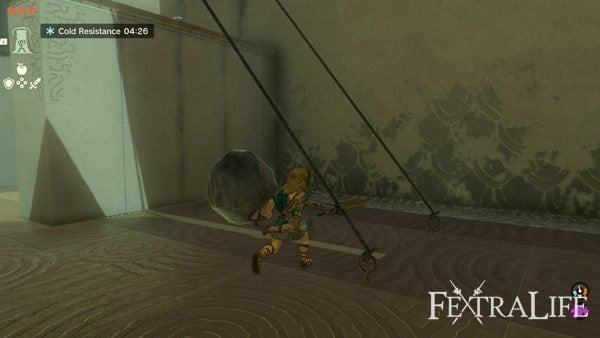
Congratulations on finding and completing all three Shrines. Receive an x1 Light of a Blessing as a reward from this Shrine. You will be teleported back to the entrance and Rauru will instruct you to return to the Temple of Time. For you to do so, reach the elevated section near the Gutanbac Shrine entrance by using the Ascend ability.
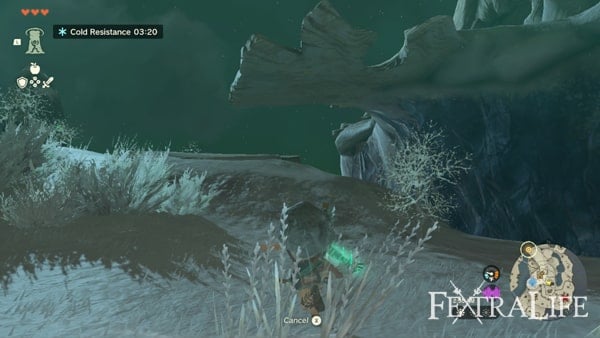
Head inside the tree and find a treasure chest that contains Archaic Warm Greaves. Next up, is an area with a lot of Wing Zonai Devices, these are the bird-like vehicles that you hop on and glide. And also, there is a Zonai Dispenser near the area, just use the Ascend Ability to reach it. Just in case you need to utilize it.
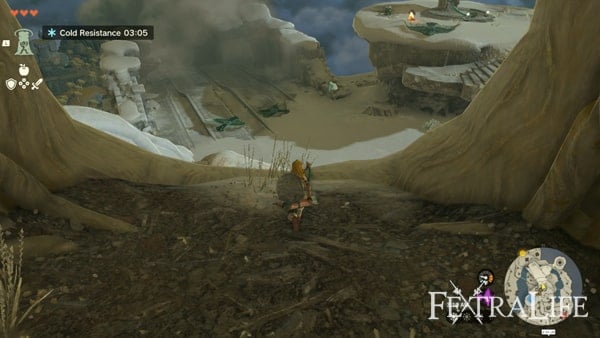
If you are ready to move forward, use the Ultrahand to place one of the Wing Devices near the end of the catapult line, you will start to see it moves on its own as it slides. Quickly hop on it and enjoy the ride. Fantastic view isn't it? Glide through the Temple of Time and start the long dive to land on the nearby ponds of the temple
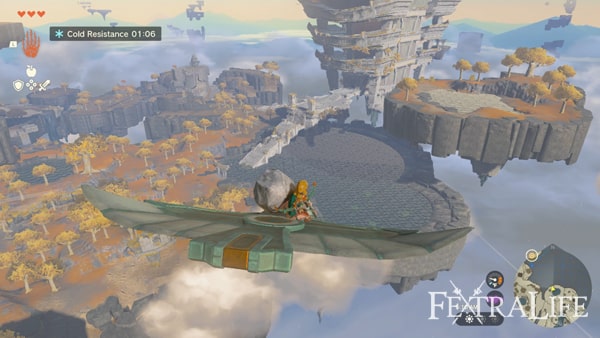
Climb to the temple again and touch the door to finally open it, clearing one of the Main Quests: The Closed Door. Head inside the temple and touch the glowing crystal that will trigger a cutscene with Princess Zelda. This event will also reward you with the Recall Ability. The system will update the Find Princess Zelda main quest and your goal now is to explore the inner section of the Temple of Time.
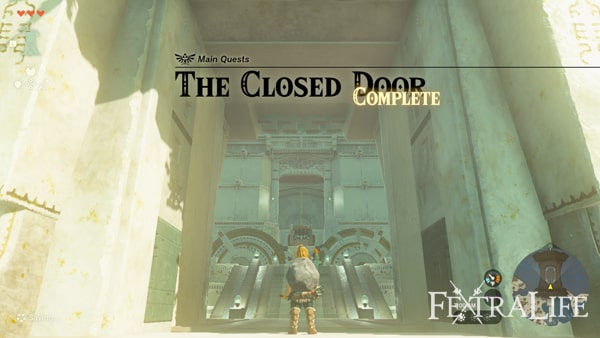
Complete Temple of Time
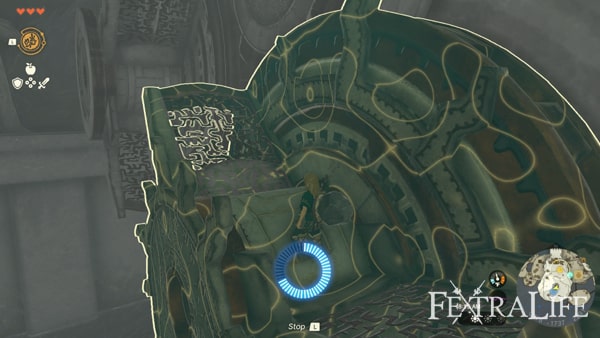
This temple is rather short, so no worries about that if you are somewhat tired from the previous adventure. Start, use the Recall Ability to the giant cogwheels in this area. The Recall Ability essentially rewinds an object's motion in a short period. In this instance, you need to rewind the cogwheel so Link can hop on it and ride it to access the upper parts. Upon reaching the center pillar, rewind the center cogwheel to access the next area.
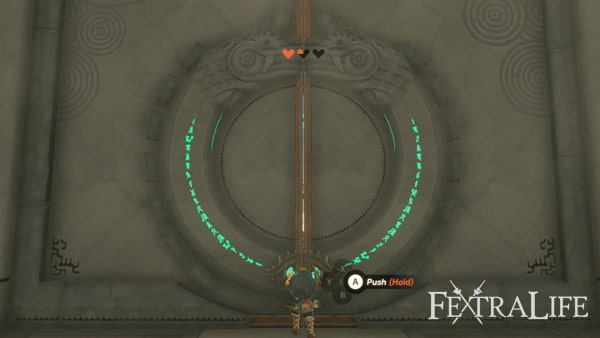
You can ignore the Goddess Statue for now. Head to the huge door behind the statue and try to open it. You will discover that you do lack the ability to do so. You need an additional Heart Container. But to do so, you need a total of x4 Light of Blessings in exchange for one Heart Container from the Goddess Statue. Rauru will advise you to seek another shrine but no worries, you can fast travel there from the Temple of Time.
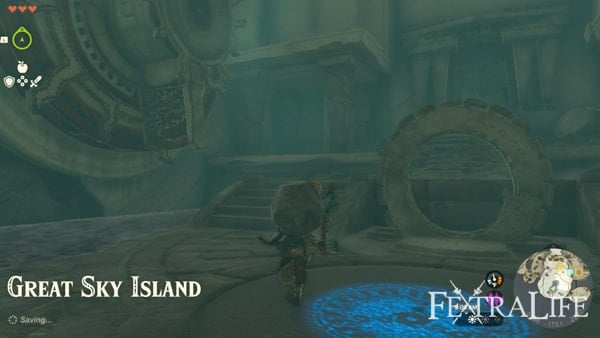
Open your map and fast-travel back to the Room of Awakening location. In this location, use the Ascend Ability to the nearby stone structure, nearest to the cogwheels. Rewind the nearest to yours and hop on it to successfully make on to the other cogwheel and eventually reach a cave. Head to the inner section of the cave and discover the next shrine.
Complete Nachoyah Shrine
This dungeon is relatively easy to complete and this is a good place to practice your Recall Ability. A relaxing one to finish this section. So enjoy it. Starting with the first puzzle.
Nachoyah Shrine Puzzle #1
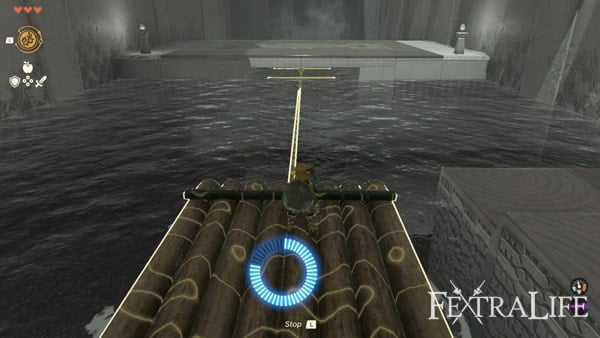
Simply rewind the moving raft so it will go in the opposite direction. Hop on it and done. Simple right? Down to the next puzzle.
Nachoyah Shrine Puzzle #2
The raft that you need to ride this time will come from the waterfalls. Wait for it near your location and rewind it. Hop on it and it will return from its original positioning. That's it for the second puzzle. While on your way to the next one, there will be a large gear that you can also rewind for you to be able to reach the upper part platform and get the treasure. It contains x10 Arrow. Jump back in and approach the third puzzle.
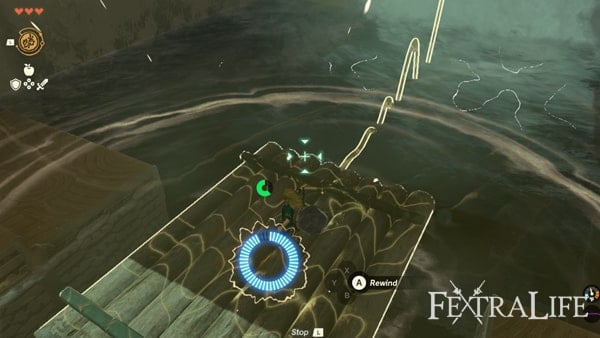
Nachoyah Shrine Puzzle #3
It looks complicated, but it's not. Notice the two clock hands? The iron gate opens when two hands are in contact. Focus on the hand that's rotating clockwise and wait for the hands to be in contact. Rewind it so both hands, are now rotating clockwise, leaving the iron door open during the rewind duration.
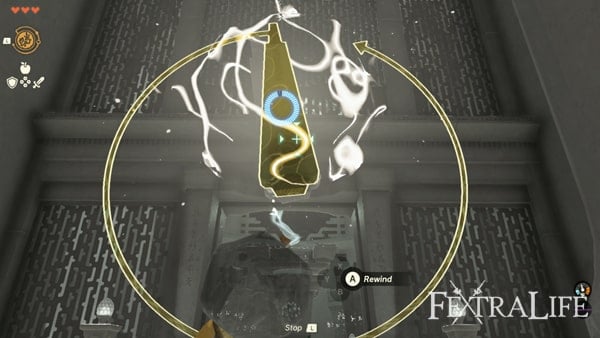
That's it. Now you are done with this Shrine and get your fourth Light of Blessing. You will be teleported back to the entrance of the shrine and there is a Crystal Refinery near this location. You can leave it for now and head to the exit and discover another platform of Wing Devices that you can take advantage of to glide your way back to the Temple of Time.
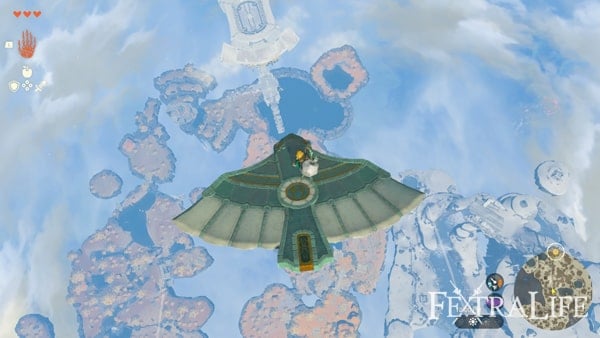
This time, it is going to be a long glide but the view is worth it. Ready yourself for a nice ride. Place the Wing Device on the catapult and hop on it again. When on flight be sure to dive in the right moment to reach Temple of Time's pond.
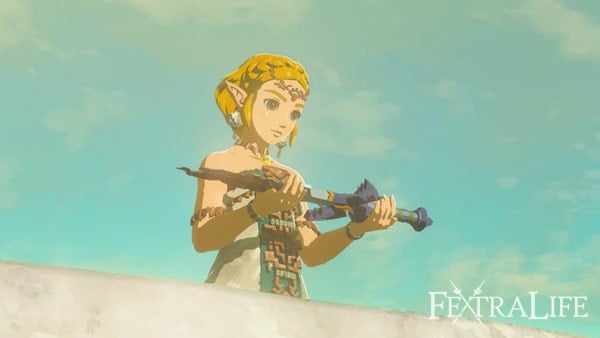
After landing, return to the Goddess Statue found in the temple and offer x4 Light of Blessing. Link will be rewarded with an additional Heart Container. After the upgrade, touch the door and you will be able to open it successfully now. A cutscene with Rauru will trigger. After the cutscene proceed to the quest marker. Use the Ascend Ability to reach the other side of the bridge.
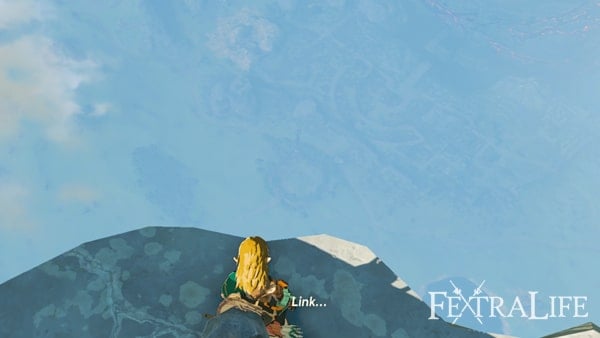
Upon reaching the end. Another cutscene will trigger. Zelda will guide Link to the surface to continue. Congratulations on completing Great Sky Island Section next, we will be exploring the surface of the Kingdom of Hyrule. Check the section for the guide.
Zelda Tears of the Kingdom Central Hyrule Region Part 1 Walkthrough
Objectives To Complete in this Part
- Reach Lookout Landing.
- Find and talk to Purah.
- Locating Hyrule Castle and Finding Captain Hoz.
- Clearing Kyononis Shrine.
- Return to Purah.
- Clearing Jiosin Shrine.
- Complete Camera Work in the Depths Main Quest.
- Head to Hebra Region.
Temples To Explore in this Part
- No notable Temples to explore in this part.
Shrines To Explore in this Part
Notable Items or Abilities To Pick Up
- x1 Hylian Tunic
- x1 Hylian Hood
- x2 Light of a Blessing
Central Hyrule Region, Lookout Landing
Welcome to our Central Hyrule Region Part I guide. This will be a short section since it only covers the main events and objectives when landed on the Surface. You will be tasked to investigate the nearby regions immediately. This is also the reason why the Central Hyrule Region Section will be divided into parts since I've figured out, we will be in this region a lot when backtracking for main objectives.
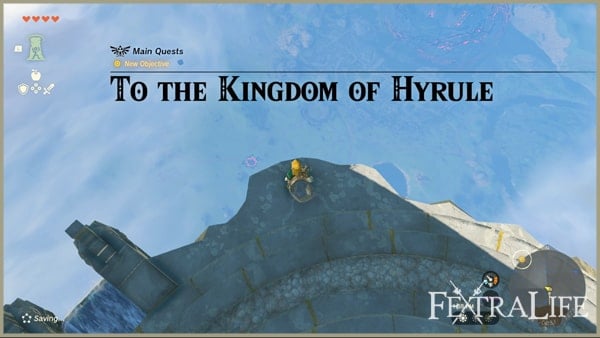
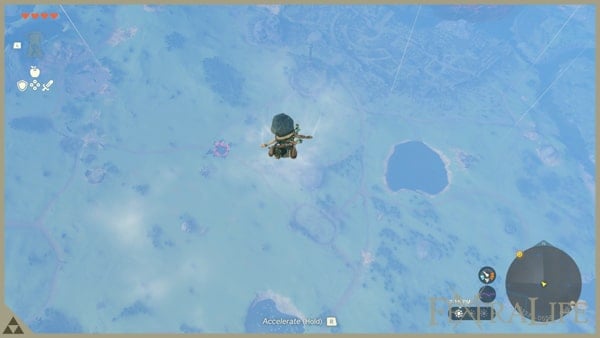
Now that is out of the way, the main quest To the Kingdom of Hyrule will commence. As Princess Zelda called you from the surface, it's time to answer the call. Dive from your starting point and make sure you land on a pond below. As soon as reach the ground, enjoy the view and welcome to the surface. Quiet something isn't it? Follow the quest marker and your goal is to reach the Lookout Landing. It can easily be found since the Skyview Tower of the central region is located there and your mark is guiding you there as well.
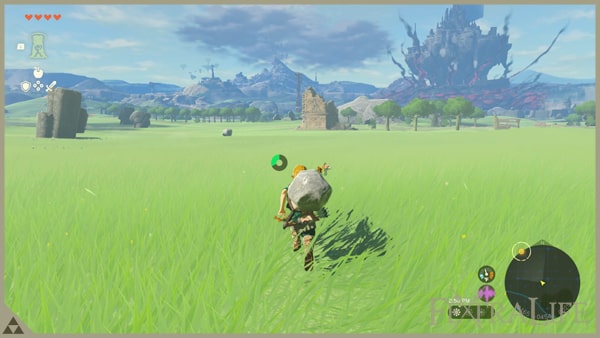
On your way, there are ruins here with minor enemies like a Bokoblin. Deal with them quickly, it is not too much of a hassle. If you spot a Boss Bokoblin, it's the alpha type of Bokoblins, easy to spot, reddish huge Bokkoblin walking in the fields. It might be too much for you right now so I suggest skipping fighting it.
Find and Talk To Purah
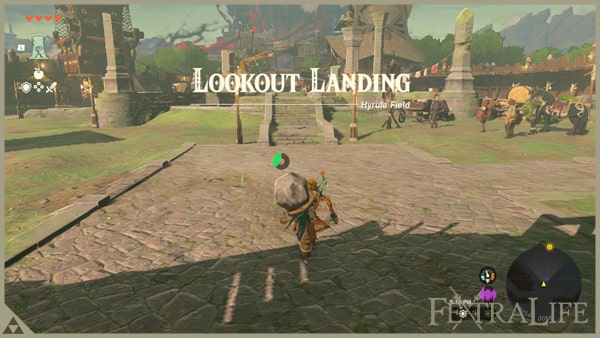
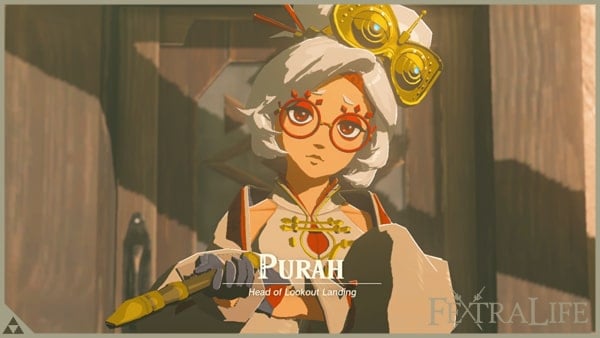
Continue your way and eventually reach the Lookout Landing. The guards will inform where Purah resides, it is the building with a large telescope that looks like an observatory. Talk to Josha, and she will call on Purah. A cutscene will trigger. After filling in Purah with the situation, she will instruct you to visit Hyrule Castle and look for Captain Hoz. This will complete the Main Quest: To The Kindom of Hyrule. And start another one which is, Crisis at Hyrule Castle main quest.
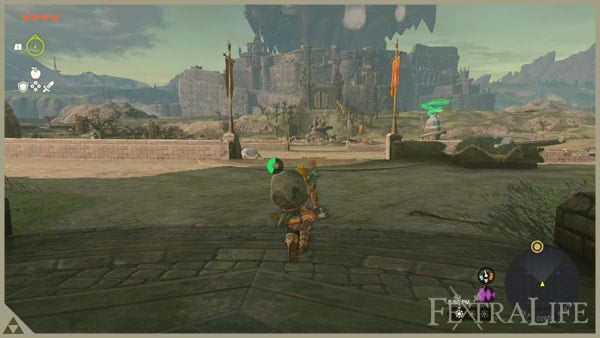
Hyrule Castle is located just north of Lookout Landing and you can see it right off the bat. Head north and notice a shrine and clearing this is a priority so you can fast travel to this location as well.
Clearing Kyononis Shrine
A very quick detour and this is a short shrine to complete. This shrine is essential since it will teach you the basics of combat, in my opinion, they should've placed this in Great Sky Island. There are no puzzles in here, instead, you need to follow combat objectives to proceed. Before fighting a Captain Construct I, get the x1 Rusty Claymore and x1 Rusty Shield on the side.
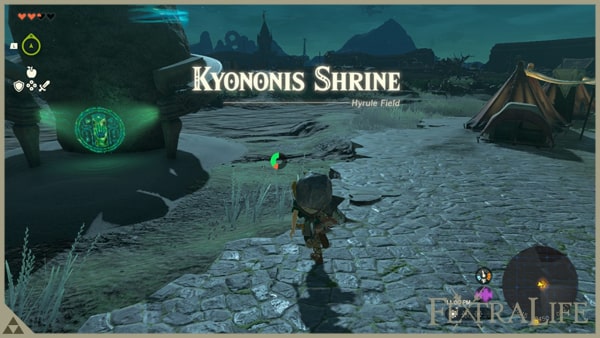
Kyononis Shrine Objective #1
You need to perform a side hop and perfectly dodge an incoming attack. How to do a perfect dodge? Wait for the enemy's attack animation to start and before the attack hits you, side hope and a bullet time will occur. Activate Flurry rush, this is a powerful attack combination so mastering perfect dodge is a must.
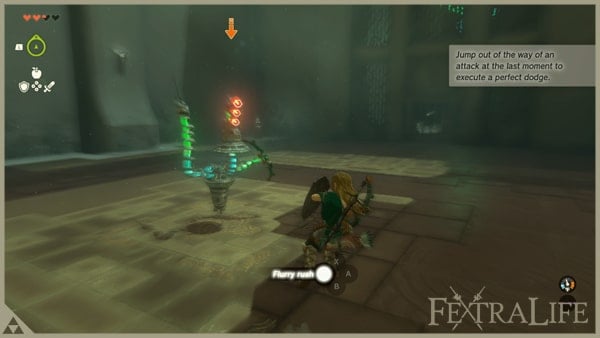
Kyononis Shrine Objective #2
Same idea in objective #1, but instead you need to do a backpedal. It should be a perfect dodge as well and initiate a Flurry rush.
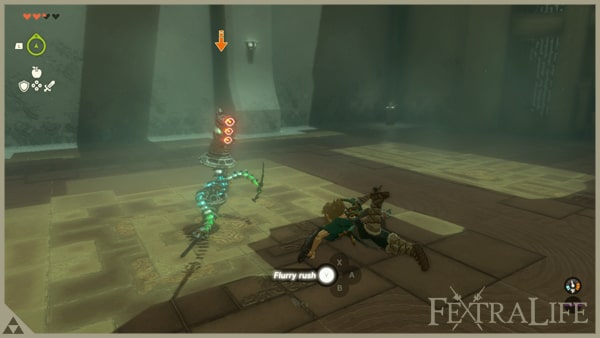
Kyononis Shrine Objective #3
You need to deflect an incoming attack. By raising your shield and parrying at the right time. If done successfully, the attack will be deflected.
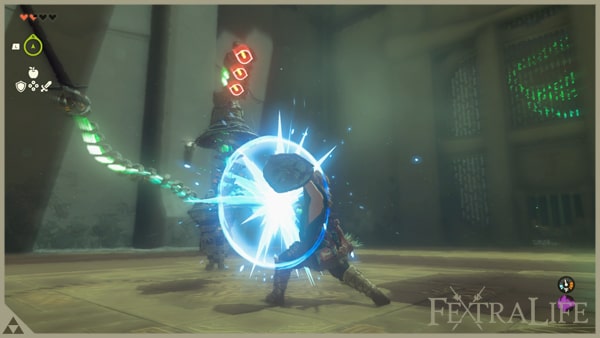
Kyononis Shrine Objective #4
The link needs to deal with a charge attack. To do this, simply hold the attack button and notice that your stamina gauge will show the charge gauge as well.
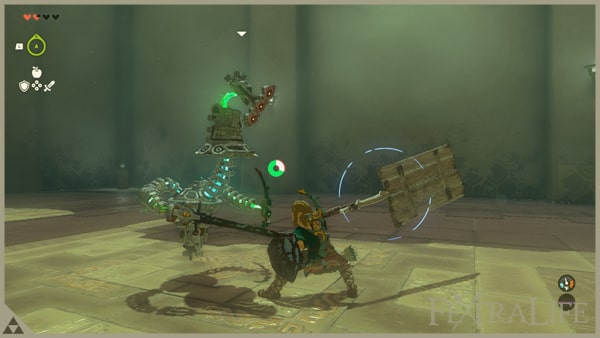
That is all for this Shrine and do not forget the techniques that you learned here since these are the fundamentals of combat. You will be using these techniques a lot. If you master perfect dodging and abusing the Flurry rush, battles will be somewhat trivial to you. Get your x1 Light of Blessing as a reward and you can now fast travel to this location.
Locating Hyrule Castle and Finding Captain Hoz
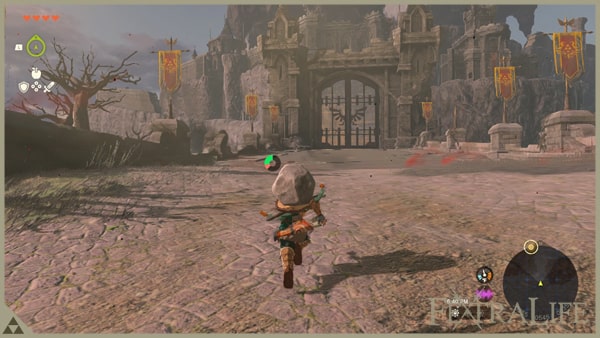
The shrine is out of the way, continue to the Hyrule Castle gates. To enter, simply circle around on the side of the gate to pass through. Continue the main path here leading to the upper section of the castle's foundation. When you arrived at the First Gatehouse section, there is a sword and an x1 Soldier Spear that you can take on the side. Access the upper area of the First Gatehouse by using the Ascend ability. Find Captain Hoz that is currently on watch. A cutscene will trigger, shrouded with mystery.
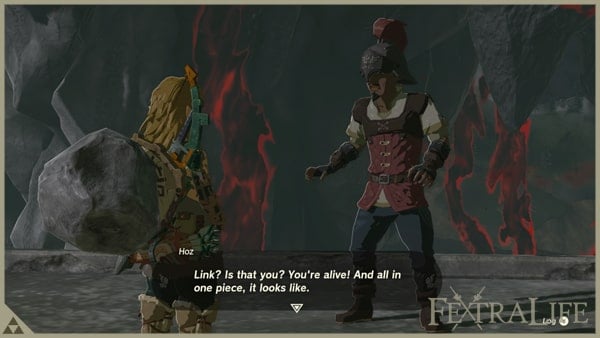
Return To Purah
Updates will be given to Purah and she will determine that you need your map to investigate the nearby regions for possible clues. However, your Purah Pad does not have the data yet. They will prepare the Lookout Landing Skyview Tower all night so first thing in the morning, you can use it. For now, use the Emergency Shelter that they opened for you to re-supply and rest.
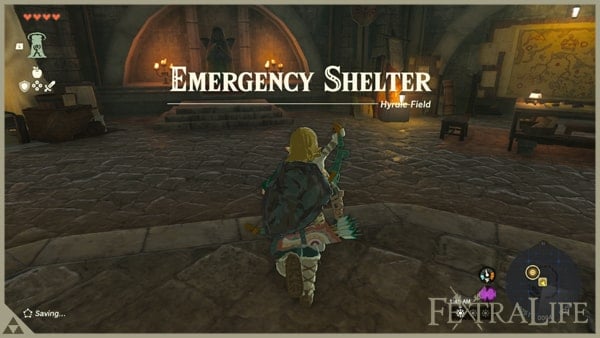
There's a Goddess Statue in here, a Cooking Pot that you can use anytime, and get the weapons available nearby, the x1 Traveler's Sword and x1 Boko Reaper. Don't forget to cook all your raw materials to restock your dishes for replenishing your health. If you are done resupplying, access the empty bed and sleep until the morning.
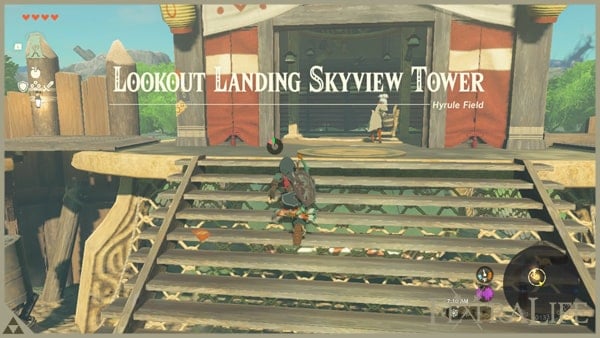
First thing, the Lookout Landing Skyview Tower is ready for use. Exit the Emergency Shelter and I advise you to buy the x1 Hylian Tunic and x1 Hylian Hood in the shop for added stats and at least to look good. If you don't have enough Rupees to buy the tunic, sell your Opals, Ambers, Rubies, or excess materials that easily can be replaced with like, Bright Bloom Seeds. Just be sure to at least retain x20 pieces of it for general use. Leave the Hylian Hood if you are really scarce with Rupees. After getting the tunic, equip it, and go talk to Purah to proceed.
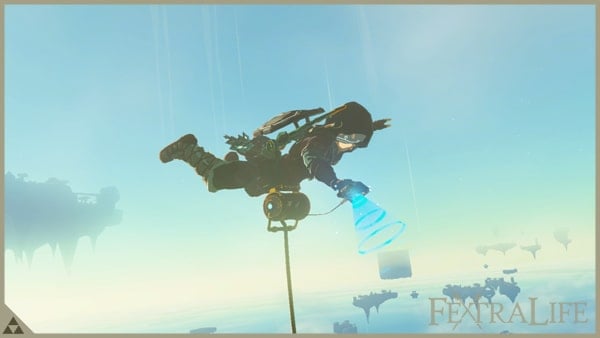
She will tell you that the towers in general are ready and watch a cutscene where all of the towers across the surface will be activated. You need to find them manually of course. Most importantly, I cannot stress how important a Paraglider is in your adventures, and Purah will give it to you. Now, access the terminal and enjoy another cutscene where it shows their process of surveying the map as Link bolsters up in the Sky. Your Sky and Surface Map will be updated every time you access these towers.
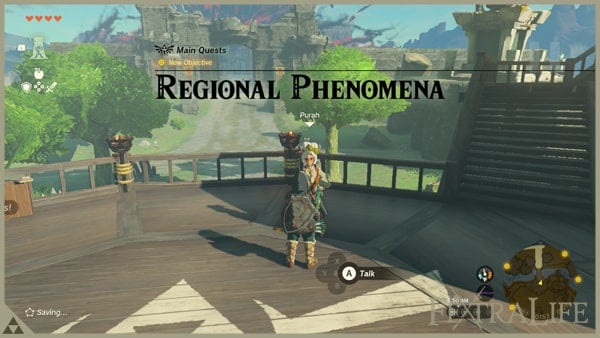
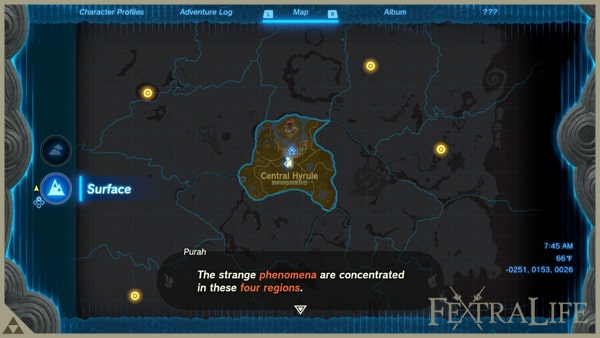
After your tower experience, talk to Purah again and she will ask you to investigate local phenomena in the nearby region. Hence, The main quest for Regional Phenoma will commence. Note that this is one of the longest Main Quests here since it covers the whole other regions. Keep in mind that each region you visit will have its separate Main Quests as well.
Complete Camera Work in the Depths Main Quest
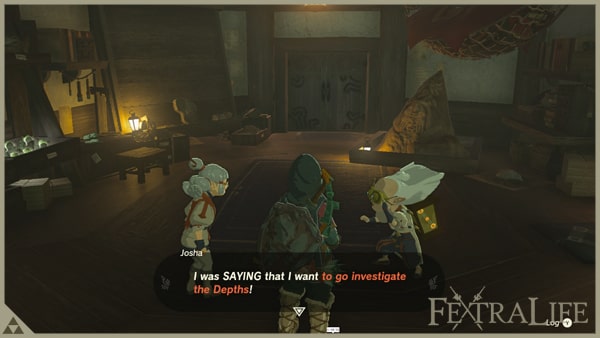
Before going to different regions, I would like us to complete the Main Quest: Camera Work in the Depths. You will be completing this regardless so it is better to clear it now. It will also unlock your Purah Pad's Camera Feature. Access the room below where Purah stands, and Robbie and Josha will be there. They will ask you to search The Depths, this is the surface beneath you and it is a huge area to explore.
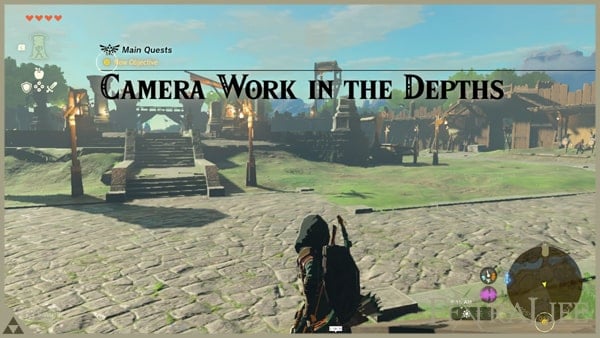
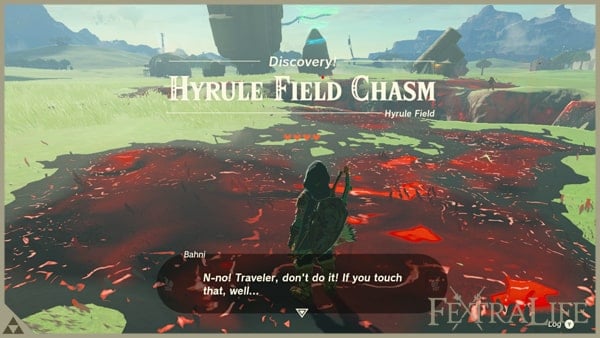
The main quest Will commence and you need to follow the quest marker leading to the Hyrule Field Chasm that you need to go to. Located from the south of Lookout Landing. Go there and upon arriving, don't jump just yet. Let's complete the nearby Jiosin Shrine so you can fast-travel here.
Clear Jiosin Shrine
Easy dungeon to complete, now let's get on ahead and complete it. This dungeon is all about Ultrahand object manipulation, useful for puzzles in the near future. We will only have two puzzles this time.
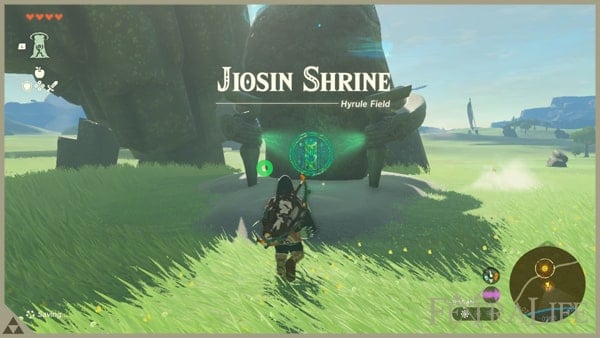
Jiosin Shrine Puzzle #1
Notice the enclosure has an X-shaped opening, and you need to use the Ultrahand to manipulate an X-shaped stone slab nearby. Fix the orientation and slide the object outside the enclosure through the opening. You need to use this slab later on as a bridge to cross over to the next section.
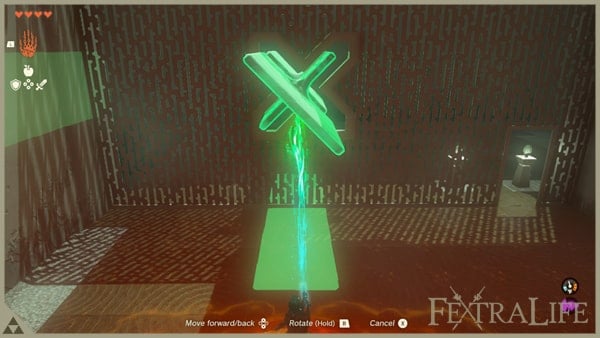
Jiosin Shrine Puzzle #2
The same concept applies here in the second puzzle. Manipulate the L-shaped stone boulder here out of the first enclosure and to the second one for you to be able to reach the end of the shrine and get your x1 Light of a Blessing. You will be teleported outside as usual and you can now access this Shrine for fast traveling.
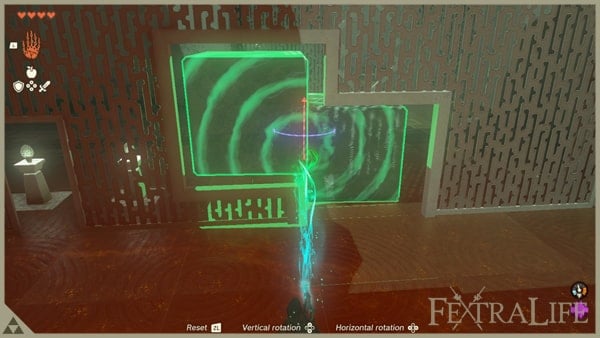
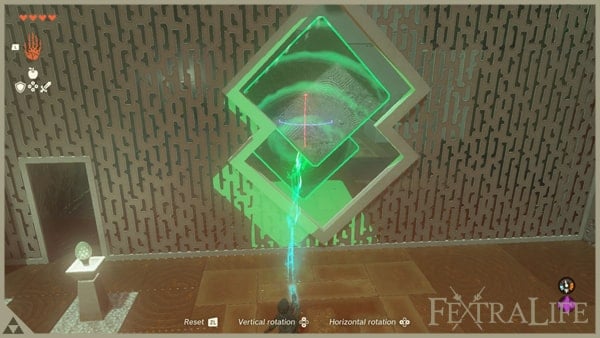
Continuing The Main Quest Camera Work in the Depths
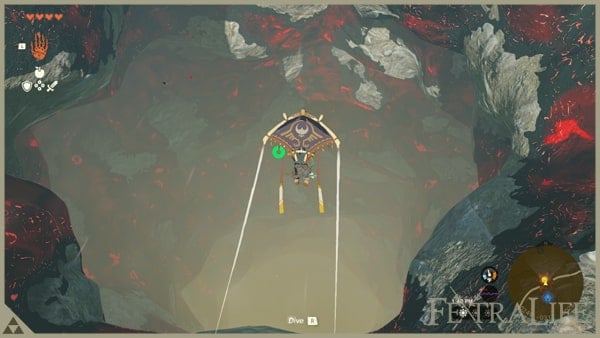
After clearing the shrine, Dive into the Hyrule Field Chasm to continue this quest without touching the reddish substance, these are glooms and they sap out Link's health when you step on it too long. Do not forget to use your Paraglider before hitting the ground or else, you'll die. The Depths is a dark place due to its location. You will be needing at least x3 to x5 Bright Blossom Seed for this mission, maybe less. Remember how to use them? You can manually, pop them by throwing them to the ground and using your melee weapon. And the other one is by fusing the seeds to your arrows before firing them. I prefer the arrow method since you can aim quickly where you want it to land.
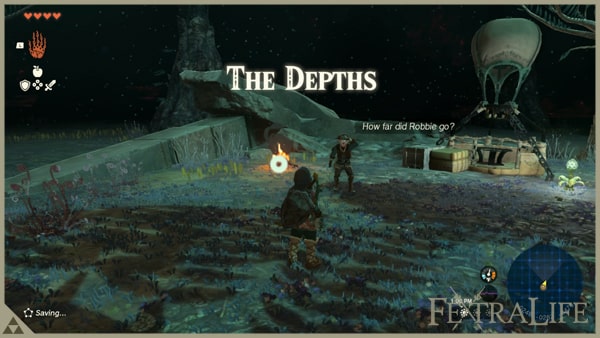
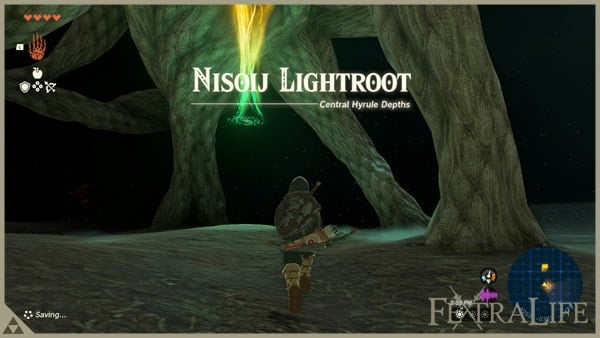
Ponnick is a researcher as well like Robbie. He went down to survey the area as well. He will inform you that Robbie went to the Lightroot and headed west. You now have to find him. Now check the nearest glowing object from the camp and discover that this is Nisoij Lightroot. Activate it and uncover a fraction of the map and also enlighten its surrounding. After activating the root, head west.
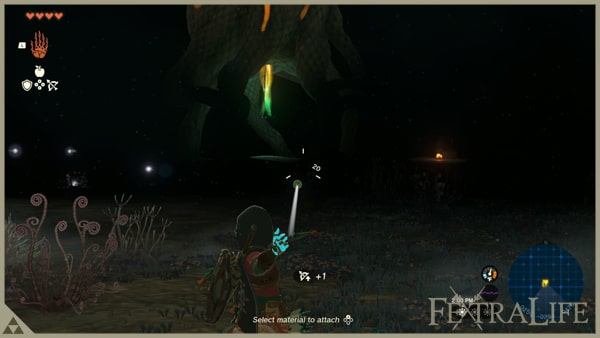
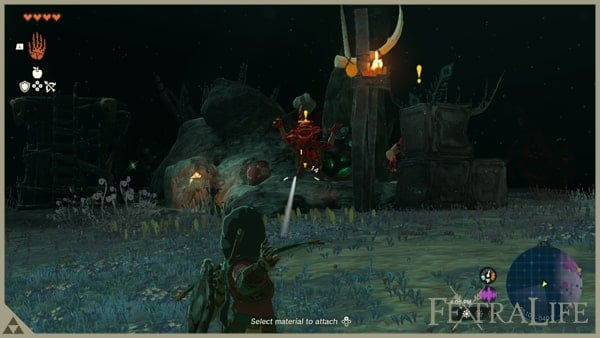
The coordinates that you need to go to are 0783 0433 0469. This is where Robbie went. Along the way, avoid the glooms here by circling around it. Get all the materials that you can gather along the road. Use Bright Blossom Seeds if it's too dark to proceed.
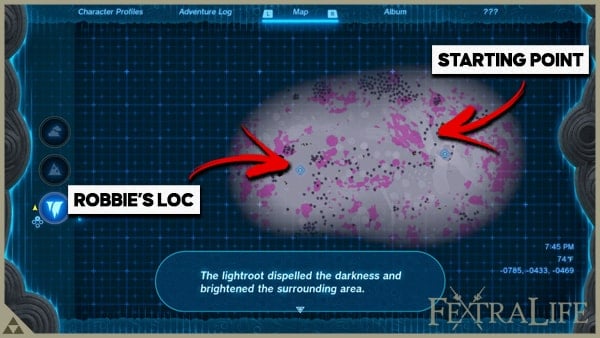
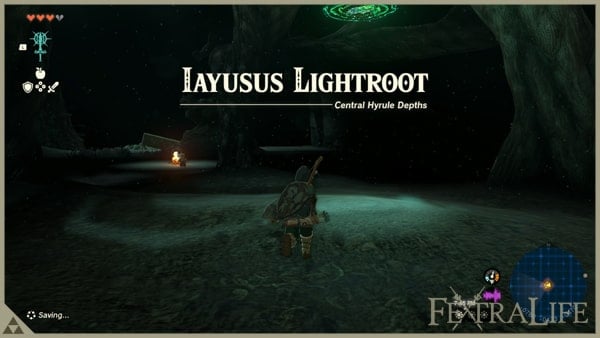
You will encounter enemy settlements here, and most of the time you will fighting with Bukublin and Moblin types of enemies. But gloom versions of them. I suggest taking out the ones on the outpost first with your bow and arrows. Then dealing with the rest. After clearing them out, each settlement houses concentrated gem pillars. So break them for Zonaites. Soon you will reach the listed coordinates and activate the Iayusus Lightroot to enlighten the surroundings and reveal this part of the map.
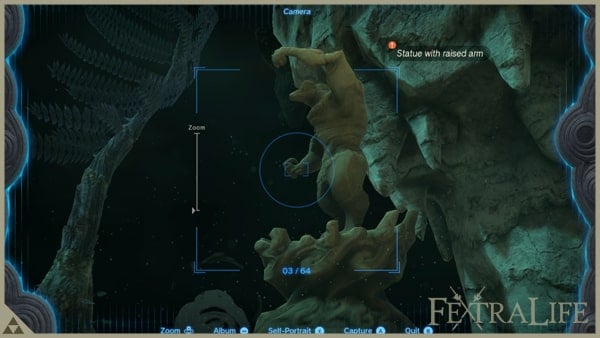
Talk to Robbie and he will unlock the Purah Pad's Camera feature and you need to take a picture of the large statue near Robbie. This is the main objective. After this, save the image and head back to Lookout Landing by fast traveling. Talk to Josha and you are done. Receive x5 Zonaite as a reward. Congratulations on completing the main quest Camera Work in the Depths and also for completing this section, Central Hyrule Part 1. Our next section will cover Hebra Region. It will be a long ride so prepare yourself so let's move on.
Zelda Tears of the Kingdom Hebra Region Walkthrough
Objectives To Complete in this Part
- Main Objective: Reach Rito Village
- Clear Ishodag Shrine
- Reach Sherrene Stable
- Clear Sinakawak Shrine
- Clear Gatakis Shrine
- Activated Rospro Pass Skyview Tower
- Talk To Harth
- Clear Sahirow Shrine
- Get Through Hebra Summit Cave
- Get Tulin's Bow
- Reach The Top of Hebra Peak
- Clear Mayaumekis Shrine
- Clear Kahatanaum Shrine
- Reach The Peak of Rising Island Chain
- Clear Wind Temple
Temples To Explore in this Part
Shrines To Explore in this Part
Notable Items or Abilities To Pick Up
Main Objective: Reach Rito Village
Central Hyrule Region Part I is done and now it is time to visit the Hebra Region. This going to be a long section to complete but no worries, I will be with you every step of the way. Check out the map below as this summarizes our journey reaching Rito Village. This is where the quest marker leads you in Hebra Region. I have also pointed out the structures, and shrines that you need complete or visit before reaching Rito Village. You can check the Interactive Map at your leisure. This map shows all the structures that you will be visiting until you reach Rito Village.

Access the Lookout Landing Skyview Tower and take advantage of skydiving to reach the next destination faster. Always make it a habit to check for nearby towers just in case you want to reach a place, it might be quicker to just skydive, rather than go on foot. We need to land on a near shrine here the Ishodag Shrine. Budget your stamina since you do have a limited amount for now. Make sure you land safely with the Paraglider to avoid dying.
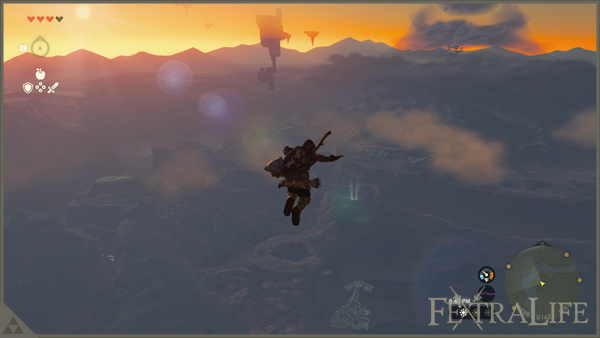
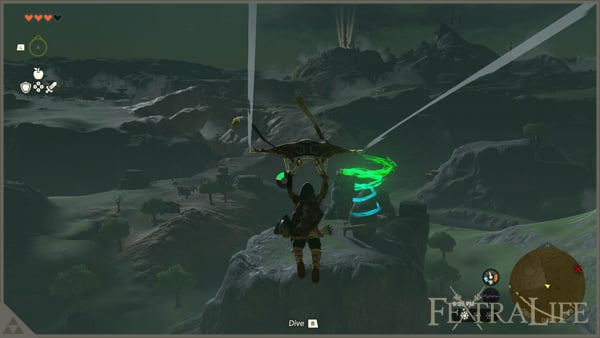
Clear Ishodag Shrine
Our first stop is this Shrine, complete it while we are on our way to Rito Village. This dungeon is more of Zonai Devices: Fan utilization. You will have a taste of it more.
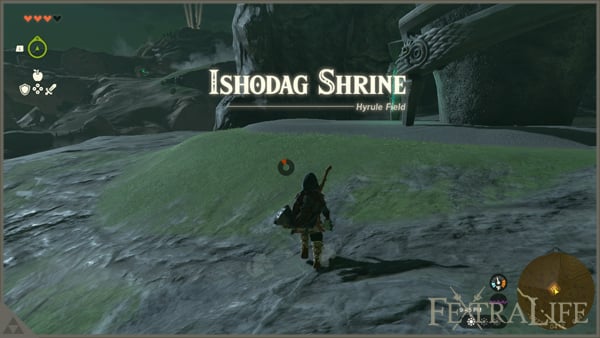
Ishodag Shrine Puzzle #1
Take the nearby x1 Fan and orient it facing up, so the wind will blow upstream. Ride it with your Paraglider and you are done to reach the next area and you are done.
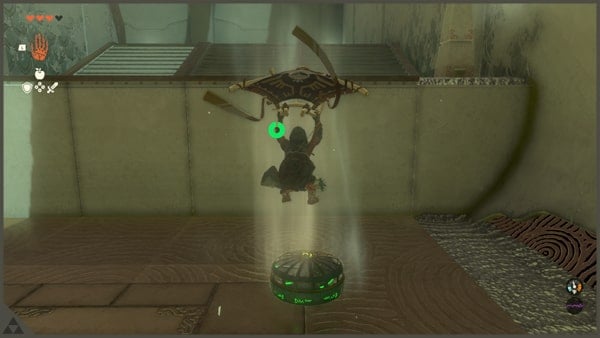
Ishodag Shrine Puzzle #2
The second puzzle is easy, you just need to create a raft, powered by an x1 Fan available here. Attach it to the plank and activate it to cross over the waters here.
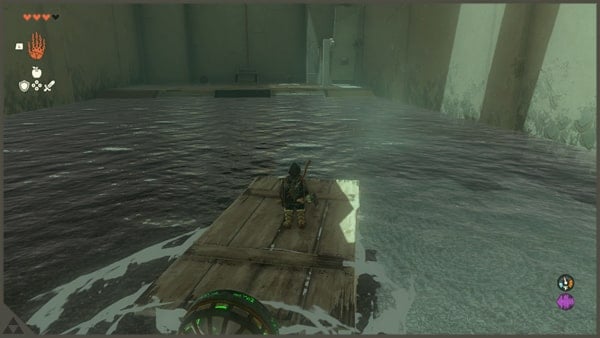
Ishodag Shrine Puzzle #3
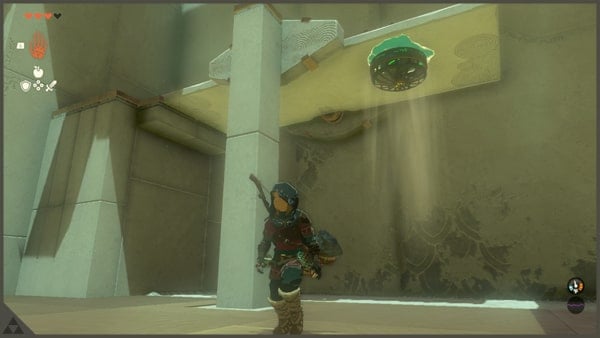
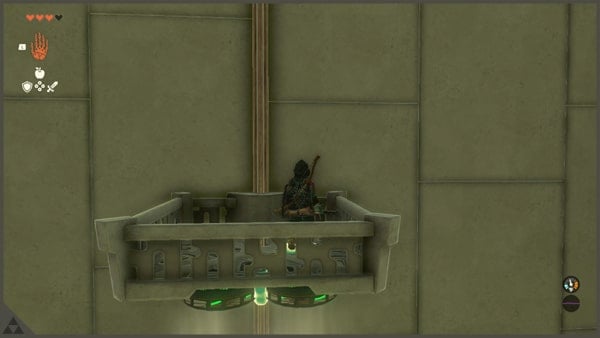
On the third puzzle, attach x1 Fan underneath the loose stone slab so it can stay in its place. Use the Ascend ability to access the upper part and get the treasure chest with an x1 Opal inside. After getting the treasure, attach x2 Fan underneath the elevator so it can move upwards. Hop on it and you are done. Get your x1 Light of a Blessing as a reward and you can also fast-travel back here.
Reach Sherrene Stable
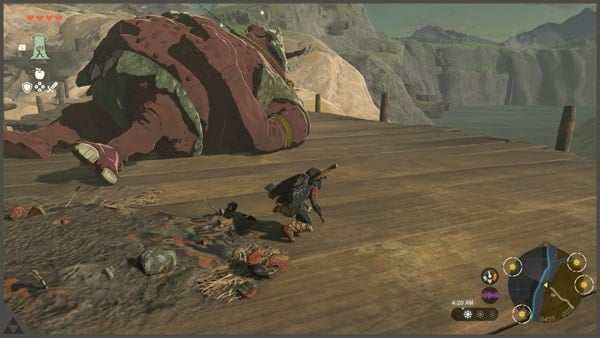
Back on the road and follow the quest marker here and get any raw materials that you can find along the way for later use. Our next objective is to access your first stable in this guide, which is the Sherrene Stable. On a wooden bridge ahead, there's a sleeping Hinox on it. If you don't want to deal with it, just crouch and move slowly so you'll avoid waking it up. Get the materials lying around in here. If its day time, you can just circle around to avoid it or fight it head-on. Aim for the eyes and it will go down in no time. Follow the path ahead and notice a structure with a horse statue on top of it, there's the stable that we need to go.
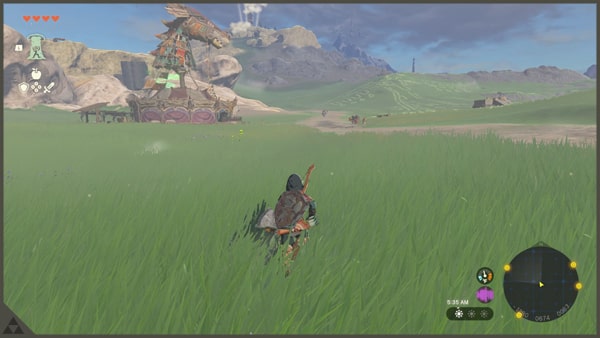
Talk to the shop owner, and he will explain to you the basics of Stables. basically, you can register the Horses that you catch on the field, so anytime you need one, you will have access. Every time you catch a horse and register it, you will receive a point. Earn these points to exchange horse items. For a much more detailed guide, visit our Horses page. This page contains all the information that you need regarding Horses and Stables. You can also sleep here by renting the beds.
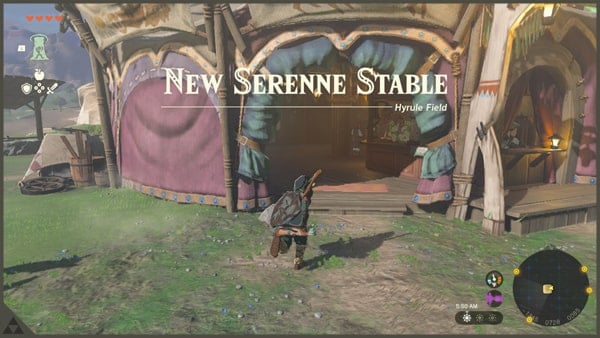
Now we need to catch a horse nearby so you can get the feel of it. Catching a horse is relatively easy. Look for a group of Horses running around and approach it slowly from behind. Mount and soothe it and it will be yours. Horses have different stats but for this one, any horse will do. again, check our page for it. After you captured one, return to Sherrene Stable and register the horse you captured. Visit the stable anytime if you need your horse.
Clear Sinakawak Shrine
Another shrine nearby so might as well complete it. You need as much Light of Blessings as you can get. Enter the Shrine and prepare for the puzzles.
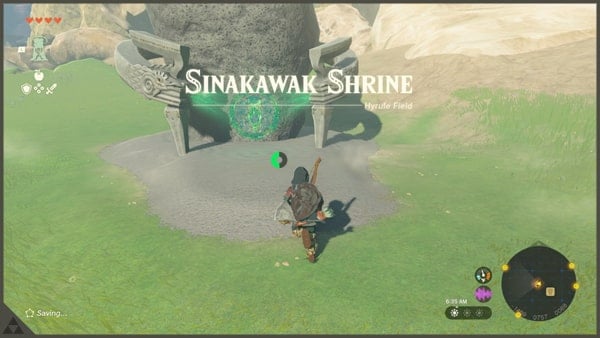
Sinakawak Shrine Puzzle #1
In my opinion, this dungeon is pretty advanced. But will guide you through it as clearly as possible. First, you need to create a hot air balloon type of vehicle for you to access the upper section. Simply attach the plank nearby to an x1 Balloon. Then place one of the stone torchlights to make it float.
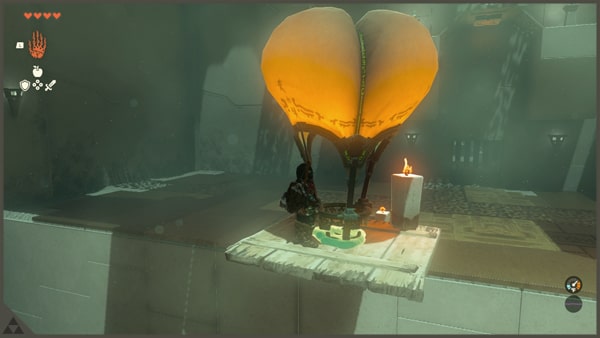
Sinakawak Shrine Puzzle #2
The second puzzle is simple, you need to place one of the balloons in here below the gate's switch. So the Balloon can activate it for you after it comes in contact with the switch.
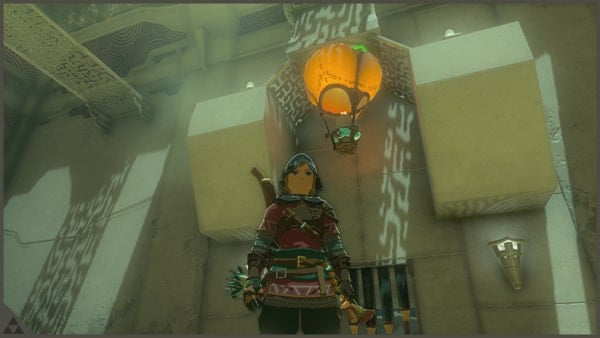
Sinakawak Shrine Puzzle #3
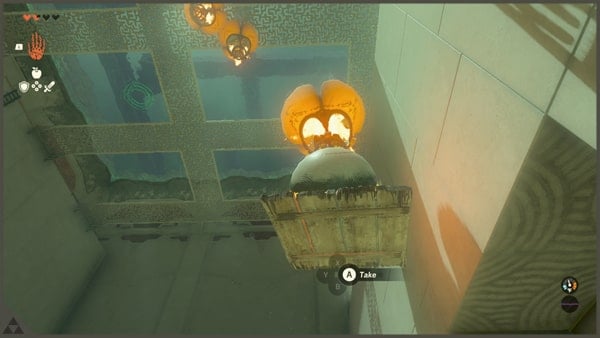
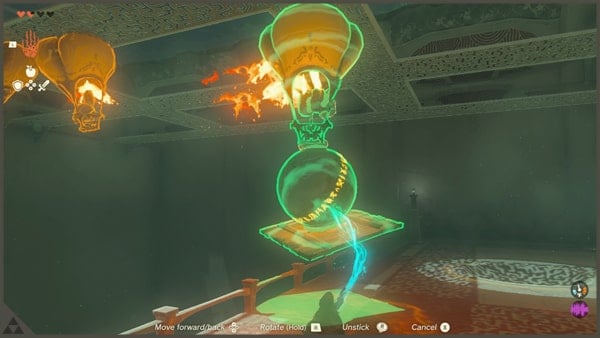
There are various ways to complete this puzzle. This is the beauty of this game. But generally, you need to transport both small and large iron balls to the upper section. So the doors will be unlocked. My method is as follows. You need to attach each iron ball to its respective Balloon so you can transport them to the upper section. Just make sure both balloons that will float will hit the lower ceiling and not the highest one. The second thing that you need to make sure of is, once you are on the upper section, you can reach both balls with your Ultrahand. Once both iron balls float, notice the opening here where you can use Ascend to access the upper section. Place both iron balls in their respective slots. The small room contains a chest that provides an x1 Opal. In the next room, go get your x1 Light of Blessing and you are done.
Locate and Activate Lindor's Brow Skyview Tower
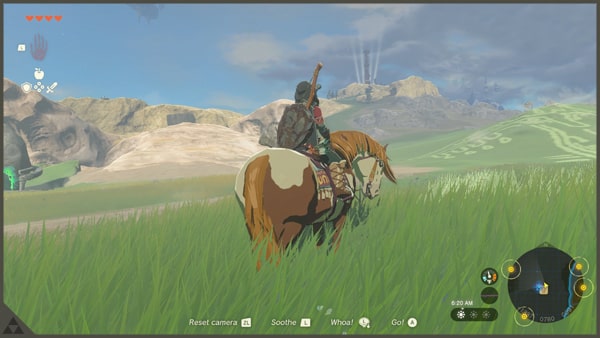
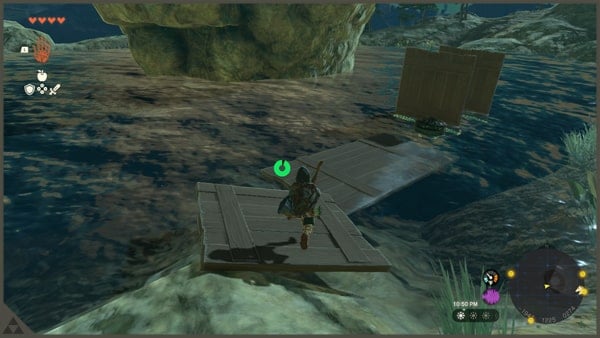
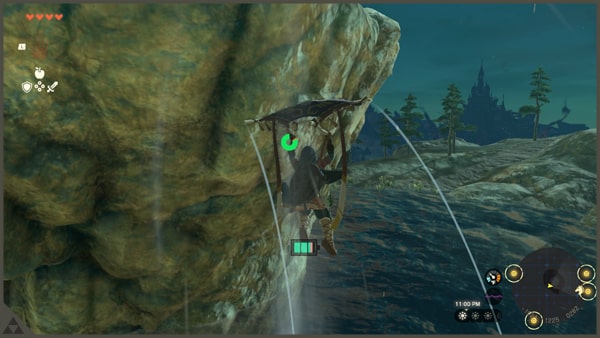
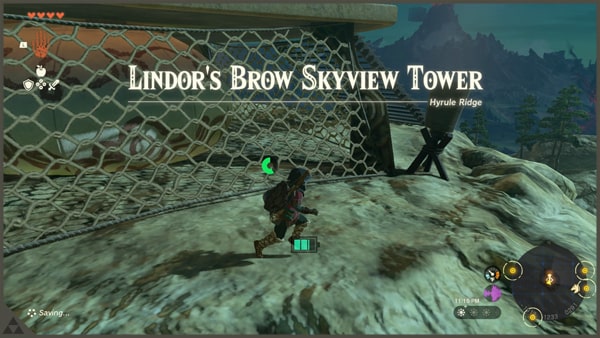
The tower is not that far from the Sinakawak Shrine. You can in fact see it towering on the mountains. Use your horse to reach the foot of the mountain quickly. As soon as you reach the tower vicinity, you will notice that you need the materials available around for you to get across. What I did here is unnecessary, but I had fun doing it. The easy way is to make a bridge from x2 to x3 wooden planks here and reach the foundation of the tower. Now you just need to climb the walls. I used an x1 Fan so it can propel me upwards. Activate the tower to update the map. And we will skydive here from the next location.
Locate the Lucky Clover Gazette
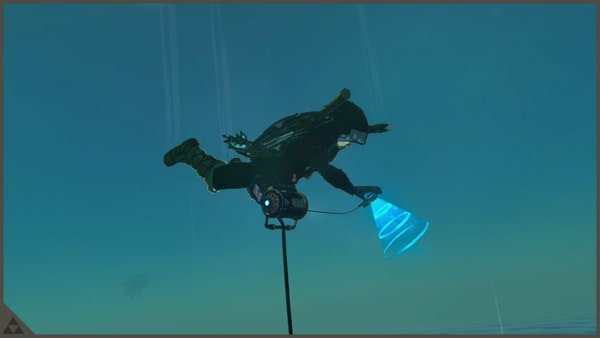
From the Lindor's Brow Skyview Tower launch and glide your way to the snowy region where the next destination can be located. This is going to be a long dive. But no worries, if done properly, you can reach the other side if you budget your Stamina. This is a much quicker way of accessing the snowy regions than on foot.
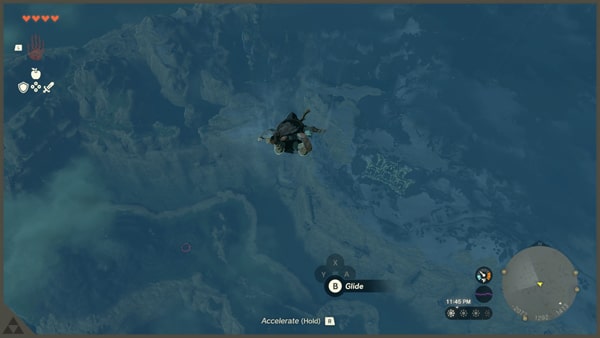
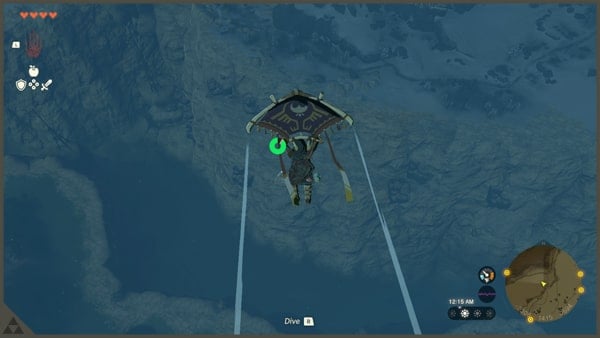
Paraglide your way to the other side, once you land, follow the quest marker leading to the northwest part of the map. Cold weather strikes again and I hope you remember Sauteed Peppers for you to last in the cold. There is a set Cooking Pot here that you can access if you need to cook dishes or use a Portable Pot. Continue following the marker and a cutscene will play. It will show you that the Blood Moon shines now. Basically, when Blood Moon triggers, defeated enemy monsters will respawn, crushed ores and dropped weapons will return, and Cooking usually tends to have " Great Success ". You may or may not encounter The Blood Moon since it depends on several factors. More into this later.
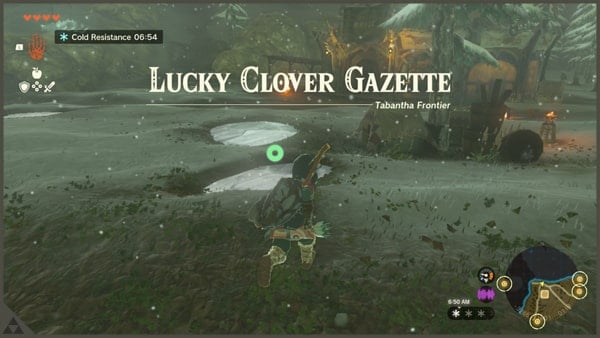
Not far from here, you will locate the Lucky Clover Gazette and there's no need to talk to the point person inside. Your main objective is to reach Rito Village next and what you need to do here is notice the destroyed bridge nearby. Go there and a bonfire is lit as well. Look around you and find a Hylian Pine Cone. This is a common material.
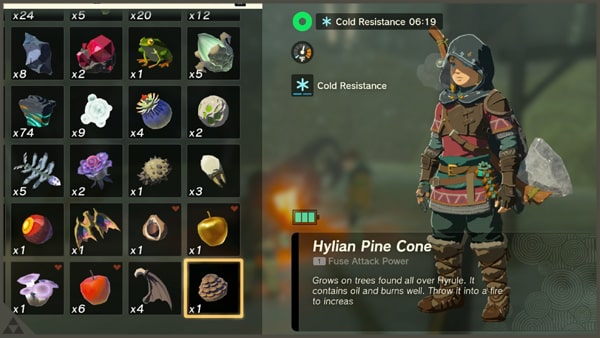
You need to drop one at the bonfire. Upon explosion, it will create an upstream that you can ride with the Paraglider to be able to cross to the other side. Congrats on reaching Rito Village. Now, we need to find Tulin and his parents to start the next chain of quests. Locate the Goddess Statue at the entrance of the village and offer your x4 Light of Blessing. If you are following this guide, you should have four in total.
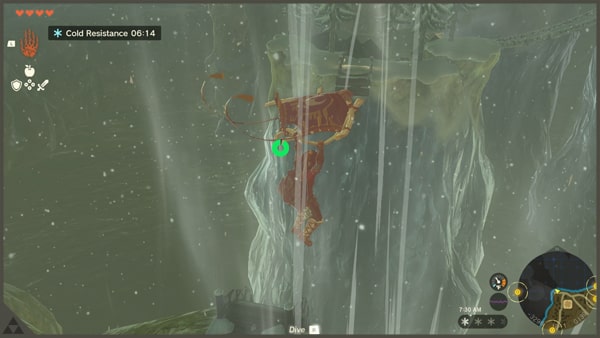
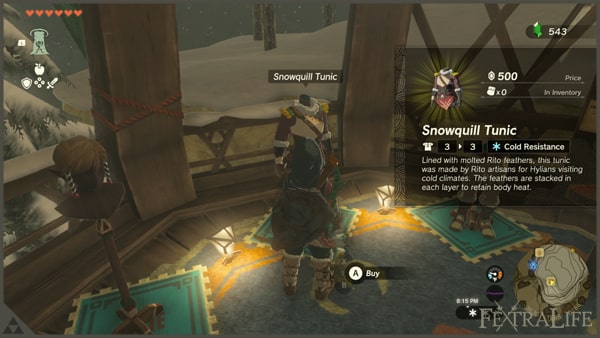
Now head to the armor shop and it is advisable to buy x1 Snowquill Tunic that will greatly protect you from the weather in this region since you will be dealing with a lot of quests and locating a lot of places later on.
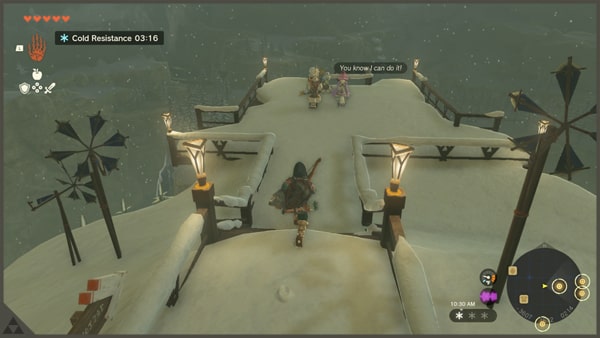
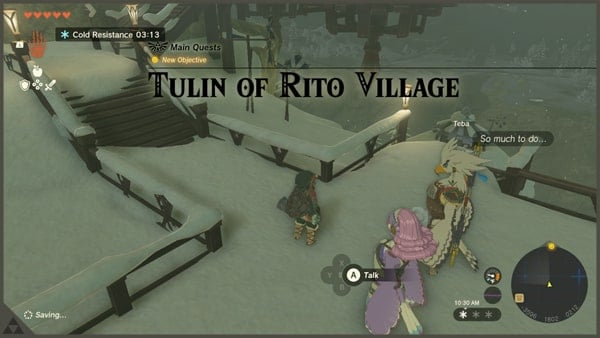
If you can't buy it for now, you can move on with your current gear but later in the guide, I will specifically require you to have the Snowquill Tunic. Don't forget to sell all the valuable rocks that you have like Amber, Opal, and Ruby aside from Flint. There is also an accessible Cooking Pot here just in case you need more Sautéed Peppers. I advise you to stock up as well. Access the upper parts of the village and we need to find Tulin and his parents to start the next chain of quests. Teba will ask you to talk to a guy Harth, who is a Rito as well and resides on the outskirts of the village Before going to the next objective, let us complete Gatakis Shrine first since you need to teleporter as well in this village. Make it a habit to complete the nearest shrine in a village since usually, this provides a little background on what will be the puzzle will look like when traversing the main dungeons in a specific region. The shrine is just located at the foot of the village. Simple dungeon to get through, you will be harnessing the wind here often.
Clear Gatakis Shrine
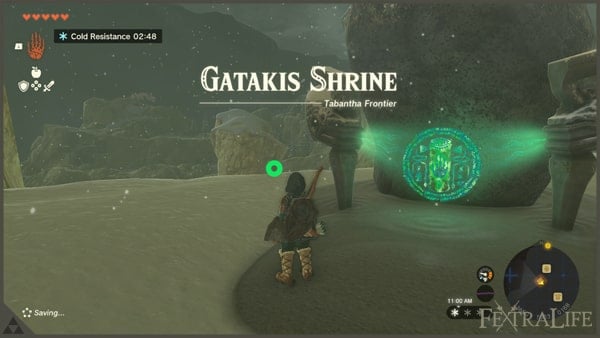
Gatakis Shrine Puzzle #1
Ride the wind with your Paraglider and avoid the lasers by going on through the opening on the right. This solves the first puzzle.
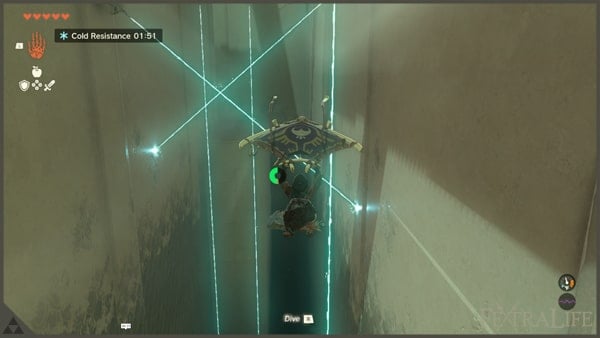
Gatakis Shrine Puzzle #2
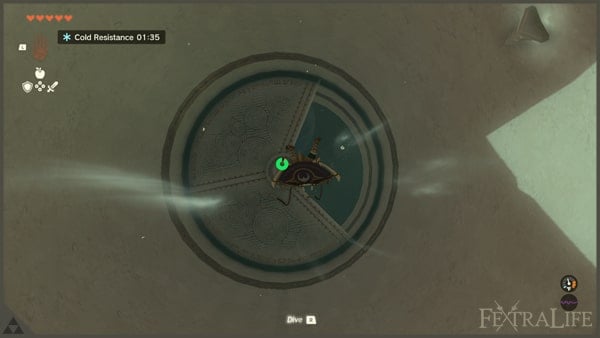
You need to access the lower parts here by taking advantage of the upstream. Go through the obstacles here like going through the rotating wall with an opening. Destroy the icy floor in here by stomping through it. Pass here, a wide open space where constructs are guarding. Get the nearest chest containing an x1 Strong Construct Bow. Now there is another opening with another upstream that you can ride to access the upper parts. This is the entirety of this shrine. Get your x1 Light of Blessing and continue.
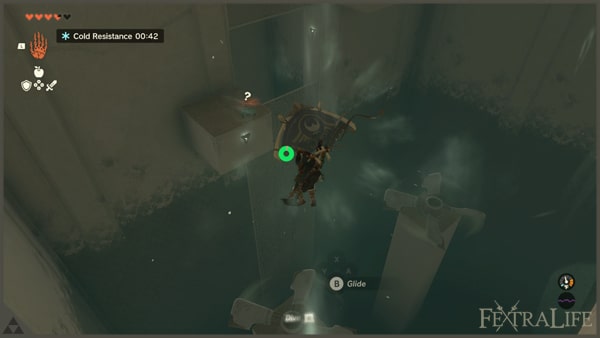
Activated Rospro Pass Skyview Tower
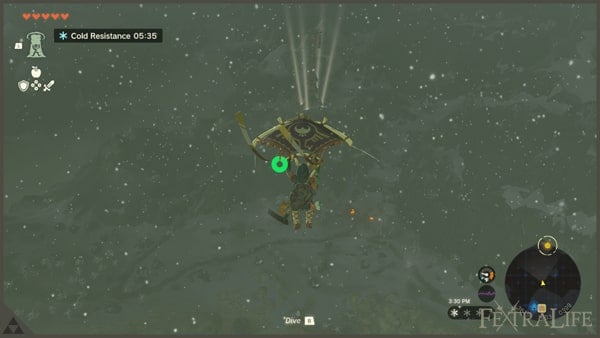
Were can easily access this Rospro Pass Skyview Tower from Rito Village by using the ascend ability to reach the highest peak of Rito Village. Notice a high towering stone pillar at the peak of the village. Reaching the peak will let you notice that the tower and Harth's location are in the same direction. Glide your way through the tower and destroy the vines by shooting them with arrows infused with Fire Fruits. Access the tower and update the map.
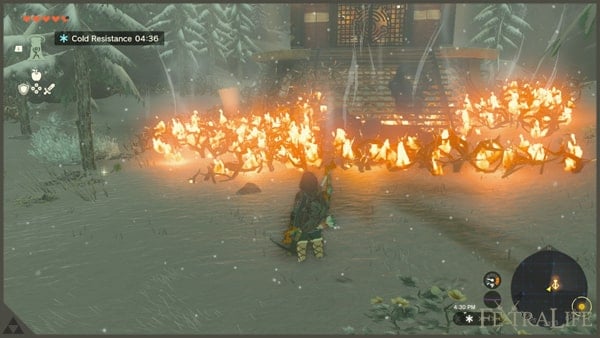
Talk To Harth
Glide through your way to Harth's location, it is the place with a landmark of two bonfires. He will direct you to follow Tulin who went to Hebra Summit Cave. Before going to the next destination, get all the raw materials around here and restock dishes if you need to know, especially Sautéed Peppers.
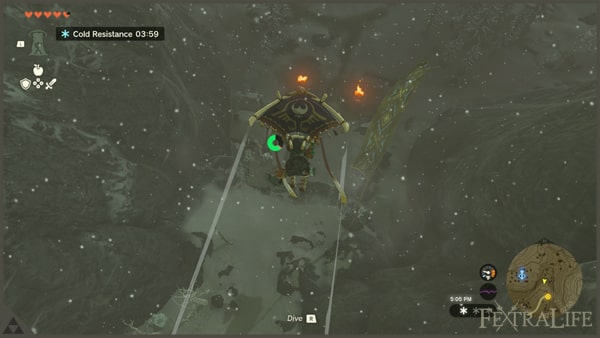
Clear Sahirow Shrine
Access the Rospro Pass Skyview Tower again and dive your way to the nearest shrine, you can see it glowing from above. This is also an easy way to spot the Hebra Summit Cave later on. Sahirow Shine is easy as well and you just need to avoid laser obstacles here.
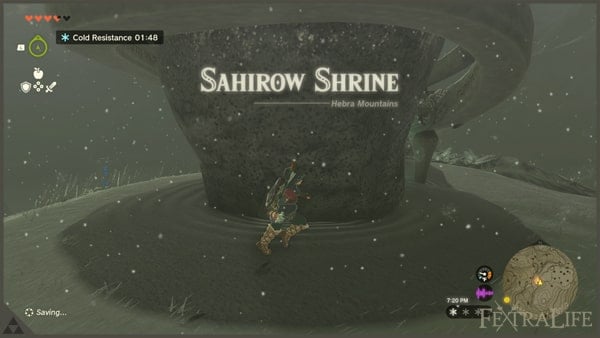
Sahirow Shrine Puzzle Number #1
An easy way to solve, just avoid the lasers here, jump and crouch if you need to. Then move forward.
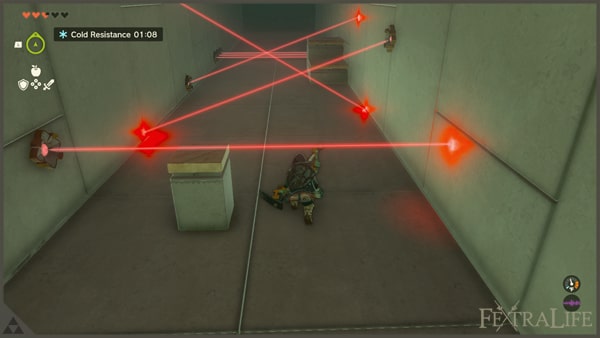
Sahirow Shrine Puzzle Number #2
Use the Ascend ability to access the moving platform. Now, use the Ultrahand and place the iron crate here and block it where the laser shoots. This will open the iron door on the other side. Get the chest containing x1 Spicy Elixir.
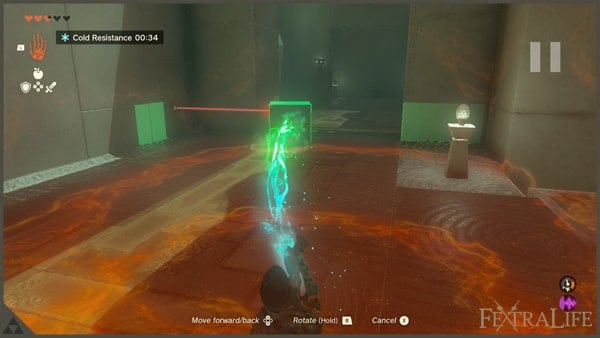
Sahirow Shrine Puzzle Number #3
Head to the next room and notice the lasers that you need to avoid are moving now. Dodge the lasers accordingly and the third moving set of lasers, the one nearest to the shrine, notice where the lasers were attached. You can get through this by using the Ascend ability. Get accross and get your x1 Ligt of Blessing.
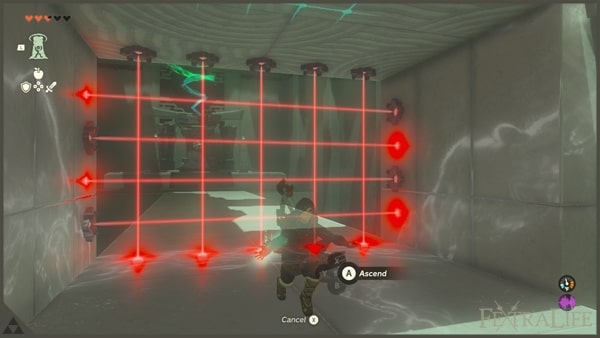
Get Through Hebra Summit Cave
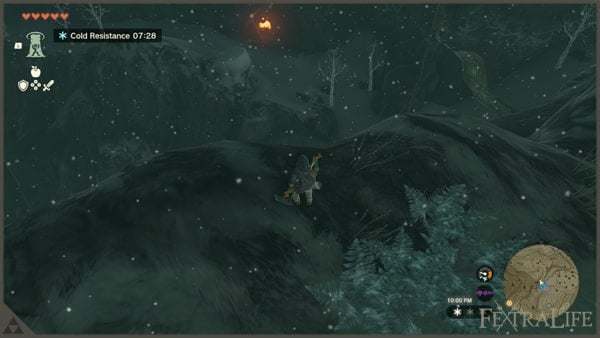
The entrance of the cave is just located below Sahirow's Shrine's location. The entrance has this large bonfire as a landmark. We need to get through this cave as quickly as we can to find Tulin. Follow the straightforward path here and notice a pond where you can get a Chillfin Trout. Follow the cave paths until you reach a wide area where an upstream is breezing from the ground.
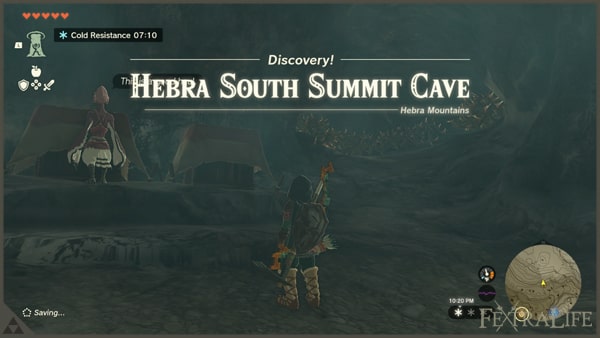
Notice the icy concentration that you can get through by stomping on it. Below this area, you can gather useful materials such as Bright Caps, Chillshrooms, Ambers, and Rock Salts. Use the Ascend ability to return to the upper level and ride the upstream.
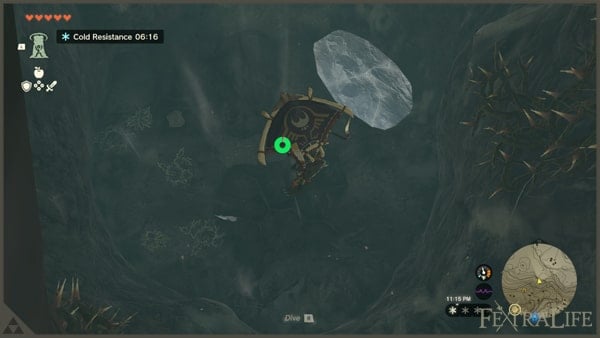
There is an opening here that you can access and will lead you to an area filled with concentrated gem pillars, destroy them all and the bright pillars contain Luminous Stones. Be careful that a Horriblin will ambush you here, deal with it by using your bow when it hangs in high places. The next area is where an unlit bonfire, get the materials here like Glowing Cave Fishes, Chillfin Trouts, and Flints. Look above and see that to progress, you need to climb your way up. But before climbing up, I suggest planning your route and burning all the thorns that may possibly block your way.
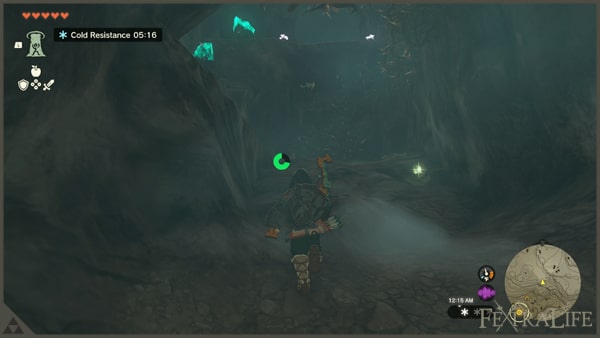
Two spaces here that we can explore, explore the cave opening filled with thorns. Kill the Bubbulfrog here to get x1 Bubbul Gem. We are done here and head back and access the other opening. Continue the path here and encounter Stone Pebblits. Just use a stone-type melee weapon and get precious stones that you can sell like Ambers. Continue forward and notice Gesane guarding a set camp. He will tell you that Tulin headed outside and went to Talonto Peak. He also mentioned that the landmark of the peak is a cedar tree. Restock your cold resistance dishes here, use a Portable Pot if needed.
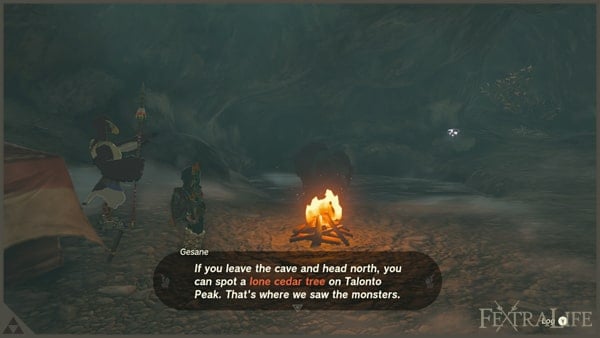
Find Tulin in Talonto Peak
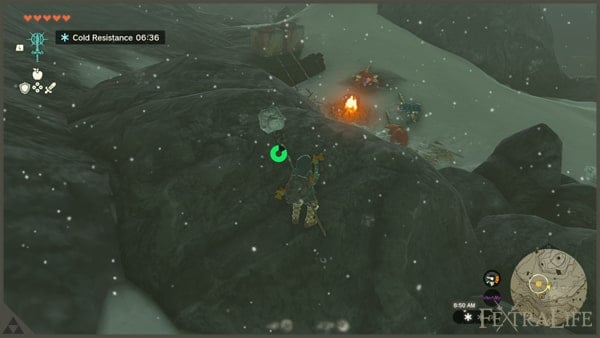
We are done with Hebra Summit Cave and we need to find Tulin in Talonto Peak. Get the Ice Fruits here for later use. You will come across a camp being guarded by Bokoblins. Surprise them and get their loot. Near a large floating ruins debris, a Boss Bokoblin patrols the area with its minions. You have the option to engage them or get past them unnoticed. Continue following the mountain trails here, climb if you want, and eventually find Tulin at the peak with the said cedar tree.
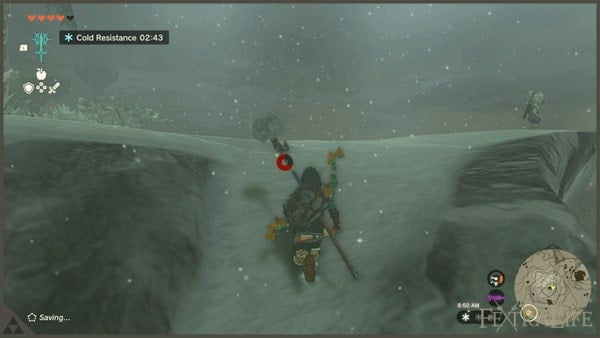
Get Tulin's Bow
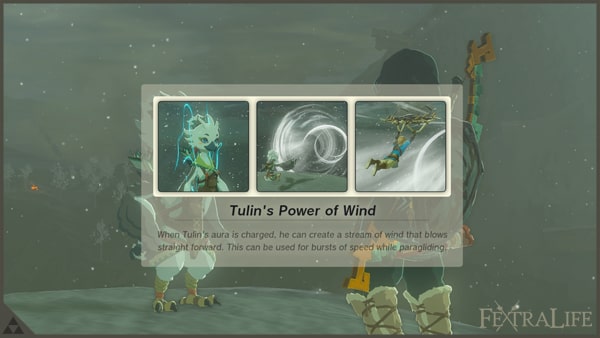
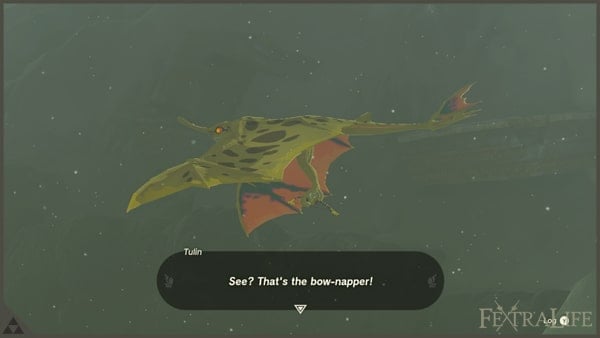
Tulin will ask for your help since his bow was abducted by an Aerocuda. This is an easy task. Take your bow and arrows and fused them with Keese Eyeball and you are done. If you don't have the eyeball, just aim manually. You can also get arrows from breakable boxes around. After getting the bow, more Bokoblins will come, and defeat all of them with Tulin. Nothing special regarding this fight, just pick targets one by one and you should be fine. You will have clues that Princess Zelda somehow went to the storm above thus, you and Tulin need to reach Hebra Peak.
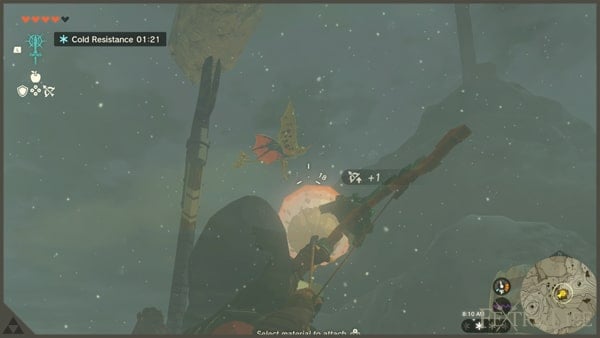
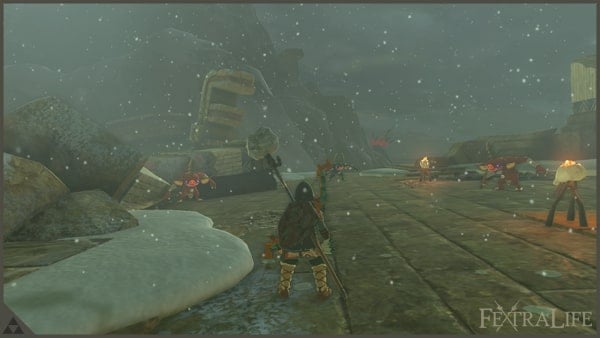
Reach The Top of Hebra Peak
This is the start of your long platforming journey in this region. Expect a lot of climbing and gliding as the upcoming level is abundant on these kinds of obstacles. Most of the headaches are out of the way already since I will be guiding you precisely on how to progress and clear the level.
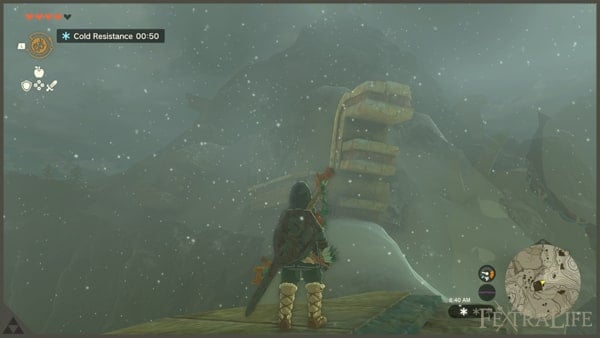
We need to reach the top of Hebra Peak first. Notice the golden structure debris near you? I call this debris since it fell from the sky. You'll see what I mean later. This is where you need to start platforming. Glide to the nearest debris and on top of it, a chest with x1 Zonaite Sword. Continue traversing the line of debris here, so far it is simple to follow. When you reach the end, of the first set of debris, notice there will be a lot of enemies residing here, you don't need to deal with them and instead, glide your way to the next set of debris to access the upper section of the mountain. It is worth reminding you to always use Tulin's gust of wind while you glide since you can reach more distance by doing so. You will be abusing this ability in this region.
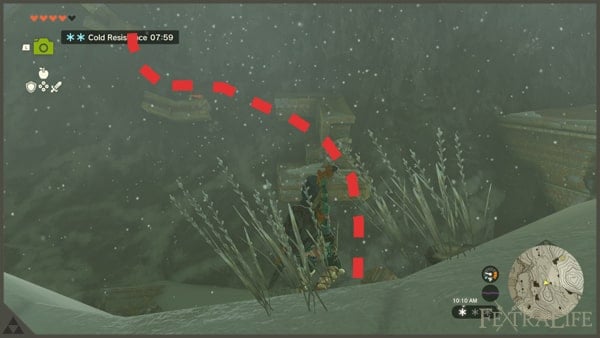
After reaching the new set of debris, follow the direction that I showed here, you need to climb your way to the top. In one of the first platforms here, there is a Soldier Construct II. Carefully deal with it and continue progressing. Traverse the debris with the help of the mountain as well. Don't forget that Link can climb mountains as well as long it is not slippery. Budget your stamina as well and don't use the leap too often unless you are sure that Link will be able to reach the next platform as miscalculation may cause you death. Climb up until you reach Hebra's Peak.
Reach The Peak of Rising Island Chain
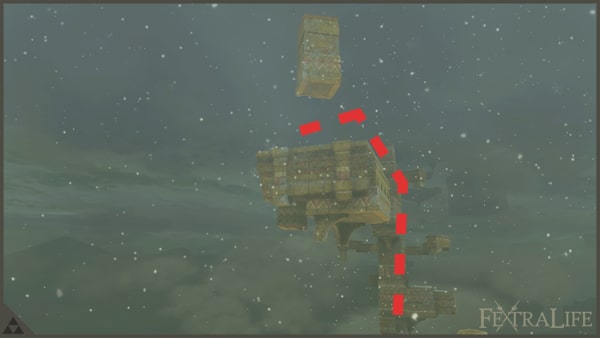
Another Rito is waiting for you named Huck. He will also encourage Tulin to take on the challenge and see what's in the storm clouds. Your first goal is to reach the hanging stone structure where you can use Ascend to climb great heights. Upon reaching the second platform that towers upwards, climb it manually and at the top, you will be able to see the platform that you need to glide on next, remember to use Tulin's gust of wind so you can reach the other side. Use the Ascend ability to access the upper parts of the Rising Island Chain. This is the reason why I call the structures that you found on Hebra Mountain. It is an actual part of Rising Island that fell from the sky.
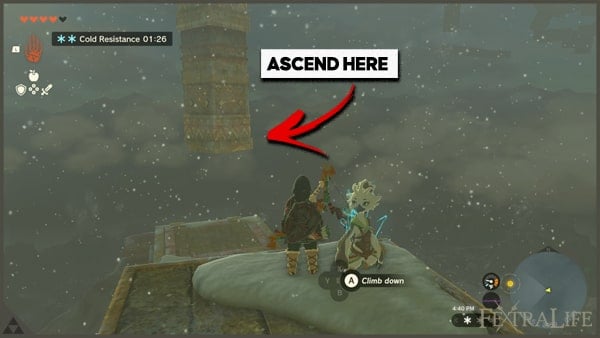
Now you will notice a flying boat and a nearby shrine. Before continuing your quest to reach the peak of the said island, let's complete the shrine along the way. Jump to the boat's upper cover and this will bounce you greatly to a great height. This is your main mode of traversal in this Rising Island Chain. Later you will find yourself bouncing to different boats to reach certain areas. So note this. Use the boat and jump your way and glide to the nearby shrine.
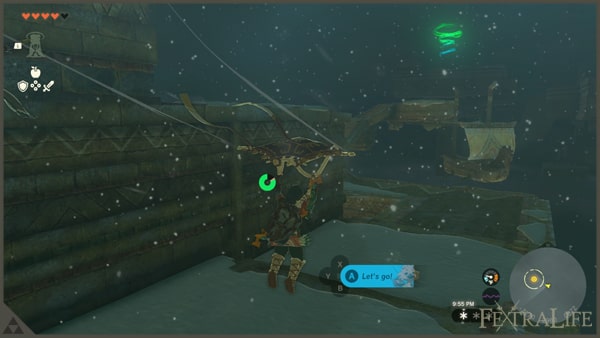
Clear Mayaumekis Shrine
Let's clear this shrine quickly. You will also have a taste of the boat experience that I am referring to. The puzzle on this shrine mainly relies on hitting the switches to open shutters.
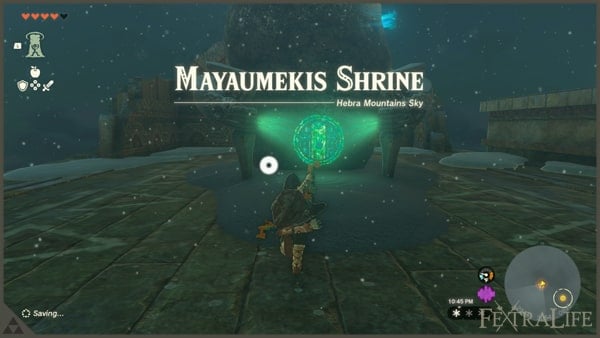
Mayaumekis Shrine Puzzle #1
Simply shoot the switch with your Arrows. Aim and release, this will open the shutter. Continue forward.
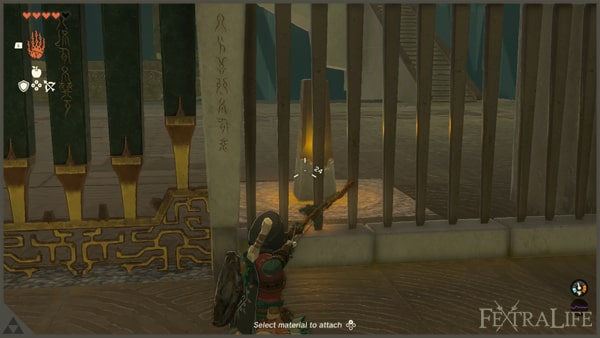
Mayaumekis Shrine Puzzle #2
Before jumping to the boat nearby, there's Soldier Construct II waiting for you so deal with it. Jump onto the next boat and notice the one roaming around. You need to glide and land on it. Your goal is to reach the farthest boat here to hit the switch and open the shutter below the next area.
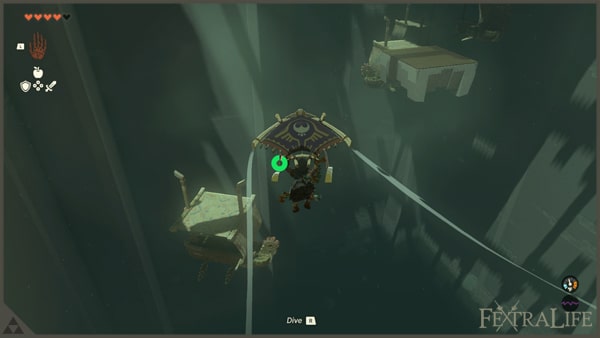
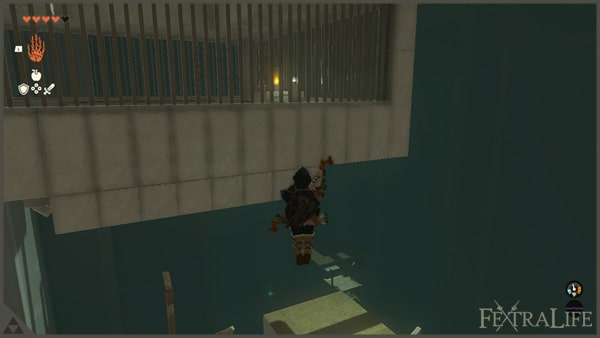
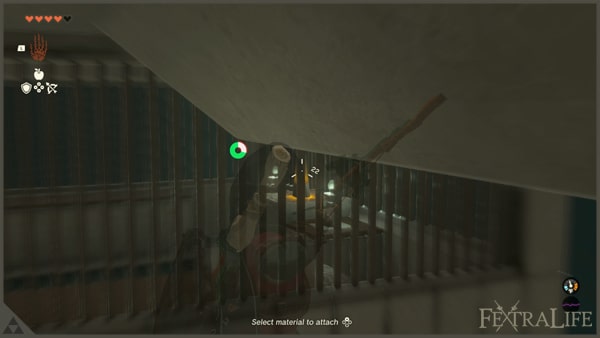
You can hit the said switch by using your bows and arrows and entering bullet time. It is easy to hit when you jumped from the farthest boat that I am referring to. Now, jump to the boat parallel to where the shutter opens and you are done. Get your x1 Light of Blessing as a reward.
Post Mayaumekis Shrine
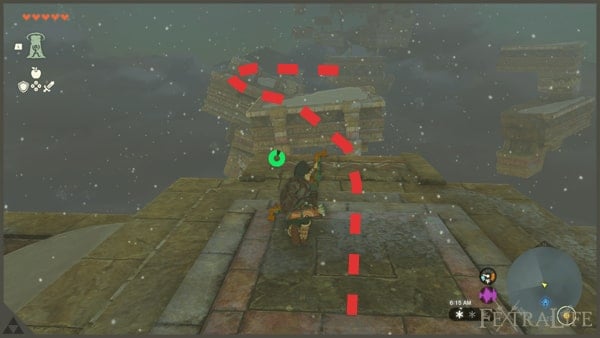
Continuing our main objective of reaching the peak of the Rising Island chain, pass the icy flooring in here, and you will begin jumping from island to island. Remember what you've learned in Mayaumekis Shrine in utilizing those boats. It will come in handy. Travel to the first three islands here and make your way to another boat and jump on it. Your next stop is another hanging structure that you can Ascend to. You can easily find it by checking the images here.
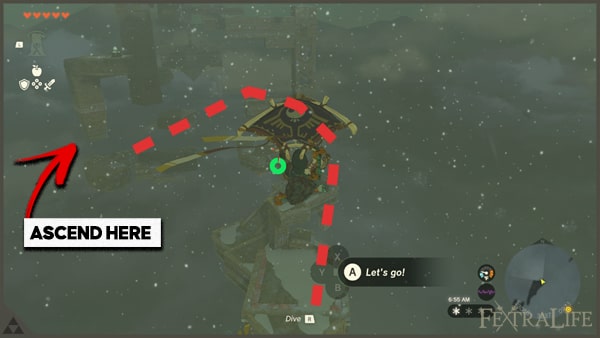
The hanging structure that we are looking for has icicles, attached to it. There's little space for the Ascend ability to work, go through the walls, and deal with the x1 Soldier Construct II waiting on the other end. Open the chest nearby and get x3 Portable Pots. Near you is another hole that you need to get through by shooting the icicles. Glide through the hole and use the Ascend ability once again to progress.
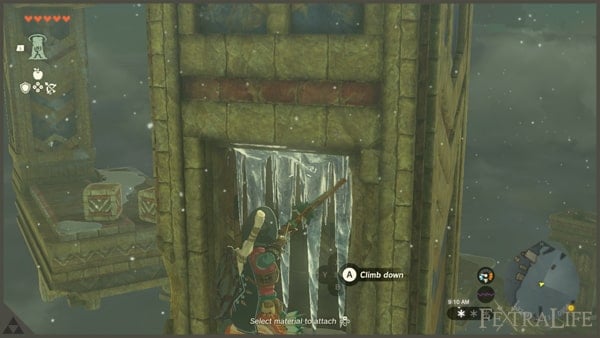
Glide towards the next set of islands and our next destination is another boat underneath an island with frozen flooring on it. Use the nearby island to reach the said area. The image will show you the boat and island that I am referring to. Upon reaching the island, break the frozen flooring and access the boat for you to ascend and glide your way to the next set of islands. Notice that there is a floating structure here that looks like a cell. Its opening is covered with icicles that you can easily break with your arrows. This is a building where a lot of Aerocuda's are circling around. After breaking the icicles, proceed to the frozen flooring below where you stand, and uncover the boat there so you can propel yourself through the hanging cell structure. Inside the cell, you can find a chest containing x10 Arrow. X3 Chillshroom can be gathered here as well. Break the boxes around for more arrows.
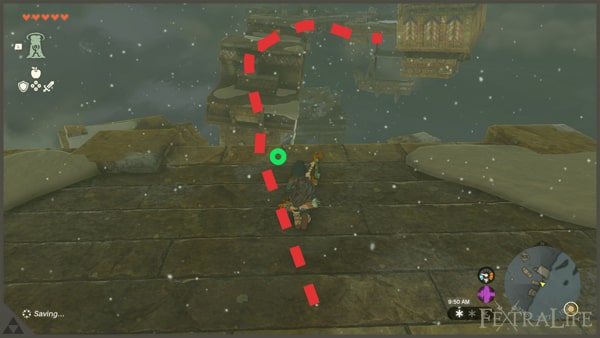
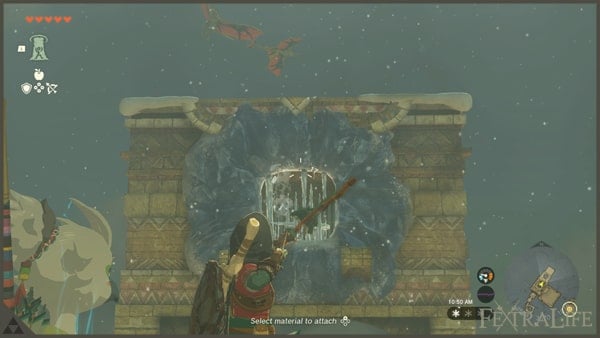
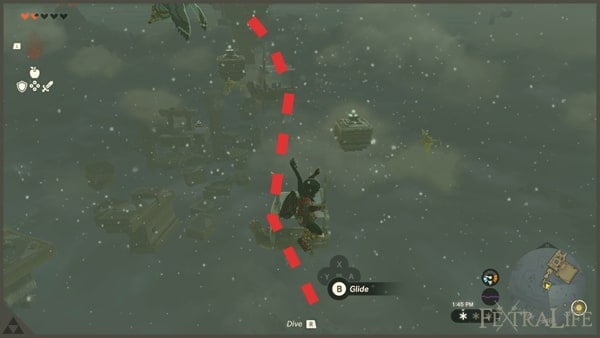
To proceed notice that another boat is being covered with stone blockades. You can manipulate at least one stone crate here by using Ultrahand and put them on the boat so the box will be forced to destroy the blockade from within. Access the boat and reach the next island. Here you can find another frozen covering in here again, destroy it and glide your way according to the direction that the images are showing you. Use the boats to safely glide here. For now, the nearest structure where you can rest and stop is our priority. You can easily determine it while you glide and use the boats around.
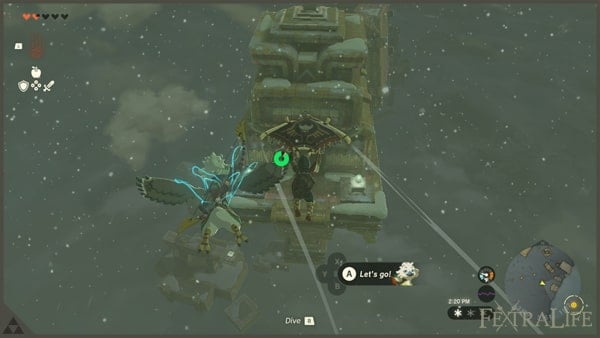
Then, upon reaching the place, there's a Cooking Pot here that you can use for cooking. Gather Chillfin Trouts in the pond and Chillshrooms. Use x1 Flint near the wood and start cooking. Restock healthy dishes and dishes for cold resistance. You can have a break as well if you want to.
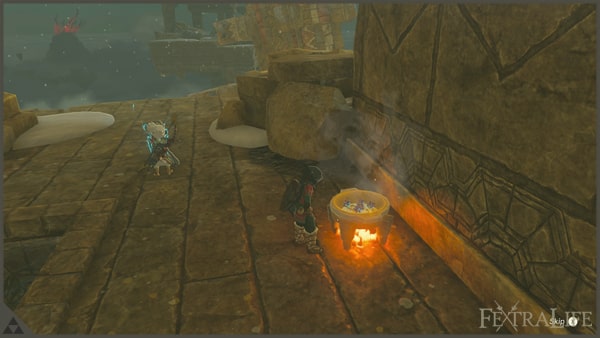
Ok, it is time to move forward. Thankfully the next set of islands is pretty straightforward and no difficult platforming is required. The goal is to reach the island extending to the upper areas of the island. Notice the Aerocudas and Soldier Constructs IIs fighting in the next platform. Join the fun to obtain their loot. On the next island, be careful traversing the connecting bridge ahead as it collapses when Link steps on it. Save your game if you want to just in case you fall so you will not start from below areas again. A Soldier Construct II is waiting to ambush you here so put it out as soon as possible.
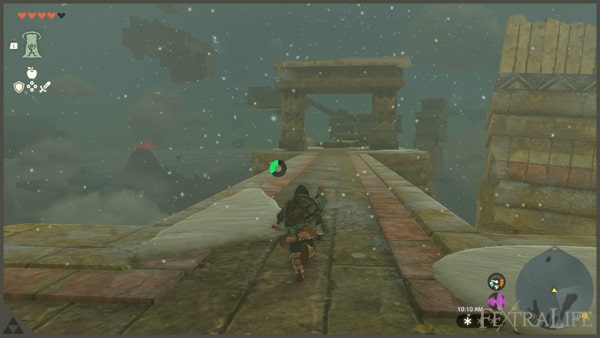
Now, the next island is pretty tricky, since you will be dealing with x2 Soldier Construct II and a Captain Construct I that is capable of handling a Time Bomb. This is one of the Zonai Devices that timely explodes and deals great damage upon contact. Be very careful about fighting the constructs here and as much as possible take out the smaller ones as possible while observing where the bomb has been thrown off to. There's a stone blockade in here that you can destroy by using stone-type weapons or use the Time Bomb provided here along with other Zonai Devices.
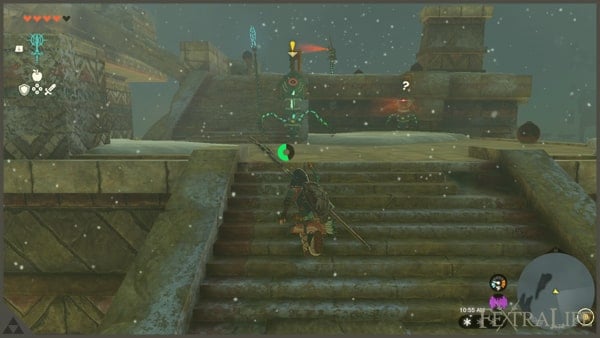
When Link finds a space or area where a lot of free Zonai Devices are sitting on shelves and ready for utilization, I call them, workshops. Destroy the stone blockade and below a room containing a chest that provides x1 Large Zonai Charge. Go back to the Workshop and you need to access the upper islands here to proceed, however, building a hot air balloon vehicle does the trick. You can follow the one I built here, x2 metal platforms connected by an x1 wooden plank. x2 Balloons on each other so it balances the weight. Balloons are being powered by x2 Flame Emitters. Ride the vehicle until you are confident enough to reach the upper island.
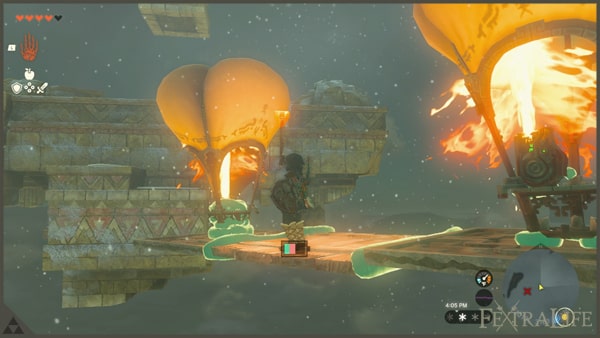
Use the Ascend ability to the hanging structure to proceed. We are about to reach the top and congrats on making it this far. There are a series of boats here again that you can use to cross over to the next island with a shrine. We need to clear this one first before continuing the journey.
Clear Kahatanaum Shrine
This is more of a bonus shrine, head inside and get the treasure chest containing x1 Large Zonai Charge. Then get your x1 Light of Blessing. That's it. The main purpose of this shrine is to be a teleporter.
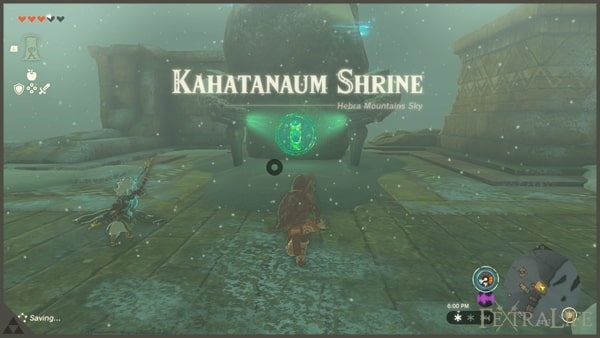
Post Kahatanaum Shrine
Let us continue and we need to do something about that extreme weather conditions. Link is now at a very high altitude section so it freezes him to death. Remember that I told you that you need to buy the Snowquill Tunic sometime later? Now is the time. Teleport back to Gatakis Shrine, access the Goddess Statue, and trade your x4 Light of Blessing for x1 Heart Container. Head to the village and buy the Snowquill Tunic in Rito Village. The chest piece is enough to survive. Restock your dishes as well if needed. After buying the chest piece, go back to Kahatanaum Shrine and you are able to traverse this section without issues as long you wear the Snowquill Tunic.
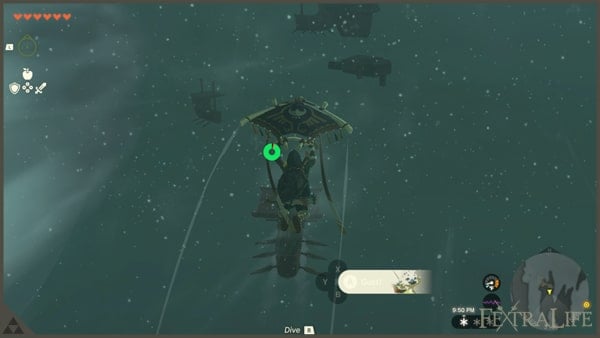
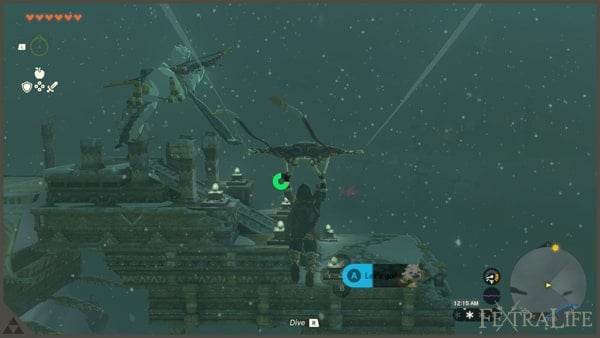
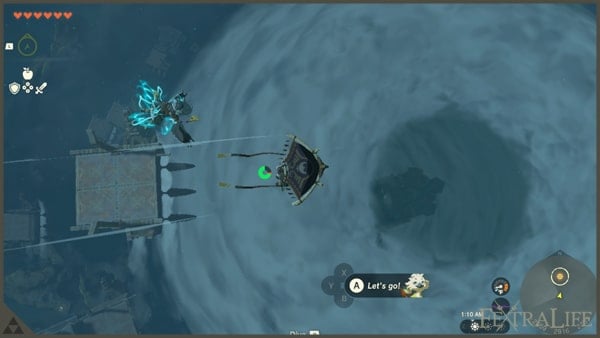
As usual, you need to take advantage of the circling boats here to increase your altitude, repeat the process until you notice an altar-like platform and this will second to the last boat that you need to jump on. Eventually reaching the top of the storm cloud after bouncing to the highest boat that you can find. You are now ready to dive into the storm cloud, and as you descend, the Wind Temple reveals itself. Land on the temple and access the green shrine here for you to unlock the fast travel point here. This begins the walkthrough section for the temple.
Clear Wind Temple
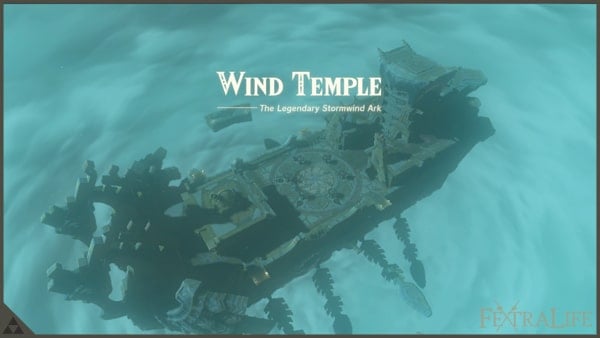
We have prepared a separate page for clearing the Wind Temple. For a detailed guide, click this Page. It will be a series of engaging puzzles and all, and this will be your first temple if you are following this guide. After following the guide, we are now skipping to the end of the boss Colgera.
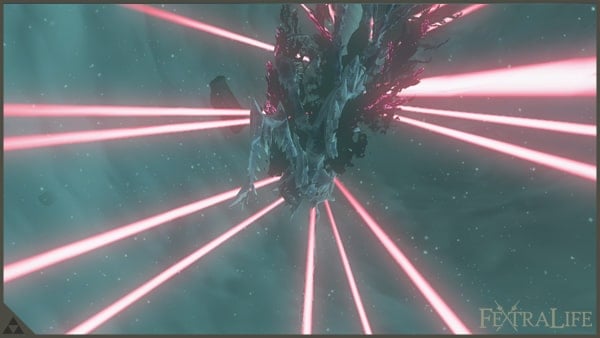
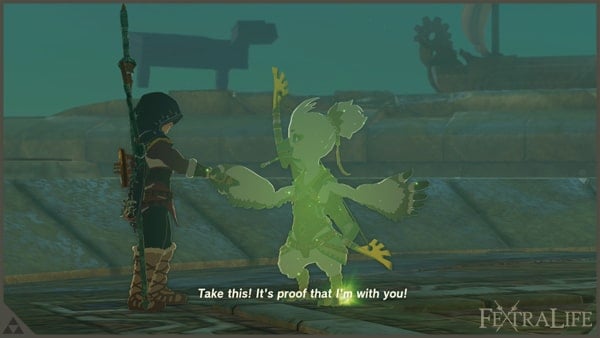
Upon its defeat, you will be awarded x1 Heart Container and x1 Vow of Tulin, Sage of Wind after the series of cutscenes where it shows that the storm has finally disappeared.
You will find yourself with Tulin's family in Rito Village. Tulin will never leave your side starting from now on.
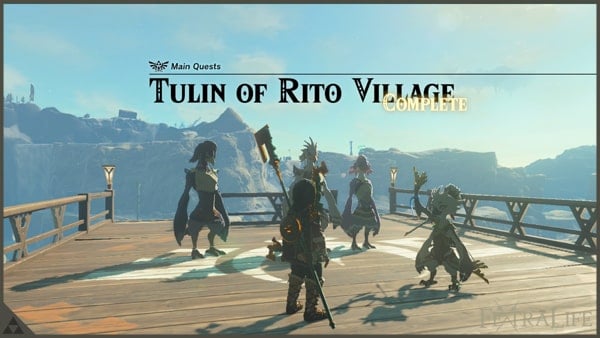
Congratulations on completing this lengthy main quest and good news though, the next region is shorter than this one so you can relax a little bit. We will now visit the Eldin Region.
Zelda Tears of the Kingdom Eldin Region Walkthrough
Objectives To Complete in this Part
- Head to Goron City.
- Clear Sepapa Shrine.
- Find Woodland Stable.
- Clear Ekochiu Shrine.
- Activate Eldin Canyon Skyview Tower.
- Find YunoboCo's HQ.
- Defeat Yunobo in a boss fight.
- Head to the top of Death Mountain.
- Clear Sitsum Shrine.
- Defeat Moragia in a Boss Battle.
- Descend To The Death Mountain Chasm.
- Clear the Fire Temple.
Temples To Explore in this Part
Shrines To Explore in this Part
Notable Items or Abilities To Pick Up
Head to Goron City
It is time to continue our journey of investigating Regional Phenomena in Hyrule. We completed the lengthy Hebra Region and now Eldin Region is the next destination. Unlike Hebra, this region is pretty straightforward but still fun to explore. Starting from the Lookout Landing, gather all the supplies that you need, recovery dishes, weapons and etc. As usual, use the Lookout Landing Skyview Tower to cover as much ground as we can and head northeast.
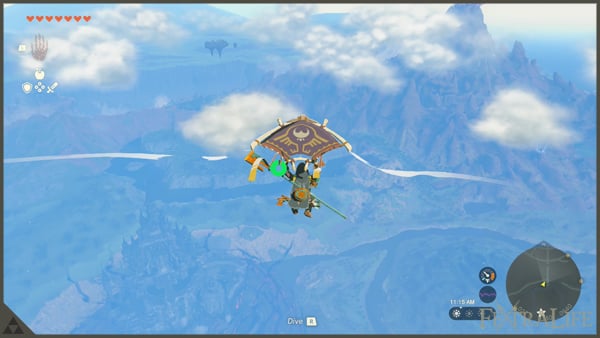
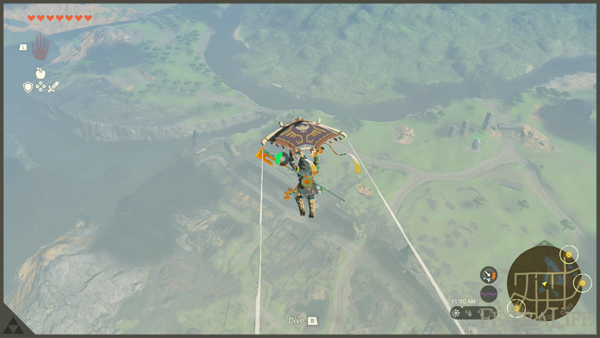
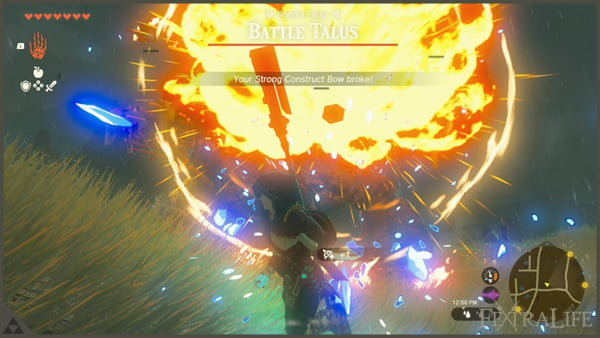
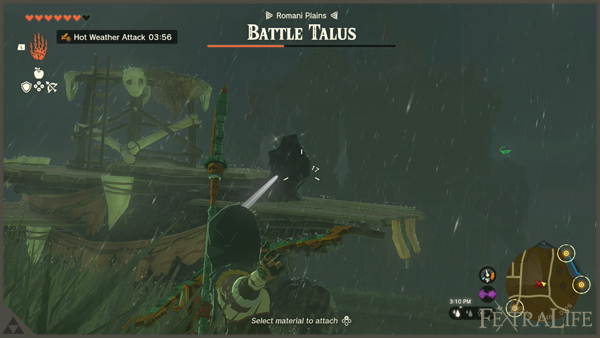
You will likely land in the Hyrule Castle's city outskirts. On your way to the east gate exit, encounter a rock boulder-like enemy known as Battle Talus and it is a mini-boss. Deal with the Bokoblins first before concentrating on the Talus. Be careful as it throws rocks that can easily hit you especially if you are stationary. I suggest you use at least x1 Bomb Flower to deal with Bokoblins riding the Talus
After clearing all the side mobs, notice the concentrated gem pillar sticking out on the Talus's body. Hit it with arrows and it will be staggered. Use this time to climb to the nearby outpost and glide your way to reach its upper parts. Deal melee damage to the said stone and it will suffer heavy damage. After it recovers, do the same thing again and the fight will end eventually. Receive precious stones such as rubies, ambers, and opals. The treasure chest in the outpost will be unlocked as well. Open it for another x1 Ruby.
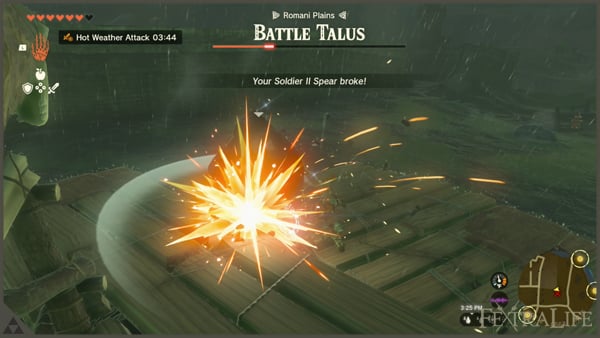
Follow the northern pathway here while gathering the raw materials available to you for later use. Not for long you will find Sepapa Shrine near the river. Let's clear this dungeon first.
Clear Sepapa Shrine
Pretty easy shrine so let's get on with it. The Recall Ability will surely be in use here, couple it with Ascend and you should be fine.
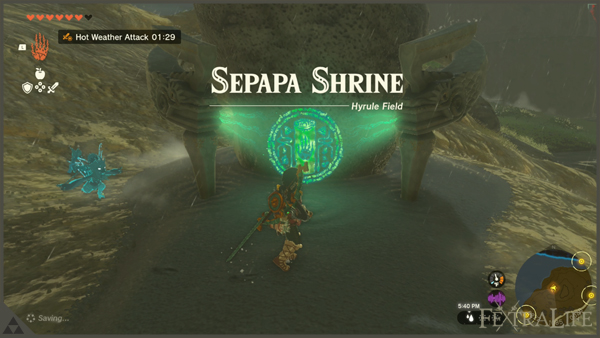
Sepapa Shrine Puzzle #1
Simple and straightforward. When the moving platform moves on the left side of the pillar it's connected to, use Recall to it so it will stop briefly, and use Ascend for you to be able to ride and access the upper section.
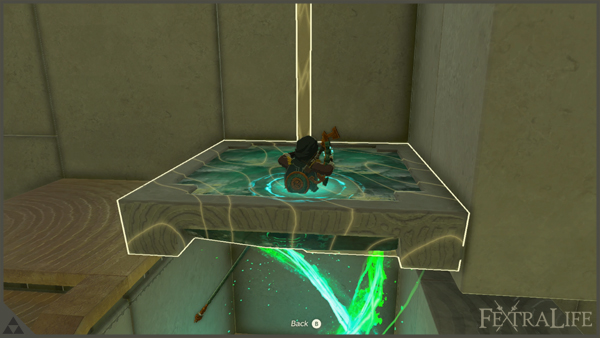
Sepapa Shrine Puzzle #2
Notice the vines extending to the treasure chest mounted on the wall. Use your Bow and Arrow, fused with an x1 Fire Fruit, and shoot the vines, making them burn. Get the chest first with an x1 Strong Construct Bow inside. Return to the shutter door here and grab the torch. Ride the raft and near the stone pillars here, quickly use Recall to the raft and equip your torch. You can hit pillars so it lights up if it did not for some reason. Bring the lighted torch to the shutter door and light both pillars.
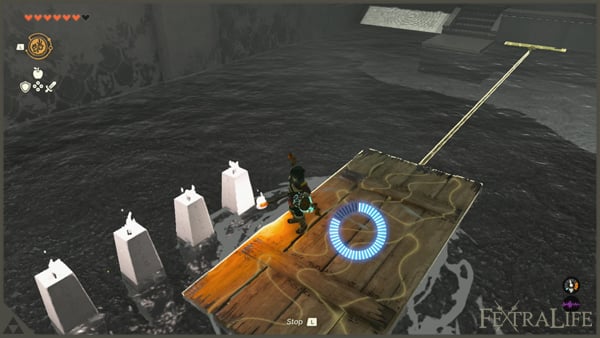
Sepapa Shrine Puzzle #3
Place the iron ball first on the nearest hole where you originally picked up the ball. Wait for two seconds and place the ball in the next slot. This will open the first shutter door on the altar pathway. Pass the first order, target the ball, and use the recall ability so the ball will place itself in the first slot again, opening the last shutter door. Get your x1 Light of Blessing as a reward.
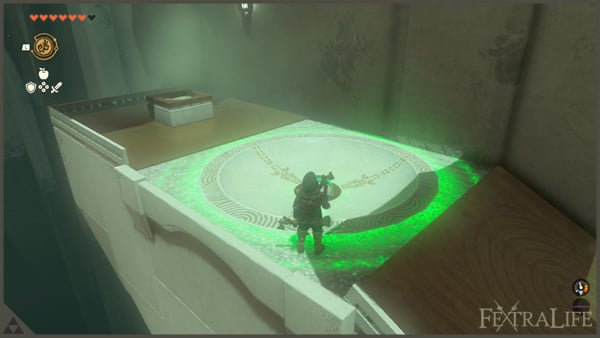
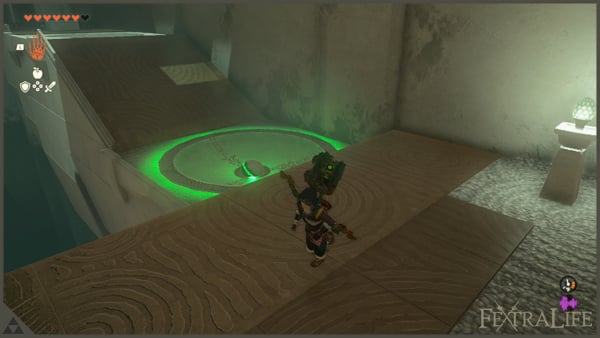
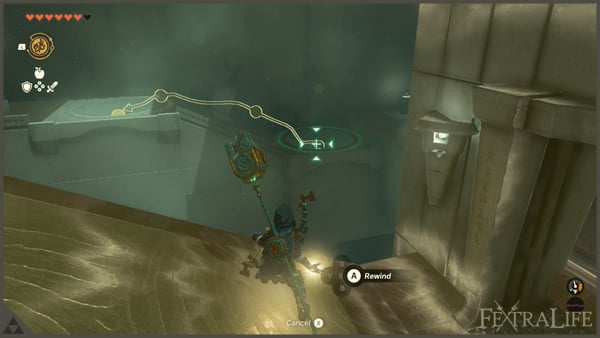
Find Woodland Stable
Our next stop is the Woodland Stable. Follow the pathway to the north and notice there are many horses that you can mount, catch one and continue the path.
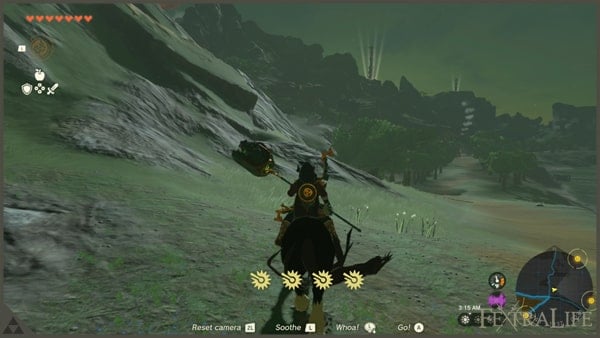
Eventually, find the Woodland Stable and Eldin Canyon Skyview Tower, which is our next destination after the shrine here. Approach the manager of the stable and register the horse that you just got and also get your points from finding the stable.
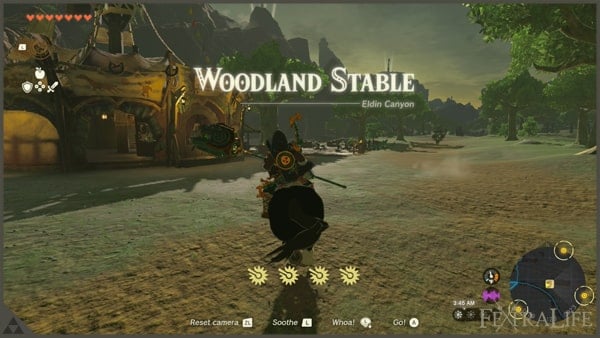
Clear Ekochiu Shrine
In every stable, there is always a shrine that you can access for fast traveling. Search the Ekochiu Shrine near the stable and let us clear it.
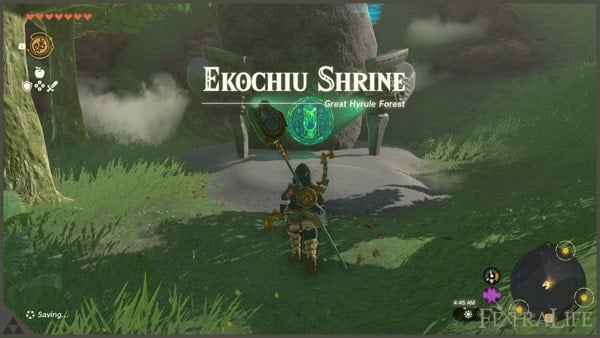
Ekochiu Shrine Puzzle #1
Step on the switch here near the stone crate. It will activate its mechanism and move toward the second squared platform. After it moves, hop on the platform and use the recall ability and reach the other side.
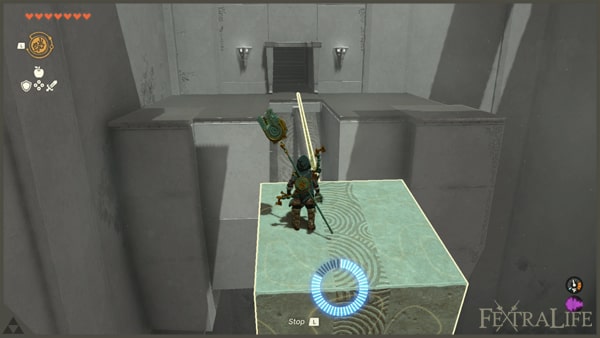
Ekochiu Shrine Puzzle #2
There's a metal crate here that will be pushed down from the upper section. Hop on it and use Recall on it to access the upper part. Then glide through where the chest is located. Get an x1 Zonaite Shield. Repeat the process and on to this puzzle.
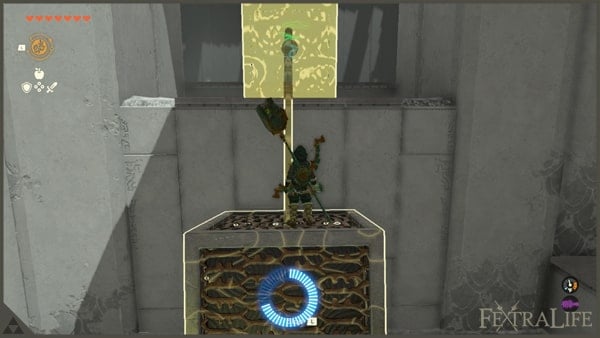
Ekochiu Shrine Puzzle #3
Place the metal crate again here onto the launcher here and step on the switch and see it launch to midair. After the crate lands, hop on it and use Recall on it for you to gain height. Then glide through the altar and get your x1 Light of Blessing.
Activate Eldin Canyon Skyview Tower
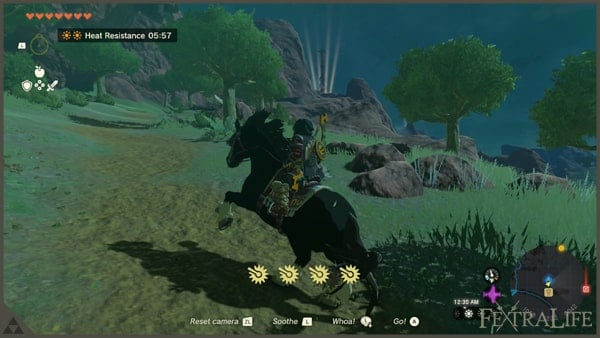
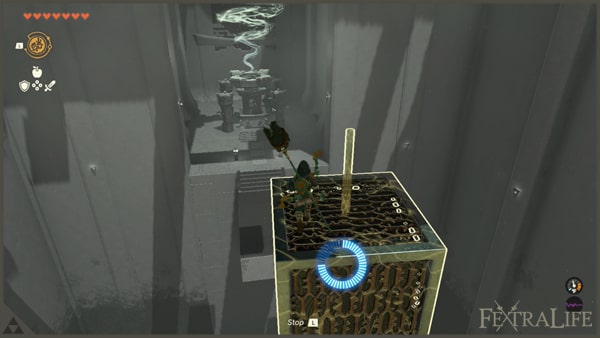
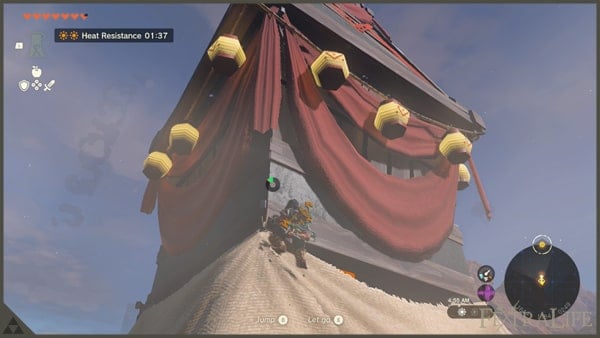
The Eldin Canyon Skyview Tower is not far from the Woodland Stable, just go get your horse, and trail the mountain path leading to the tower. We will also use the tower to minimize our land travel time to reach Goron City. Ride your horse until you need to trek the mountain on foot. Upon reaching the tower, you will notice that it is not working and the NPC Sawson will tell you about it. The solution is, you need to climb the tower and drop and enter from the lid and activate it from the inside. Update your map and begin gliding to the quest marker to the north.
Continue Locating Goron City
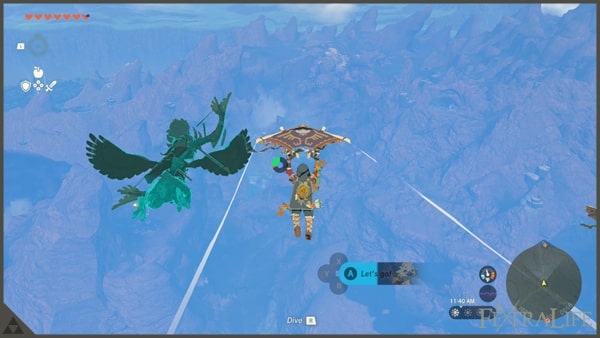
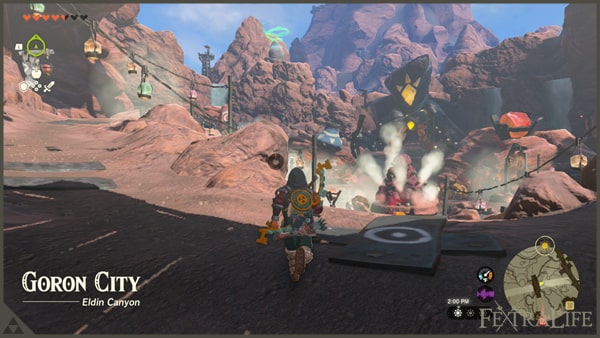
Follow the quest marker here and eventually land on the rocky mountains of the Eldin Region. You can see the city while in midair, it has the Goro statue, noticeable even from a far direction. Traverse the rocky terrain here and take advantage of Tulin's Gust of Wind while gliding. Not for long you will reach Goron City and be updated with its current situation. Speak to the old Goro in the center of the town to trigger a cutscene.
Find YunoboCo's HQ
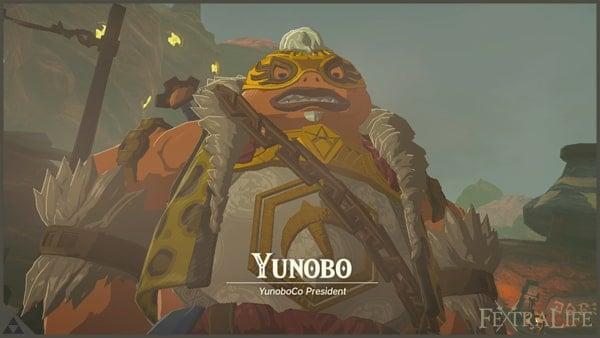
You will be introduced to a maske Goro which is Yunobo. He will retire to his headquarters during the cutscene and you need to find YunoboCo's HQ. But before that, it is much to visit the armor shop of Goron City and avail Flamebreaker Armor. The chest piece is enough to survive the intense heat in the next areas. Sell your stones if you don't have much of a Rupee. Just in case, you still do not have enough Rupees, go back to the caves that we already explored especially in Great Sky Island.
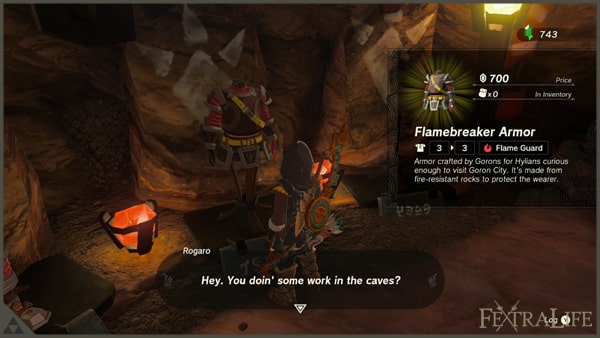
If you are following this guide, you should be able to buy the armor now since I only have a lot of my Rupees in this guide for buying necessities such as armor like these. After buying the armor equipping it is a good idea. Notice the shrine here in the upper parts of the city, clear it first to unlock fast travel here.
Clear Marakuguc Shrine
As usual, shrines that are being housed by major cities usually teach you the basics of how the puzzle works in your next important areas. Here you will learn how to work around lavas and all.
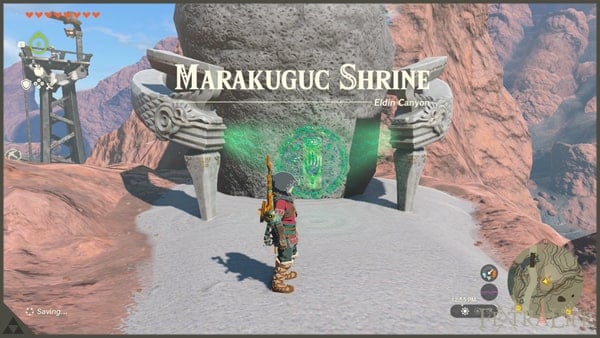
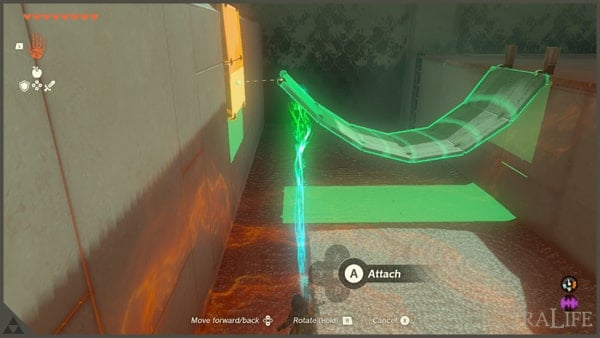
Marakuguc Shrine Puzzle #1cross
Connect the broken bridge here to its other half for you to be able to cross. Simple as that. Attach the end of the bridge to the metal platform with wheels. This will extend the bridge further so you can cross to the other side. Attach the end of the bridge to the metal platform with wheels. This will extend the bridge further so you can cross to the other side.
Marakuguc Shrine Puzzle #2
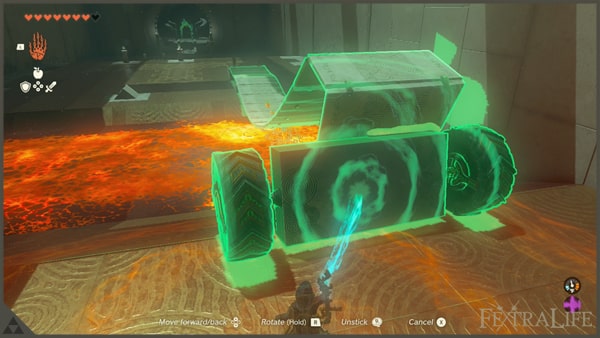
Remove the wheeled metal platform you attached to the previous bridge. Combine the other platforms here so you can create a four-wheeled vehicle. Then attached the one from the bridge extending the platform. Cross the lava with the vehicle and step on the platform sticking out from the lava and use the Ultrahand to transfer the vehicle to the other side so you can finally cross over. Ascend to access the upper section.
Marakuguc Shrine Puzzle #3
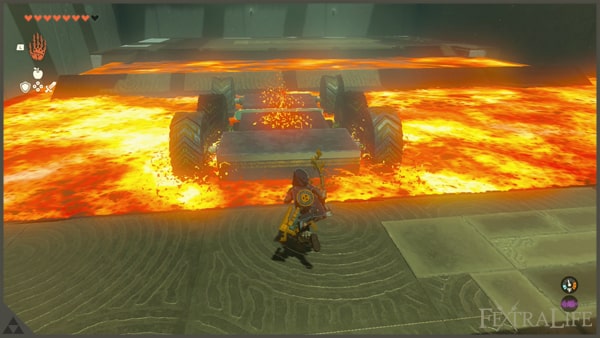
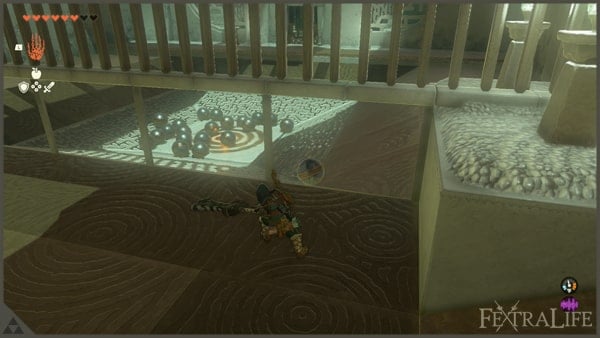
See all those iron balls? you can use the vehicle to push it all to the next area. Notice there's a space here that you need to fill. Or you can manually hit the iron balls toward the slot. Until the weight of the iron balls is enough, it will push the platform downwards opening the shutter. On the other side, there is a treasure chest and reach it by using the long platform available in this area. Get your x1 Light of Blessing as a reward.
Continue Looking For YunoboCo's HQ
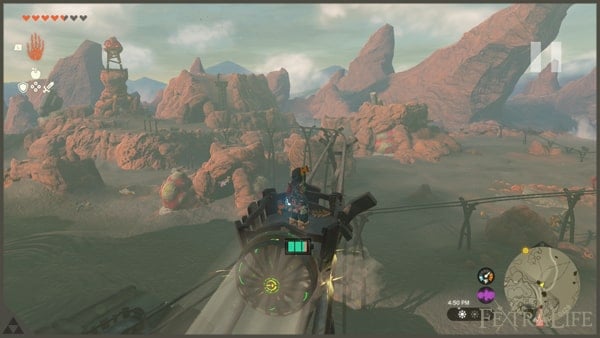
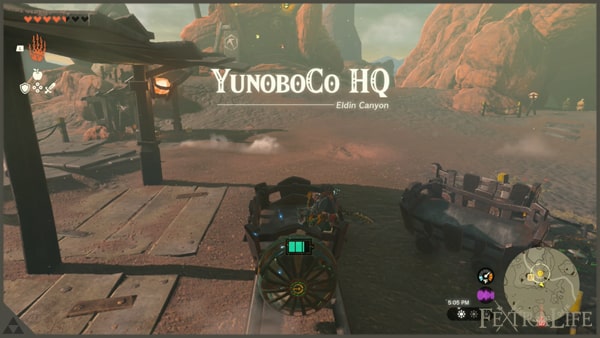
Now the dirty work is done, just follow the main path here that leads to the upper part section of the city if you are from the city proper. Near the shrine, there is a railway available and mine carts available for use. Get one with your Ultrahand and attach x1 Fan available in the area. Ride the cart and eventually reach YunoboCo's HQ. Follow the quest marker and talk to Offrak and Slergo. They will let you in and confront Yunobo.
Defeat Yunobo in a Boss Fight
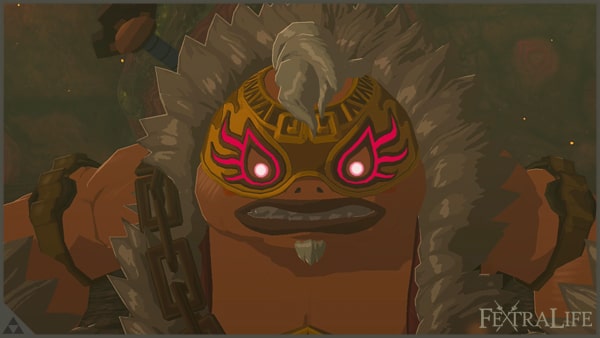
The mechanics of the fight is simple. You lock on Yunobo and stage sideways, and Yunobo will charge a roll attack directly at you. If you strafe, you are pretty much safe from this attack.
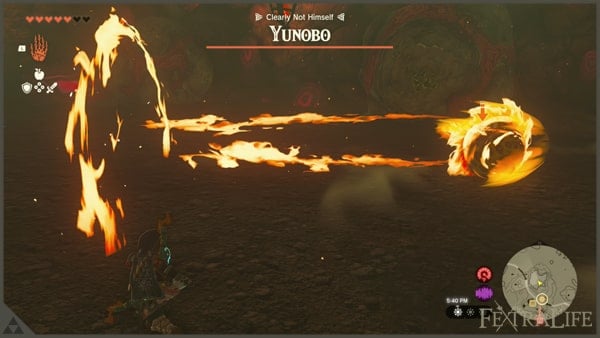
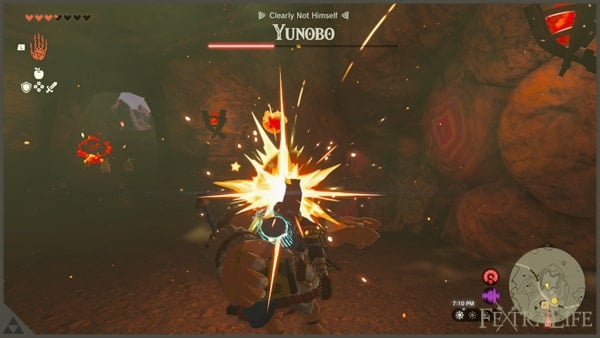
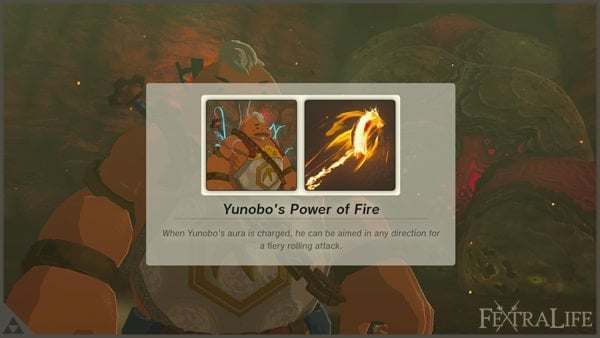
When Yunobo hits the wall for the third time, he will be stunned. This is your chance to hit him in the head with arrows or hit his head with a charge attack. Wait for him to charge, dodge, wait for him to be stunned and strike. Rinse and repeat. After the fight, Yunobo will lend you his charge attack. You can now destroy stone blockades easily.
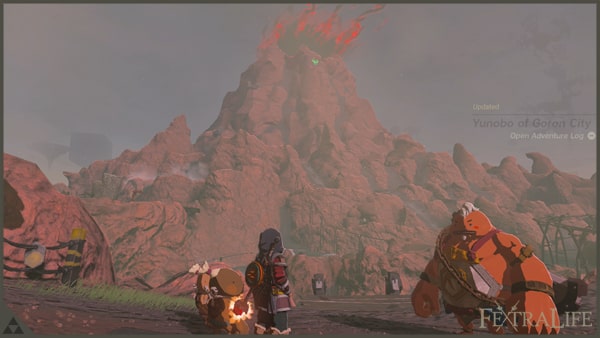
He's now back to his original senses and wants to know Princess Zelda's whereabouts. He will direct you to the Death Mountain and this is our next location.
Head To The Top of Death Mountain
Our sole purpose here is to reach the peak of Death Mountain, don't worry, the length of Death Mountain is not like the Rising Island Chain so you can relax a bit. Follow the direction of the image here and the railway extending to the upper portion of the mountain is your guide. From your location, there's a nearby Bokoblin camp. Enter the party and surprise with a pre-emptive strike. Or you hit the exploding barrels here with your Fire Fruits and Arrows. Once done, collect all the loot.
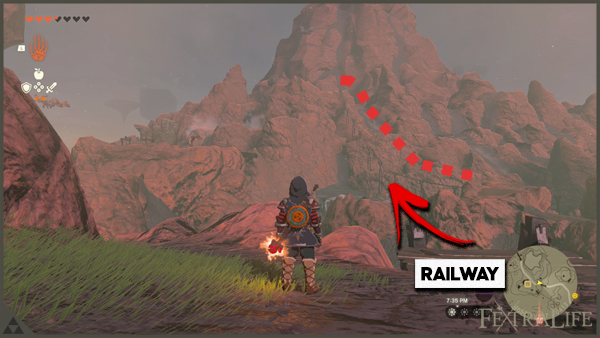
Not far from the camp where you fought all of the Bokoblins, you will be able to see falling rocks from a sky island above. Use this to your advantage, use Recall on one of the rocks after you hop on it. Gain a good level of height and start diving and gliding through the mountain while following the railways I mentioned. If you followed the railways, you will be landing on the Death Mountain West Site. Notice the railway leading to the upper parts of the mountain?
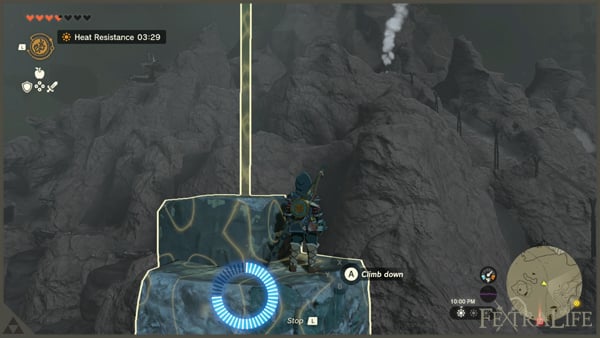
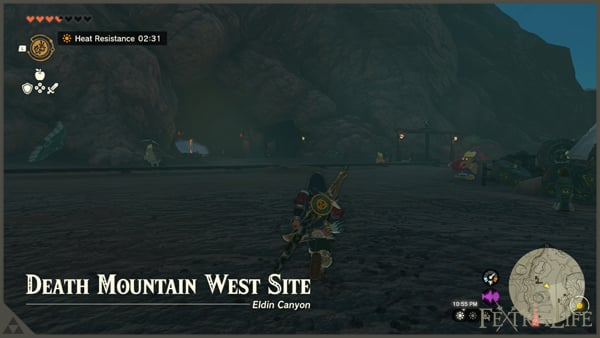
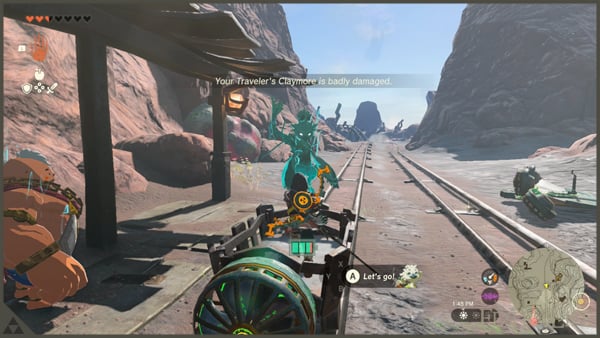
This is where you need to place a cart and attach it with an x1 Fan. Yunobo will now ready his charge and you can manually direct it while riding the cart. Use the charge to fend off monsters positioned on an outpost near the railway to have a smooth ride.Enjoy the ride and soon you will reach a section with blockades in it. Deal with the Bokkoblins guarding the area and remove the blockade with your Ultrahand and Yunobo's charge to destroy the purple rock formation blocking the railway. Continue ahead with the cart. Notice that your Energy Cell is running low. You can easily use your Zonai Chargers to replenish the energy cell since you do have a huge supply of these. Near the peak, notice a nearby shrine. We need to clear it first for us to have a teleporter in this section.
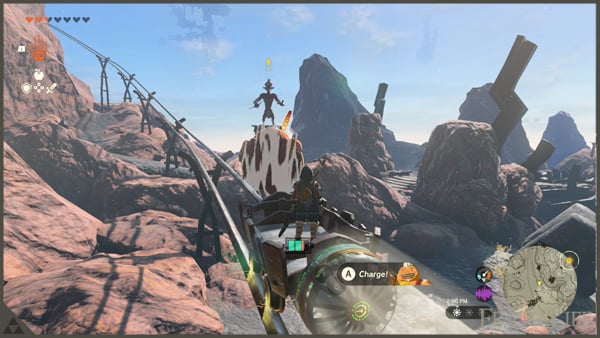
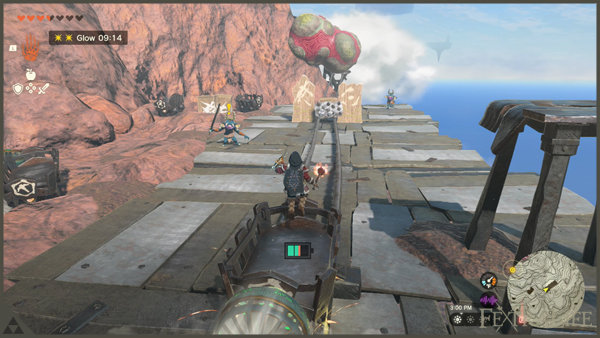
Clear Sitsum Shrine
We enjoyed this dungeon as you will harness the four-wheeled vehicle with a Steering Stick. Of course, it is made from Zonai Devices. The Big Wheel is huge, hence the name, thus perfect for difficult-to-traverse terrains such as rocky mountains, lavas and so much more. You will be using this vehicle a lot in this dungeon.
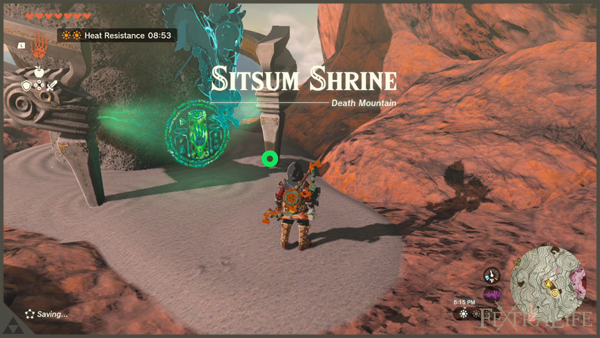
Sitsum Shrine Puzzle #1
Just ride the Zonai vehicle and traverse the lava. This will lead you to the next area. A simple and fun puzzle to solve. Notice a huge area with another vehicle parked on the other side. Essentially, you need to place the small iron ball in the slot here for the shutter door to open, and inside get the chest containing an x1 Mighty Construct Bow. You can get the ball on a small alleyway with your Ultrahand.
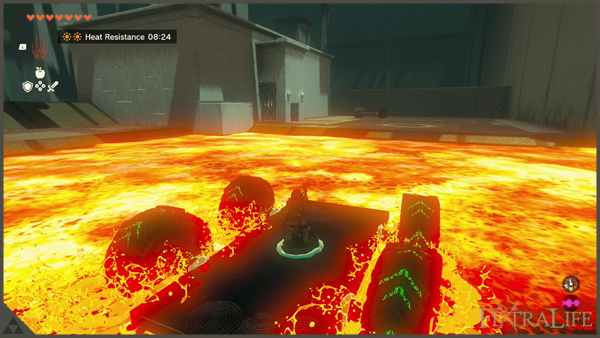
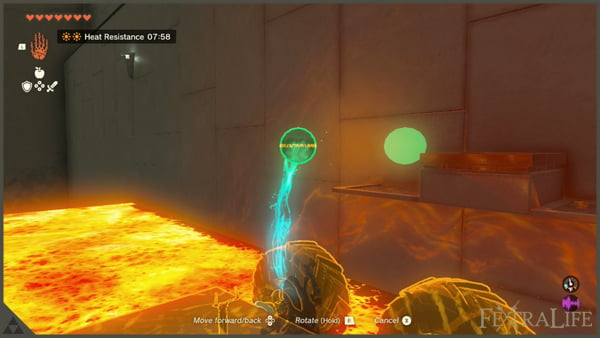
Sitsum Shrine Puzzle #2
Upon reaching the area that looks like an aircraft runway, defeat the Soldier Construct II guarding this area. Pretty enjoyable puzzle to solve as well. Just get the Steering Stick from your four-wheeled vehicle and attach it to one of the aircraft here with fans attached. Steer the stick forward to launch and fly your way to the altar. The Steering Stick is one of our favorite Zonai Devices, in the reason of, when you can control things, exploration will be a breeze, especially in this game. That goes for this dungeon and get your x1 Light of Blessing as a reward.
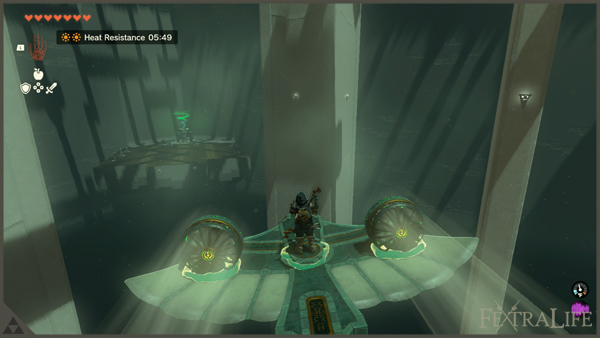
Post Sitsum Shrine
You've technically reached the top and told you it would be not for long. Talk to Yunobo here and trigger a cutscene. This will lead you to a boss battle so is prepared, but you can relax since this boss is pretty straightforward to beat.
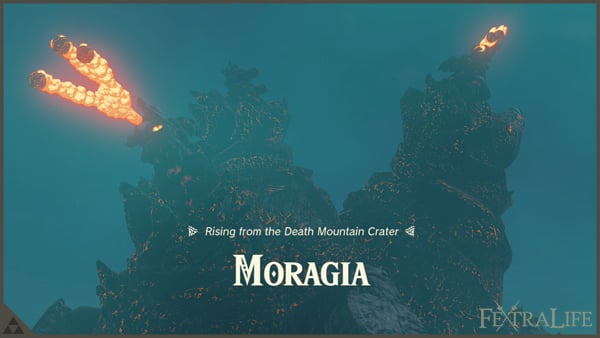
Defeat Moragia in a Boss Battle
As mentioned, this boss is easy to get through. Notice an assembled aircraft on your right, fix its orientation and ride it, It has everything you need.
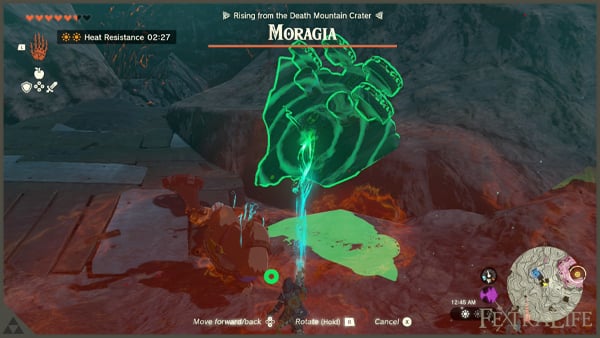
Once in midair, target each of Moragia's heads with Yunobo's charge. Mind the fireballs it's spitting, they are relatively slow so you can avoid it beforehand. Once you've hit one head, it will be destroyed and a huge chunk of its life will be reduced. Do the same strategy to the other heads and you are done. Congratulations on beating Moragia.
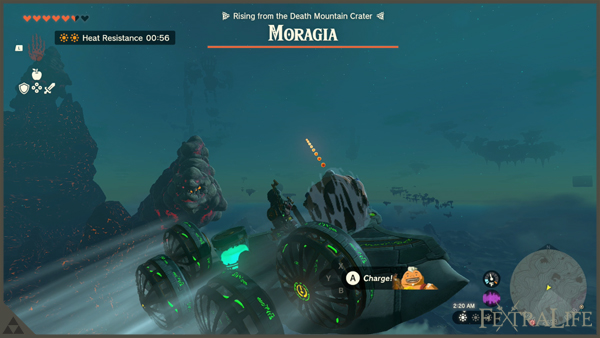
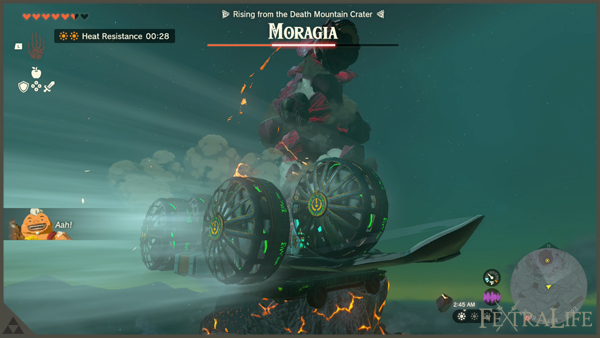
Descend To The Death Mountain Chasm
After defeating Moragia, the entrance to the Death Mountain Chasm will be revealed. Descend to it and you will be entering a space connected to The Depths as a whole. If you are following this guide, you know the basics of The Depths. Using Bright Blossom Seeds and activating Lightroots to enlighten dark areas and also update the map is a must in these dark regions. After landing activate the nearest Lightroot here which is Mustis Lightroot.
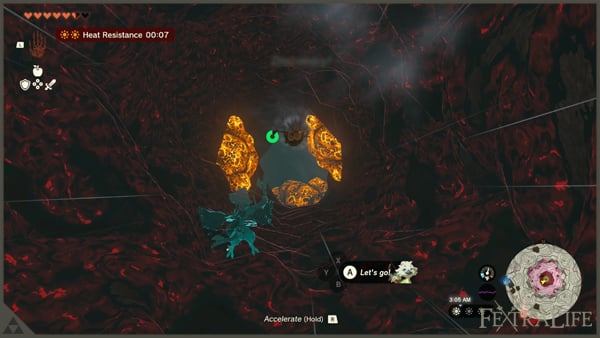
More exploration for us and this is relatively a huge area but we will focus on the important ones for now. Talk to Yunobo to proceed and he will be called from within the Fire Temple. Blow the purple stone blockades ahead to access the darker area here. Abuse your Bright Blossom Seeds as usual. A group of Little Froxes are waiting on the other side, they can gank you from all directions so be mindful of that and deal with them one at a time. Yunobo and Tulin will also help you. After the battle, notice that there's a nearby Zonai Device Dispenser. Use Zonai Charges since you have a surplus, or Contruct Horns to get more capsules, you can get valuable Zonai Capsules in here like a Steering Stick, Battery, and Big Wheel. Get capsules for later use. Follow the quest marker to proceed in our opinion, the greatest enemy here is the darkness itself so, activating Lightroots can alleviate this concern. We have also prepared a general direction to reach the Fire Temple. Check the map below.
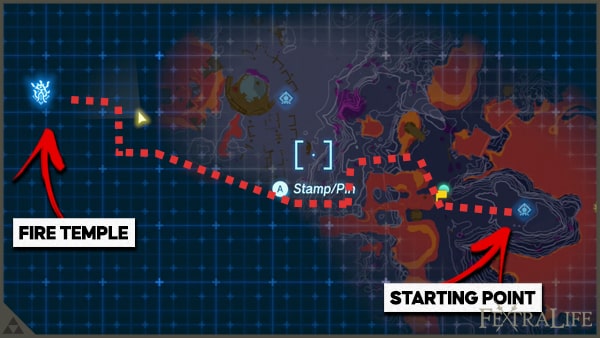
You can travel by foot or take advantage of the free four-wheeled vehicle here while traversing The Depths. On your way, notice the spirit-like orbs floating around. These are Poes. Collect the ones along the way for later use. Note that there are more free Zonai Devices that you can take advantage of just in case the need arises. It is being guarded by a Fire Like. While enlightening your path with Bright Blossom Seeds, take a sharp left turn and drive your way up from the slope here. A mining area is right around the corner.
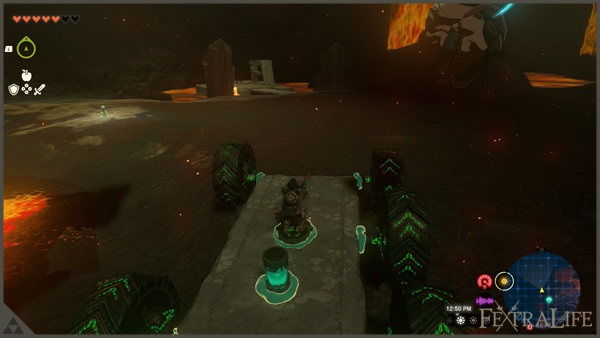
Deal with the Bokkoblin miners here and take advantage of the free ores that you can get from the ore deposits. It is worth noting the enemies in The Depths are affected by the gloom, you can observe that their bodies are covered with it. Their attacks also affect you with gloom so be cautious dealing with these types of enemies.
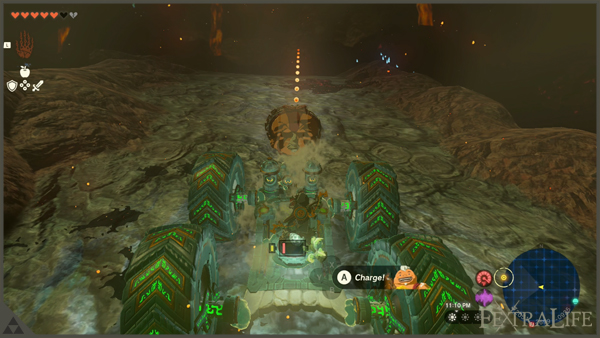
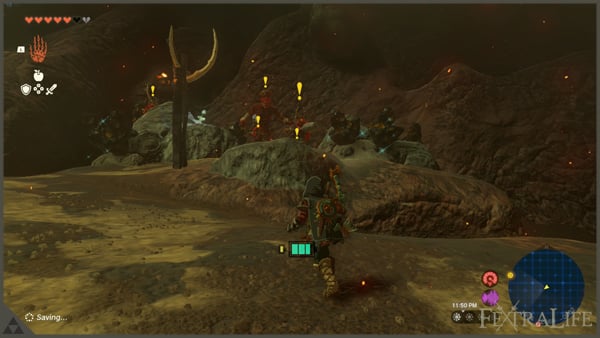
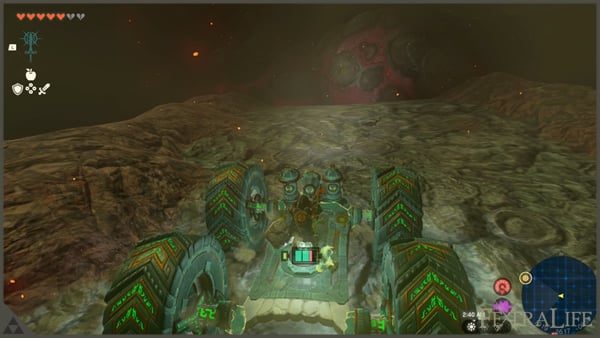
Pass the mining site, another steep slope that we need to climb along with a purple stone blockade. Destroy it with Yunobo's charge to get through. After climbing the slope, you will see the Fire Temple's location. That section is pretty lit up and you can use the bright areas as a guide to know where to go. More mining sites to find here. Deal with the enemies and gather your ores. Near the mining site, notice a railway with the cart and x1 Fan that you can use for this rail.
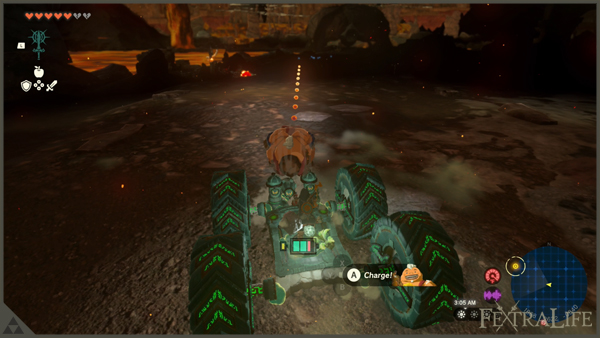
You will be entering a short tunnel made of bones. Enemies here who'll try to ambush you can easily be dealt with by Yunobo's charge. Destroy the stone blockade as well to proceed. The cart will soon reach the end of the railway and you will enter the Fire Temple's premises. Head to the temple entrance by following the stone pathway here. Congratulations on reaching Fire Temple. Destroy the stone blockade at the entrance and proceed to the temple.
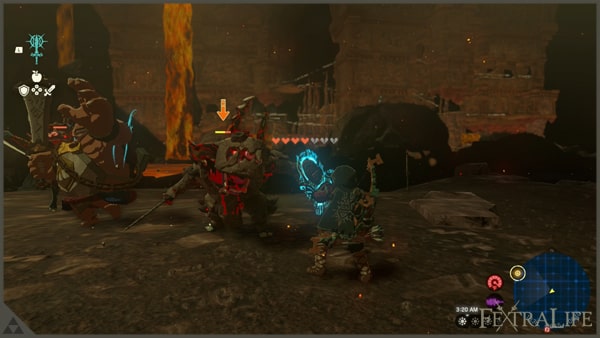
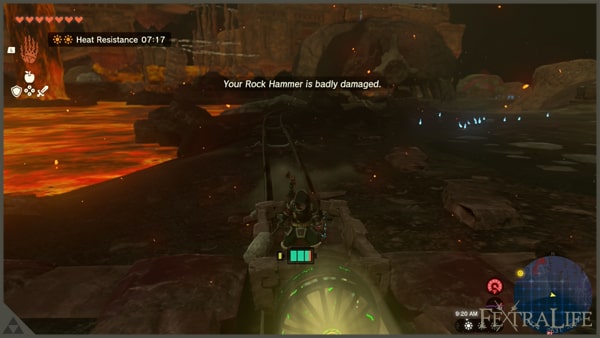
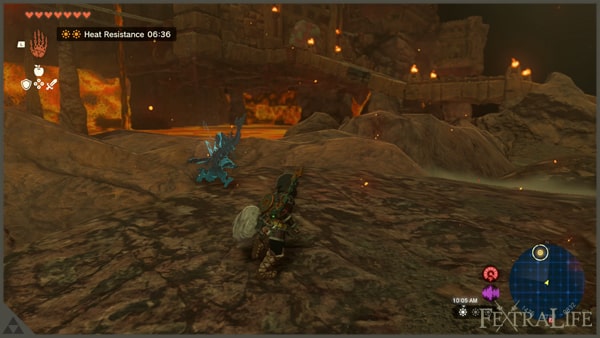
Clear the Fire Temple
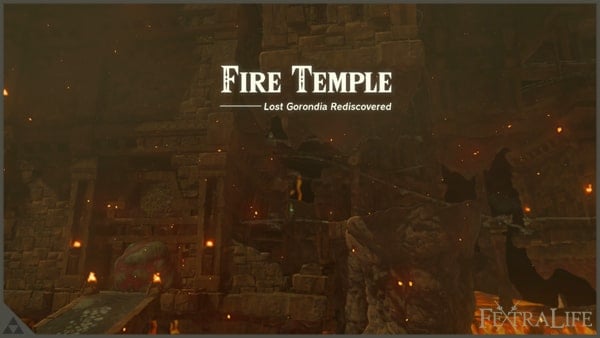
Like in the Wind Temple, we have created a dedicated page for the Fire Temple. Click this page for a detailed guide on how to complete it. It is filled with exciting puzzles as usual. Proceeding to the events of beating the boss Marbled Gohma you will be awarded with x1 Heart Container, the Vow of Yunobo, Sage of Fire. This is a sign of Yunobo's loyalty to Link.
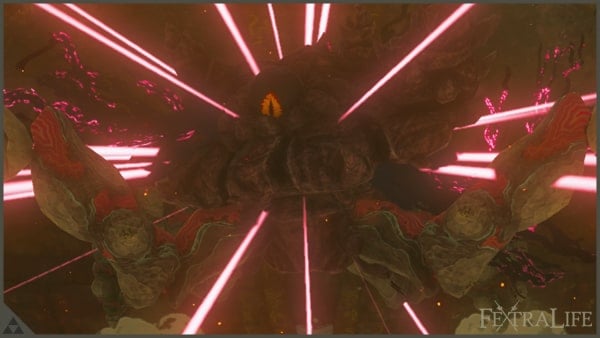
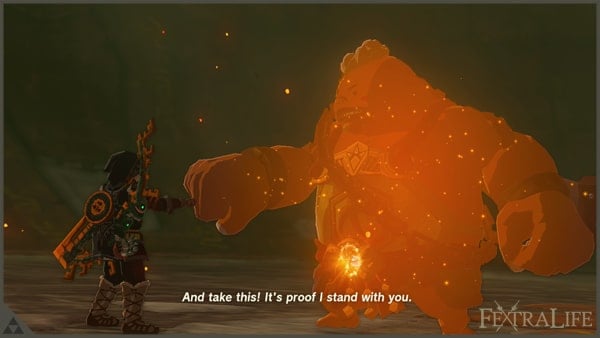
After the cutscenes in Fire Temple, you will find yourself in Goron City as things went back to normal. This concludes this section and congratulations on completing it. In the next section, we will be heading to the east in Lanayru Region.
Zelda Tears of the Kingdom Lanayru Region Walkthrough
Objectives To Complete in this Part
- Reach Zora's Domain.
- Activate the Upland Zorana Skyview Tower.
- Clear Mogawak Shrine.
- Clear the Sludge Cover Statue Quest.
- Find Sidon in Mipha Court.
- Clear Ihen-A Shrine.
- Find Jiahto in Toto Lake.
- Restoring The Zora Armor.
- Find King Dorephan.
- Clear Jiratagumac Shrine.
- Find The Floating Scales Island.
- Defeat the Sludge Like in a boss fight.
- Clear Ancient Zora Waterworks.
- Reach the top of Wellspring Island.
- Clear Water Temple.
Temples To Explore in this Part
Shrines To Explore in this Part
Notable Items or Abilities To Pick Up
- x4 Light of Blessing
- x2 Heart Container
- x1 Vow of Sidon, Sage of Water
- x1 Zora Armor Chest Piece
Reach Zora's Domain
We just finished Eldin Region and it is time to move forward to Lanayru. A refreshing region surrounded by tons of bodies of water. Rivers, lakes, waterfalls, and more. Our main objective is to reach Zora's Domain. We enjoyed our stay here since the previous region was soaked in intense heat. Time for you to relax a bit. First off, restock your dishes in Lookout Landing, there will be no hazards this time in Lanayru Region but more of platforming stuff. If done restocking head to the next destination.
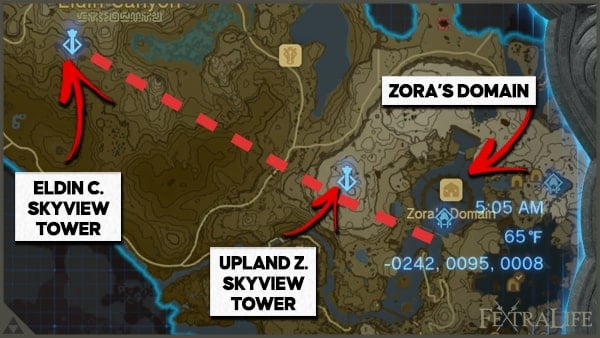
Activate The Upland Zorana Skyview Tower
Teleport your way to Eldin Canyon Skyview Tower, launch your way to the sky, and dive into the direction of the next quest marker located in the east. We will use this momentum to reach the next tower. It is not far from here and you can see it right off the bat. Just for fun, I used aircraft here, with a Steering Stick but it is not required. You can reach normally from the previous tower.
Upon reaching the tower, notice that sludge is covering the tower entrance. Around the vicinity of the tower, there are Splash Fruits available. Get these and hold, drop, and pop at least x1 Splash Fruit near the sludge at the tower's entrance and it will clear it instantly. Make sure you save these fruits as you will need them later in a quest. Activate Upland Zorana Skyview Tower and dive to the next location which is Zora's Domain. Our main city for this region. Head to the nearest shrine first so we can unlock the teleporter. You can see it while you gliding due to its greenish aura.
Clear Mogawak Shrine
This shrine is filled with puzzles involving water. Figures. We will be utilizing the water a lot and take note of how the puzzles work here since most concepts will be applied in later's temple, the Water Temple.
Mogawak Shrine Puzzle #1
Notice the source of water here from a platform, what you need to do is attach the stone tablet lying around parallel to the one attached. We need to create a mini watermill that will power the platform nearby. Use the Ultrahand to direct the watermill to the source of the water to make it move. After successfully doing so, get the empty cylinder and place it on the powered platform and fill it with energy.
Mogawak Shrine Puzzle #2
Get the cylinder filled with energy and head to the other side of the area where a sealed area with a chest inside is located. Place the cylinder to the power source. And notice the ball emitting a point-blank electricity AOE. Use the Ultrahand to manipulate the iron ball and the said electricity so the power can transfer over to the next iron ball. The shutter door opens and get your x1 Opal from the chest. If you simply run out of time, just recharge the cylinder to the power source powered by the watermill.
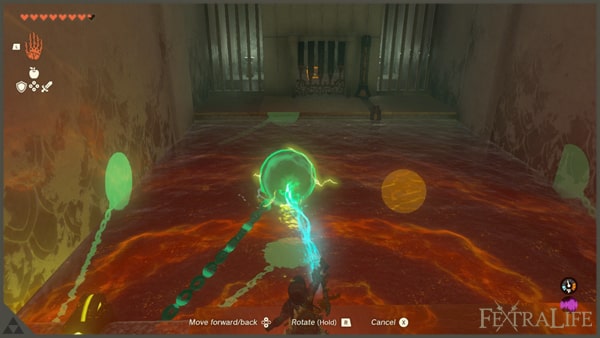
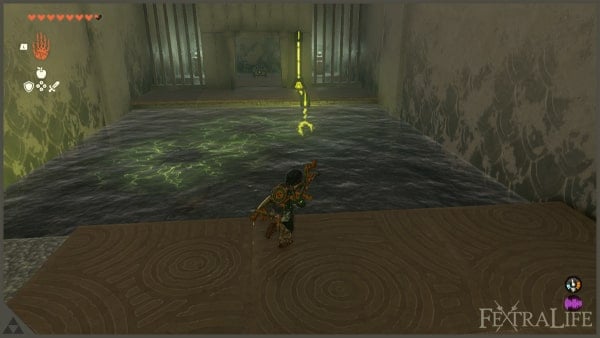
Mogawak Shrine Puzzle #3
Recharge the cylinder and bring it near to fan-powered elevator. Hop on the elevator and place the cylinder to the power source so the elevator can now lift you to reach the upper section. Get your x1 Light of Blessing as a reward.
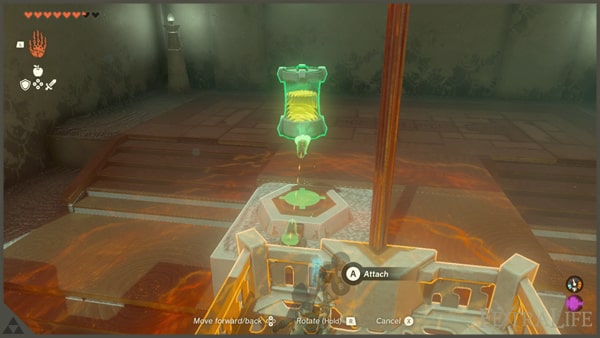
Clear the Sludge Cover Statue Quest
After the shrine, head to the city proper and talk to the greenish Zora. This is Yona. She will inform you that the statue nearby needs to be cleansed from sludge. This will start the main quest Sludge Cover Statue. Remember that I asked you to save your Splash Fruits? This is the time you used them. In my case, I dropped and pop x3 Splash Fruit. This cleansed the statue. On the other hand, if you do not have enough Splash Fruits, you roam in this region a bit to find more. It is one of the common fruits that grow around here. If you already have x3 Splash Fruit, head to the statue and save your game before popping the fruits just in case you failed to cleanse it. Make sure that all of the fruits that you dropped are very close to the statue. After successfully cleansing the statue, congrats on completing this quest.
Find Sidon in Mipha Court
After the statue quest, Yona will thank you and ask you to reunite with Sidon located in Mipha Court. It's located near the city and situated on a mountain. This will also start the main quest Sidon of the Zora. The over-extending mountain in the image here is where you need to be.
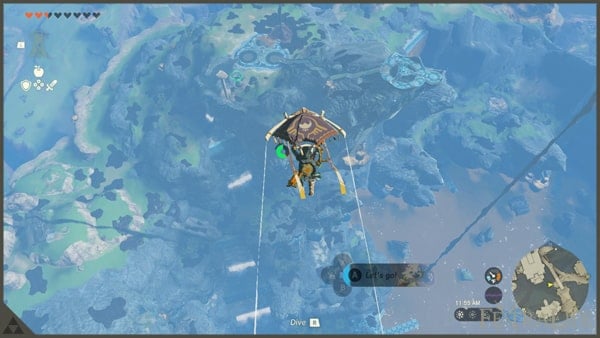
To reach the place easily, teleport to Upland Zorana Skyview Tower and glide your way to the said mountain. Sidon is waiting for you in the ponds here. Talk to him to advance his questline. He will direct you to Jiahto for more clues and Sidon stated that Jiahto is currently investigating the phenomena in Toto Lake. But before going there, let's clear the nearby shrine.
Clear Ihen-A Shrine
Use an x1 Splash Fruit to the shrine's entrance to clear the sludge. In this shrine, we will be utilizing the power of Hover Stones. These are Zonai Devices as well. They float when activated.
Ihen-A Shrine Puzzle #1
Activate and simply manipulate at least x3 Hover Stone in here so they can serve as a stepping stone to reach the upper part.
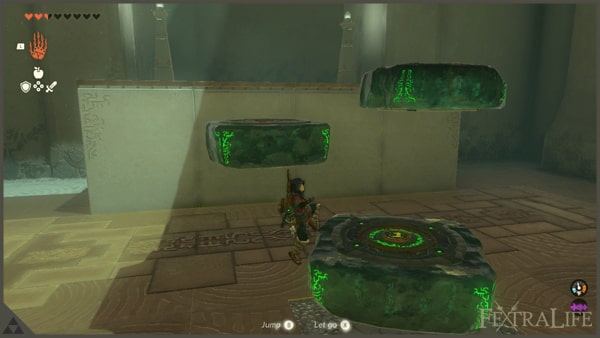
Ihen-A Shrine Puzzle #2
In the next puzzle, just go get at least one platform and activate it. Let it float in the middle of the sinkhole in here. Next, grab the metal bridge available and align it to the Hover Stone. Cross over and get the same bridge that you made. Remove the metal bridge you attached to the Hover Stone and angle it like 100 degrees and attach it again to the Hover Stone. It will serve as a ladder for you to reach the higher section.
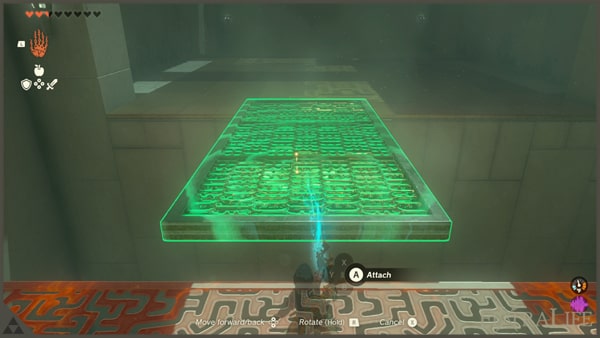
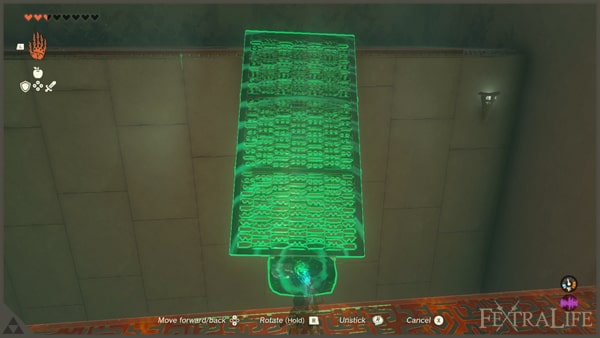
Ihen-A Shrine Puzzle #3
In the next area, use the ladder or angled bridge you made to reach a chest containing x5 Arrow. Notice a launcher here that can be activated by hitting the switch. Activate a Hover Stone and attach the iron ball to it. Place the Hover Stone near the launcher and hop on it. Shoot the switch to activate the launcher and this will propel you on the other side. Place the iron ball in its required slot. You are done and get your x1 Light of Blessing as a reward.
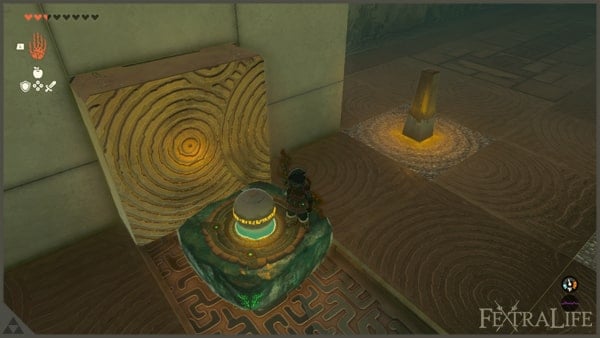
Find Jiahto in Toto Lake
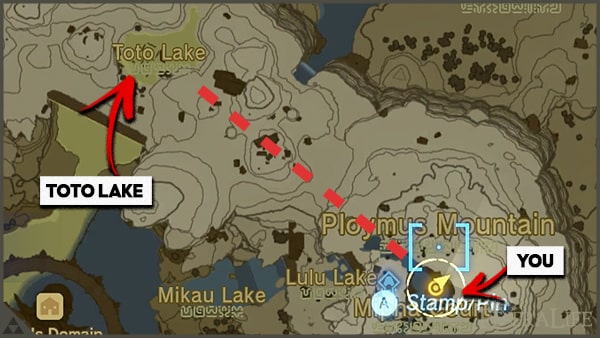
The lake is not far from here, you can see it on your map. I have also marked it down for you. While on your way, do not forget to get as many Splash Fruits as you can. You may need it later. Not for long, you will eventually reach Toto Lake. Find Jiahto in a cave here, who's examining an ancient mural. Talk to him and the main quest The Broken Slate will commence.
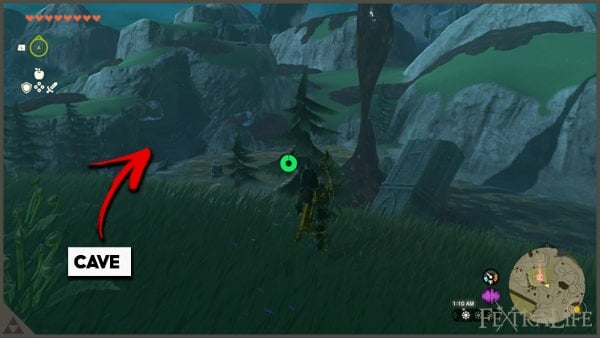
This is an easy quest to complete, you simply need to find the missing part of the slate. You will find the missing slate near the cave entrance and use x1 Splash Fruit to clear the sludge. Use your Ultrahand, to place the missing slate into the mural. This will complete the quest as well. And starting a new main quest, Clues To The Sky.
Restoring The Zora Armor
The previous quest provided so many clues to solve and what we need to do is to gather all the required equipment for you to generally solve everything. The next objective is restoring the Zora Armor. Teleport to Zora's Domain and talk to Yona. She is located on the second floor, of the main structure here, in the infirmary. She asks you to restore the Zora Armor so you can use it in your journey.
Restoring the armor requires at least x1 Ancient Arowana. This is an easy fish to find. Teleport to Ihen-A Shrine while in Mipha Court, notice the highest part of this place where the main sludge is coming from, this is also the Zora's main water source. Go there and in the fountain, you can find the Ancient Arrowanas here. Dive into the fountain area and get some. Head back to Yona and provide the x1 Ancient Arrowana. This will complete the quest.
Find King Dorephan
The next objective is we need to find King Dorephan. You can gather clues about his whereabouts from the little Zoras in the throne room. The throne room is right above the infirmary. You need to hide and sneak to them so they can spill out the king's location. Head to the backside of the throne and silently sneak your way. Upon successfully doing so, you will soon learn that the king retired to Pristine Sanctum and also you will have clues about where to find it. I am here so no need for that clues. I have also marked it on my map here so you can locate it easily.
Clear Jiratagumac Shrine
But before that, we need to do a little bit of side-tracking. Teleport to Upland Zorana Skyview Tower and launch Link into the sky and land onto the floating debris in here. Notice the Death Star-like structure from Star Wars? It spins however, you can get through on its opening. Once you get inside, access the shrine, and let's clear it.
Jiratagumac Shrine Puzzle #1
Use the Ultrahand to place one of the Wing Devices in here and place it on the catapult facing the side with Cart Zonai Devices rolling on its own. Ride the Wing to cross over. If you are having a hard time, you can use Recall to make the Wing device stay in its place so you can hop on it.
Jiratagumac Shrine Puzzle #2
Then on the other side, get x1 Cart and attach it to your Wing Device. Face it on the slope and hop on it. As it gathers momentum, because of the slope it is traveling to and also the Cart attached to it, you will be able to cross over.
Jiratagumac Shrine Puzzle #3
Attach x1 Fan to your aircraft and face it on the runway. Activate the fan and soon you will be able to cross to the other side and reach the altar. Get your x1 Light of Blessing as a reward. Now that you are done with this shrine, get out of the spinning structure, and turn off the Fan making the cross lever work. You can manually rotate the cross switch to place the opening in the direction you want it to.
Resume Finding Dorephan
Teleport to Ihen-A Shrine and simply glide your way to the marked location. You will find a small cave opening near the waterfalls, head through it and find Muzu and King Dorephan. The king is in bad shape and you will tell him your and Sidon's investigation status and he will help you to uncover some of the bits and pieces of the overall riddle that you are trying to solve. He will also give you x5 King's Scales.
Find The Floating Scales Island
After receiving the scales from the king we are now ready to locate the Floating Scales Island. Teleport your way to Ihen-A Shrine to access Mipha Court. The island that we are looking for is the fish-shaped floating island near this location. It's very hard to miss. To reach this island, observe the falling rocks from the islands above and you can use the Recall ability to make those rocks rewind their movements and ascend to the sky.
Face southwest you will notice a peculiar floating rock formation that shapes like a water droplet. Ready your bow and fuse one of your arrows to a King's Scale. Shoot the center of the rock formation and this unlocks a new path for you. Head back to Sidon at Mipha Court, by teleporting to Ihen-A Shrine. Upon talking to them, a boss fight will soon commence.
Defeat the Sludge Like in a Boss Fight
To easily beat this boss, rely on Sidon's ability to buff you with a water-protective shield. This can be useful in many cases but for this fight, it will only protect you from attacks but you need to use it to cleanse the boss with this ability. With the water protective shield active, if you press the attack button, Link can harness the shield's properties and turn it into a shockwave.
Hit the Sludge Like with it and when it was already cleansed, wait for its weakness to appear. Comparable to what you are doing to regular Likes. Hit the sack and it will be staggered open for attacks. It will regain its sludge cover and repeat the strategy mentioned above. After the fight, go get the x1 Royal Claymore as a reward.
Head to the East Reservoir Lake and talk to Sidon to trigger a cutscene. Sidon will create an opening for you to be able to enter Ancient Zora Waterworks which is going to be the next area that we will go through. In the first area, notice that there's a waterway blocked by stones. Destroy it to release water deposits and fill the area entire area. By doing this, you will be able to proceed by reaching the upper part section.
Clear Ancient Zora Waterworks
The overall objective you have at this level is straightforward. Increase the water level by unclogging all water sewers here so that, Link can reach the altar in the center. The locations of these water sources are not hard to spot and these water sources glow as well. The first water sewer is located near your starting point. Head to the west side of the area and notice it right away. Use the Ultrahand to manipulate the floating planks around, so you can step on them and hit the stone blockade with a jump attack. Be reminded that you need stone typed melee weapon in here.
The second one is not far from your current location. Look around and you will be able to see that the source is highly elevated. You can use your Bow and Arrow fused with x1 Bomb Flower and blast the blockade. Or you use the available planks here to create a box that you can step on to reach the hole.
Turn 180 degrees and pick up the nearby chest with your Ultrahand to get an x1, Zora Shield. Notice the third source from the other side. Notice the two water drainage holes as well near the main one? You can enter here and traverse sewer channels connected to the main drainage hole. Use the broken bridge here and take enter one of the small water drainage holes. Follow the straightforward sewer channels here. Enemies like Keeses and Chuchus will ambush you here, not a big deal, and take care of it as soon as you can. Eventually, you will find an intersection with water dripping from above. Use Ascend and it will direct you to the water source above. Destroy the blockade and you are done.
A cutscene will trigger showing the water level is high enough to reach the altar. You can find the exit by climbing the ladder on your right if facing the previous blockade here. Traverse the long hall and use the Ultrahand to manipulate the switch and open the shutter door. Before heading to the central altar, glide your way to the nearest cave opening from the shutter door you just opened. There's an Ice Like for additional materials and a Bubbul Frog. Kill it to get x1 Bubbulgem just in case you want to collect them later on.
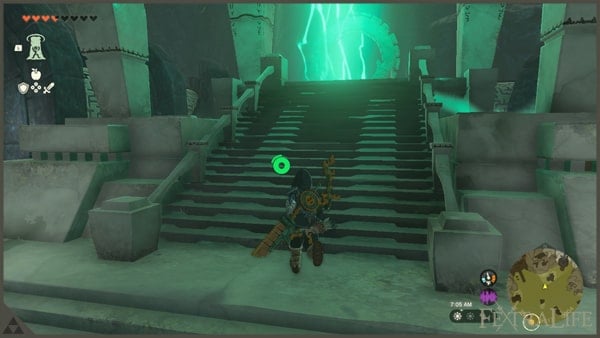
Swim your way to the central altar and activate the green shine in here to proceed. A cutscene will play and this will activate your means to reach the next area by waterfalls. This is the watery bridge that the riddle was telling us the whole time. Sidon and Link will decide to head to the next location by traversing the waterfalls. You are indeed capable of climbing the said falls because of the Zora Armor we restored earlier. Head to the waterfalls and proceed to the next area.
Reach The Top of Wellspring Island
Welcome to Wellspring Island. The gravity in this place is relatively weaker than the surface area. Your jumps cover long distances so that is a plus when traversing this place. We will be doing a fair amount of platforming to reach the top. One of your main key transportation in this place is the spawning bubbles floating around. You can ride the said bubble for a time so Link will have the opportunity to travel to different points here.
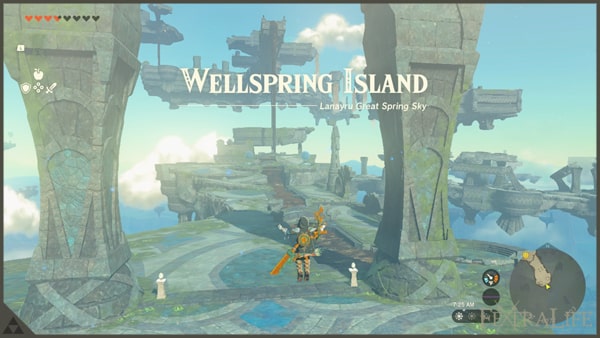
Before riding the first sets of bubbles in here, notice a treasure chest covered with sludge on the side and use x1 Splash Fruit to get rid of it. Get an x1 Soldier II Blade from the chest. Head to the platform where the bubbles travel to the higher platform. Ride the bubbles to reach the next section. Your goal is to reach the top of this level and notice the chain of islands placed in a circular formation, you will use hop on it to proceed. Ride the nearby bubbles that float upwards. Be patient, use the Paraglider if needed, and Tulin's Gust of Winds if needed. Hop from bubble to bubble and eventually manage to cross over and access the section where an x2 Soldier Construct III that are guarding the place.
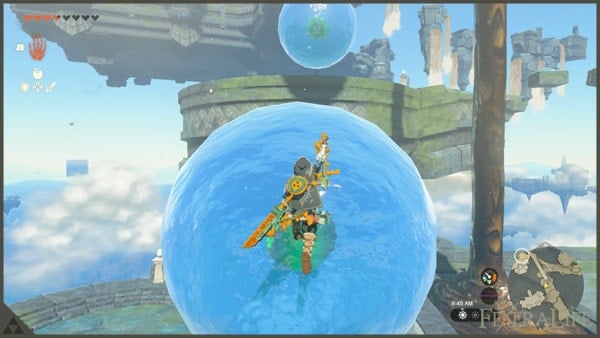
A word of advice, this Constructs hits hard and it has been a while since we faced one so might be a surprise how hard-hitting these guys can be. If you are solely following this guide and didn't do any side questing such as completing more shrines to increase your Heart Containers or exploring armor upgrades, be very cautious here. Patience and timing are the key here. Take advantage of your Sages as they will help you along the line. Avoid rushing attacks, always lock on to targets so you can react better, and remember the basics of combat. Abusing the Flurry rush would be a good idea here.
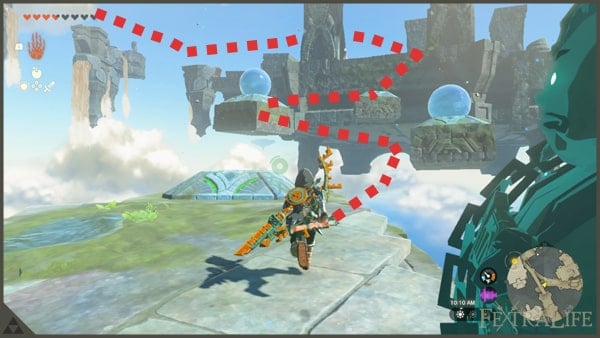
Not only do these constructs hit hard, but they are also tanky and take hits before going down. You have Yunobo's charge, Sidon's water barrier, and Tulin's wind. Be reminded you have these abilities that you can use in dire situations since it is to forget you have them when in the heat of battle. With your current stats as you followed this guide, it is certainly doable. If somehow you find it difficult to proceed here, you have the option to halt this quest and explore more shrines on the surface and increase your Heart Containers to have at least a wiggle room when taking on these difficult fights. I have also dedicated a section where we upgrade our armor set later on. Just in case you already completed a certain shrine during your side questing on the surface, and ask you to complete it later on in this guide, skip accordingly.
Now, that is out of the way, deal with the x2 Soldier Construct III here and proceed. One thing to note as well is these guys are dropping Soldier Construct III Horn, perfect as a fuse material. Take advantage of its good attack stat addition. Pass the pool with an active hydrant, and head to the upper sections. Notice the platforms with fish heads where waterfalls flow from its mouths? These are disconnected platforms where Link can transfer to, in order to proceed. Make sure the Zora Armor is equipped and glide your way and ride the waterfalls to ascend and gain height. Make sure to use Tulin's gust of winds to cover as much distance as you can.
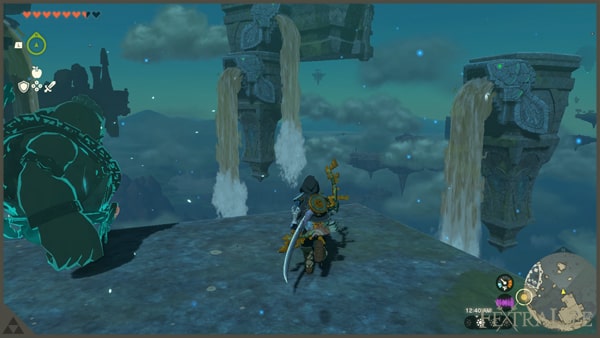
Follow the platform chain and one of these platforms holds a chest containing x3 Hover Stone. After getting the chest, proceed by jumping from platform to platform and eventually reach the next Shrine that we will clear.
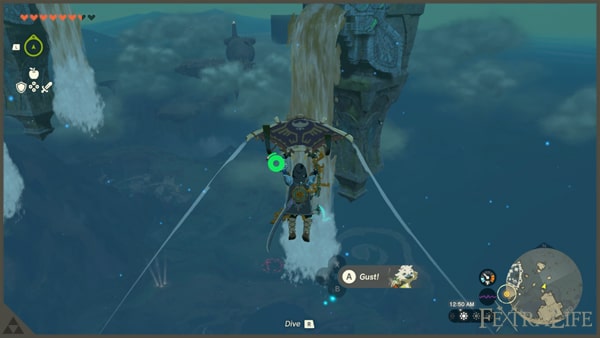
Clear Igoshon Shrine
This shrine explores the bubble mechanics that you learned in Wellspring Island. An easy shrine to complete and unlock the teleported in this level.
Igoshon Shrine Puzzle #1
The bubbles here float upwards, you know the drill, ride the bubbles to reach the next section.
Igoshon Shrine Puzzle #2
In the next area, notice the bubbles travels downwards. To solve this, use the Recall ability to make the bubble float. Ride it and hop on to the next platform to solve the third puzzle.
Igoshon Shrine Puzzle #3
The bubbles travel and ramp to the nearest platform. Ride it to reach the next platform. Harness the idea of how the bubble ramped in the previous platform. Do the same and move the metal crate in here and put the long metal piece available to create a ramp. This will propel you to the angle where the bubble will let you reach the altar with ease. Reach the altar and get your x1 Light of Blessing as a reward.
Post Igoshon Shrine
Before proceeding to the next sections of Wellspring Island, since you already unlocked the teleporter, head back to Lookout Landing and exchange your x4 Light of Blessing for an x1 Heart Container. Make the necessary preparations like stocking dishes and weapons if you need them. It is time to continue the journey, there's an available Wing device for use, use the Ultrahand and put it in front of the launcher. Shoot the switch with an Arrow and glide to the other side. Passing the stairs, a Captain Construct II is waiting. Aim for its head to stun it and head for the kill. Be aware of its Flame Emitter device and it can damage Link greatly.
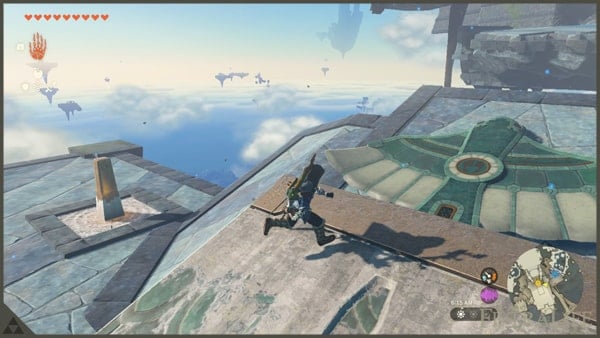
Ride the nearest waterfalls and glide your way into the next chain of platforms. This will be the last batch and soon you will reach the top. Get the chest in one of these platforms that contains x1 Old Map. Continue your ascend and you will come across an island being guarded with x2 Soldier Construct II and an x1 Soldier Construct III. Be very cautious when dealing with them as the arena is a little bit tight to move on. Once the battle is done, get the treasure chest containing x1 Soldier III Blade. Climb the broken pillar and reach the next area where bubbles travel in your direction. Use the Recall ability to make it travel in the opposite direction.
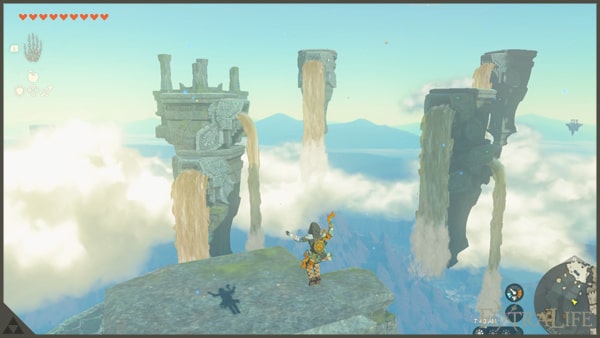
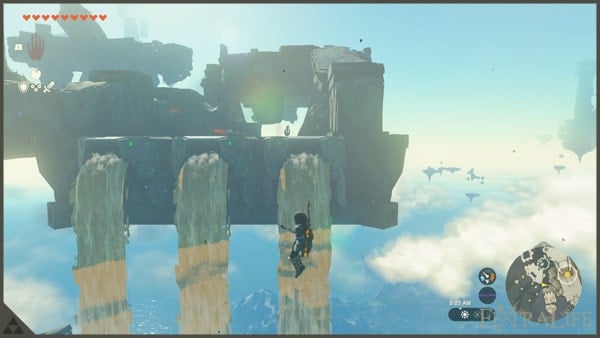
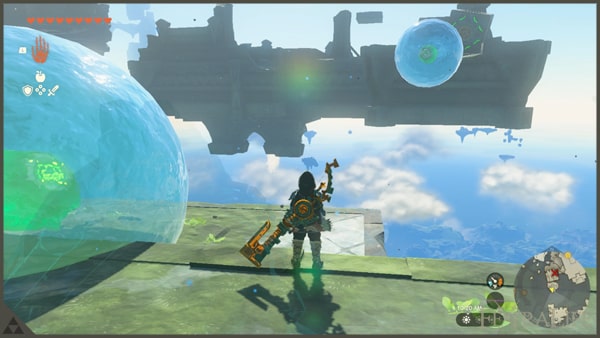
Reach the opposite end of the area and observe that the next island that we need to get to is a little bit far ahead and the bubbles can't reach that far. The answer lies in the materials available around the vicinity. Notice there are a lot of stone slabs here, the first two slabs are available near where the bubble is getting stuck. The last two that we need are in the nearby pool area with the Hydrant. Combine these four slabs to create a long stone ramp that will propel the bubble in the direction that we want. Ride the bubble and as you as you can reach the other island, glide and use the Tulin's Guts of Winds. On the other side, use x1 Splash Fruit to remove the sludge covering the treasure chest and get x1 Opal from it.
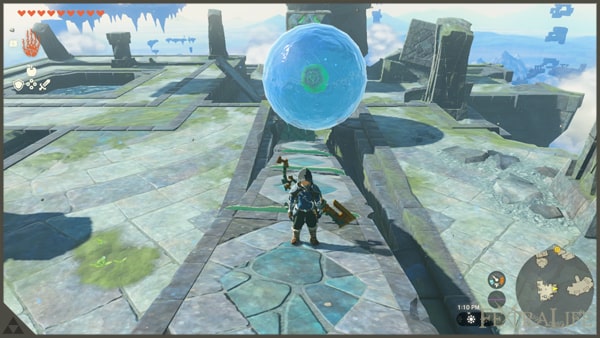
To get to the other side, build an aircraft, with the following parts. Attach a Wing Device to a Cart and place x5 Fans in at the back of it. Place the aircraft facing the ramp. Note that all of these parts are available here to save you the hassle. Now, Activate the aircraft and it will bring you to the other side without a hitch.
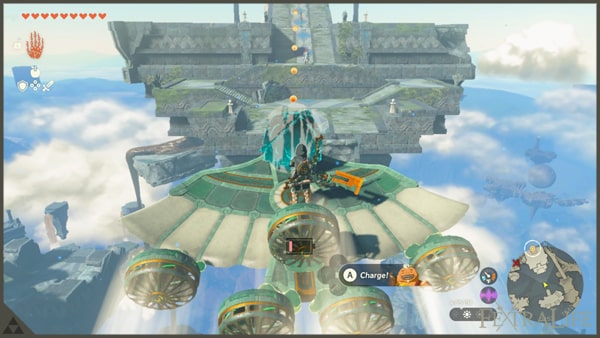
Congratulations on reaching the top of Wellspring Island. The last hurdle that we need to overcome is an x1 Captain Construct III guarding the waterfall. It shoots laser so be careful dealing with it. Gank it with the sages and eventually the fight will end.
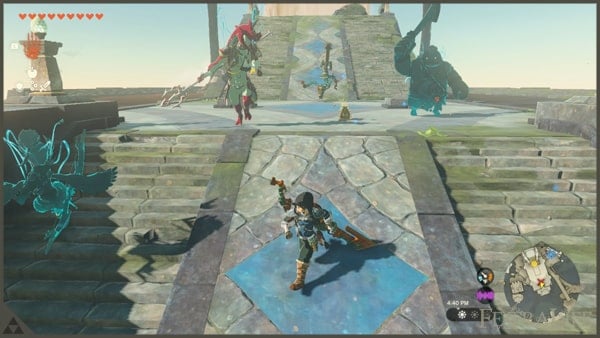
Clear Water Temple
Ride the waterfalls and reach the entrance to the Water Temple. Soon Sidon and Link will discover the source of the sludge. Using the waters from giant vases from the temple may wash the source of the sludge completely but its current state is not strong enough to do so. This starts our main goal of clearing the water temple and unlocking all of the giant vases. As always we do have a specific guide for temples. For a detailed and thorough guide to Water Temple, click this Page.
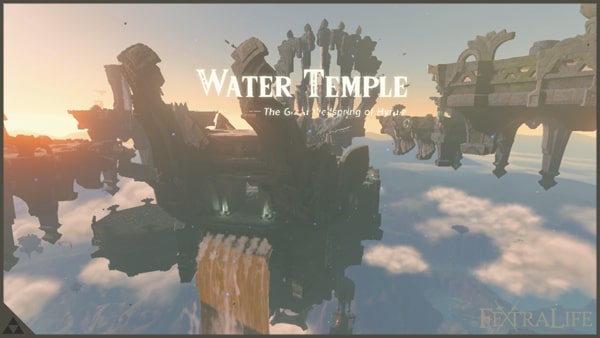
After you have been through the hoops of Water Temple and defeated the boss Mucktorok, receive x1 Heart Container and x1 Vow of Sidon, Sage of Water.
Soon the region of Lanayru will be back to normal and all the sludge will be washed away. Congratulation on completing Sidon of the Zora main quest. Head back to Lookout Landing for resupplying and get ready for the next region, the Gerudo Region.
Zelda Tears of the Kingdom Gerudo Region Walkthrough
Objectives To Complete in this Part
- Reach Gerudo Town
- Clear Mayachin Shrine
- Activate the Hyrule Field Skyview Tower
- Visit Outskirts Stable
- Clear Tsutsu-Um Shrine.
- Activate Gerudo Canyon Skyview Tower.
- Clear Turakamik Shrine.
- Unlock The Demon Statue
- Unlock The First Fairy Tera
- Unlock The Second Fairy Kaysa
- Clear Kamizun Shrine
- Activate Popla Foothills Skyview Tower
- Clear Utsushok Shrine
- Visit Highland Stable
- Find Pyper's Friend Haite
- Finding Pyper
- Collecting The Fireflies
- Visit Gerudo Canyon Stable
- Visit Kara Kara Bazaar
- Clear Mayatat Shrine
- Reached Gerudo Town
- Clear Soryotanog Shrine
- Infiltrate The Lower Chambers of Gerudo Town
- Track Riju in North Gerudo Ruins
- Secure Kara Kara Bazaar
- Defend Gerudo Town
- Solve The Riddle of the Sands
- Clear Lightning Temple
Temples To Explore in this Part
Shrines To Explore in this Part
Notable Items or Abilities To Pick Up
- x6 Light of Blessing
- x2 Heart Container
- x1 Vow of Riju, Sage of Lightning
Reach Gerudo Town
Sidon's questline is now done and we are now ready for a brand new adventure. Gerudo Region's events focus on combat mostly, due to this, I will be suggesting a possible side quest that may help you adjust or give you a little bit of leeway to tackle end-game challenges. This is the last part of the Regional Phenomena main questline as well. A long quest indeed. Our main objective is to reach Gerudo Town while clearing some essential objectives along the way. Starting from Lookout Landing, do your necessary preparations, restock your dishes and make sure you have restocked your cold resistance dishes as well just in case you need to. Gerudo Region is by far the hardest region to traverse in my opinion due to extremely hot weather by day, and cold weather by night.
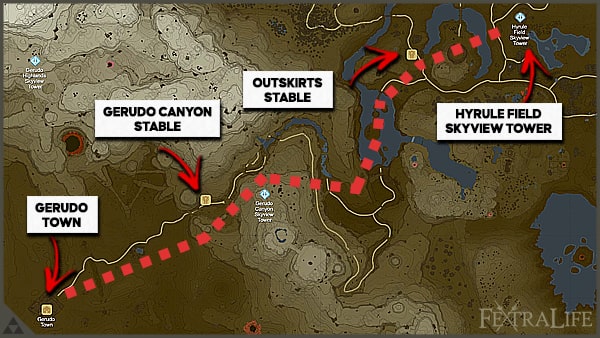
It is advisable to traverse the desert by night so your cold-weather gear will be put to use again. If you are ready, Access the Lookout Landing Skyview Tower and our next objective is to find the nearest shrine from the Hyrule Field Skyview Tower. Take a look at the map image here, I used the Hyrule Field Skyview Tower as a starting point for clarity purposes. This is your general route when trying to reach Gerudo Town. If you want to access the Interactive Map, click the Page here.
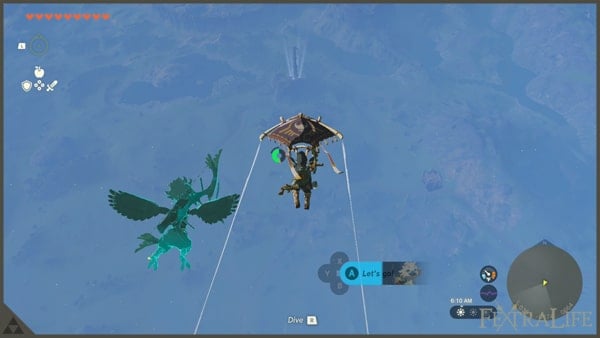
The tower is located south of Lookout Landing and you will notice it right away. While on midair after being launched from Lookout Landing Skyview Tower, glide your way through the next tower's direction. Land safely and you pretty much covered a long distance with that dive and travel on foot. You will notice the shrine in the tower's vicinity, head there first clear it.
Clear Mayachin Shrine
This dungeon is advanced and it will explore the idea of Stakes, one of Zonai Devices. You will be playing different strategies to clear this dungeon but as always, clearing all the general puzzles in this game can be done in a multitude of ways I will share what I did to clear it and it doesn't mean it's the best-case scenario. It is one of the main selling points of this game so have fun experimenting.
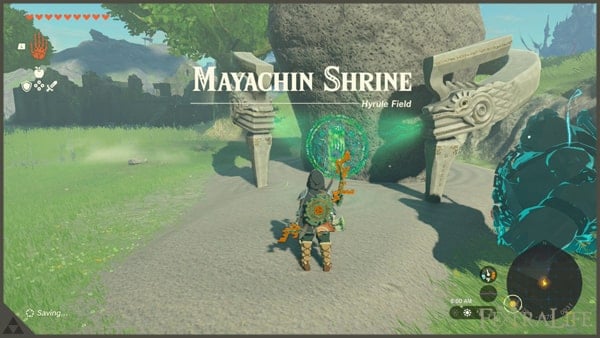
We will be focusing on the main puzzle here instead. Hop the moving metal slab in here for you to cross over and step on the switch so the stone wall target will be revealed. The first thing that we need to do is to create some kind of machine that can hit the ball with a strong force.
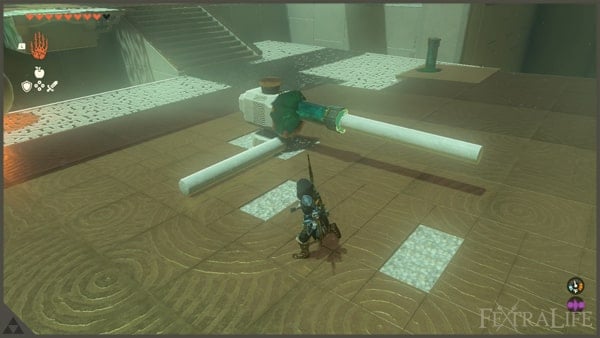
The goal is to make the ball hit the target. Assemble the following, get at least x1 Stake and a stone stick. Put the Stake to the moving mechanism in here and attach the stone stick and form some kind of baseball bat. Head back to the switch and make sure the switch is not yet activated ( green-colored mode ). Notice the white lines on the floor, wait for the iron ball to reach the second to the last line, and before hitting the switch. If done correctly, it should hit the ball with enough force to reach the target. The shutter door will open and get your x1 Light of Blessing.
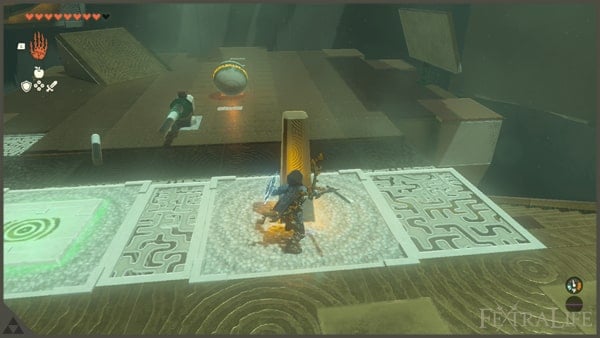
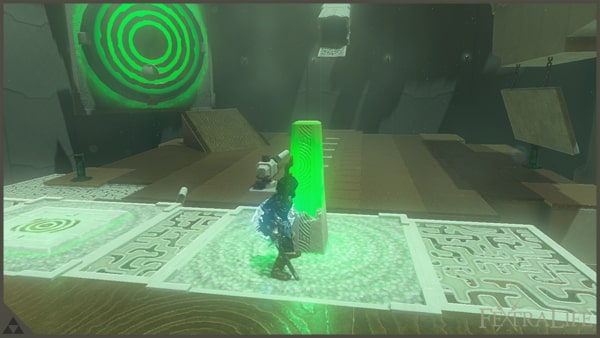
Activate the Hyrule Field Skyview Tower
After clearing the shrine, get the chest nearby by putting the stake on the wall and placing a stone slab on it. Use Ascend to get the chest and receive x1 Large Zonai Charge. activating Hyrule Field Skyview Tower is a must. Be warned that this tower has an enemy camp around its vicinity. Prepare to storm it and we will be dealing with a handful of enemies here. You can do stealth to at least get the pre-emptive strike however, knocking on their doorstep head-on will do as well. My suggested strategy is to aim for the minor Bokoblins first, before going for the big ones. Be careful as they can throw explosives at you. If you decide to bring the fight to the camp entrance, they also prepared a spike iron ball as a trap for anyone who will try to invade them.
Inside the camp, you can take advantage of the explosives available here. I suggest you use at least x2 Bomb Flowers to deal AOE damage to all enemies caught in the fight. You also have your sages with you so don't forget to use Yunobo's charge to deal extra damage and to also stagger targets. Sidon's water shockwave is effective as well dealing minor damage. They can overwhelm you with numbers especially if we do have that much space to work on. Maintain your distance and pick targets one by one as possible.
Your sages are invulnerable from attacks so take this to your advantage since enemies will be distracted by them so you can go in for the kill. Look out for the Blue Boss Bokoblin as it can hit hard and deal a huge amount of damage to Link. These types usually throw rocks as well so make sure to always move around while waiting for an opening.
The bonus tip is you can fuse the spiked iron ball they threw at you and create a morning star with a decent amount of damage. Hitting its head with an Arrow results in a critical strike as well and it will stun for a short period. Use this as an opportunity to deal blows. After the battle, ensure to collect all valuable loot from the fight and head to the tower and activate it. This will update your map as well.
Visit Outskirts Stable
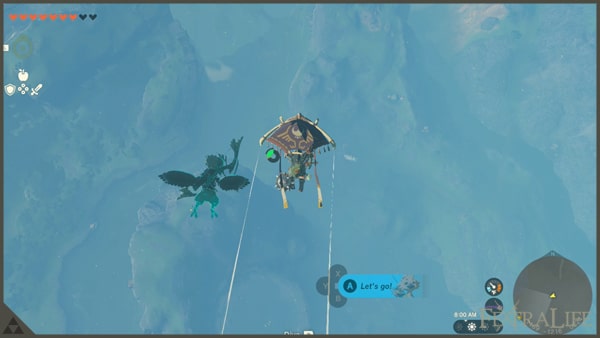
Facing the direction where the quest marker is located, glide your way and cover as much distance as you can. Before reaching the ground, you will come across Outskirts Stable. Talk to the stable manager here so it will be activated on your map.
Clear Tsutsu-Um Shrine
In my honest opinion, this is an advanced dungeon compared to the one we've already completed. It involves Stakes, one of Link's Zonai Devices. Again, there are hundreds of ways to solve this puzzle and I will show you how I did it.
As you enter the area, notice the pillar that moves, upwards and downwards. The game gave a hint to use the Stakes around to proceed. Remove the Stake currently attached to the wall. Notice the metal platforms available for use around here. Attach one of the metal platforms to the head of the Stake and stick it to the moving pillar. Make two of these and use both platforms to reach the next area. Notice the chest on top of the pillar? Use the platforms you created to get it and it contains x5 Arrows. Now head down and notice the layout of the mechanism near you, it corresponds to a pinball machine. At least how the way I see it. Your main goal is to guide the iron ball in reaching its desired slot on the other side of the large spinning wheel mechanism. By the way, note that you can use Ascend to transfer between platforms here.
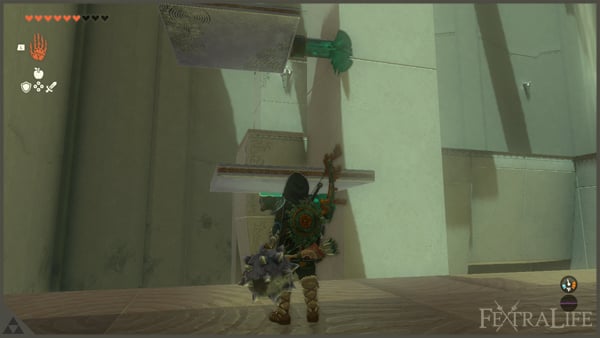
Move the two platforms you created and make sure you combine x2 metal platforms together forming a long metal platform. Attach it to a stake and stick it to the platform above you. Observe the rotating stone slab, make it stop by putting one of the stakes available here, and ensure that you angle it so the ball can easily travel to the spinning wheel section. Ascend to access the higher platform and since the said platform has holes in it, you can use the Ultrahand to manipulate it and bring it to the platform where you currently stand. At this level, The upper section of where the ball drops are now reachable by Link's Ultrahand.
What you need to do here is attach the long metal slab that you created, to the Stake near the channel where the iron ball travels. You need to create a divider to make the ball drop to the angled stone slab below. After it stops and reaches the bottom, head to the platform below and reach the ball. You can manually use the Ultrahand to put the ball on the metal rails near the spinning wheel. Finally, Use the Stakes around and stick them on the outermost area of the spinning circle. The Stakes will push the ball to the slot and solve the entire puzzle. The shutter doer opens and receives your x1 Light of Blessing. What a puzzle right? Now let's move forward.
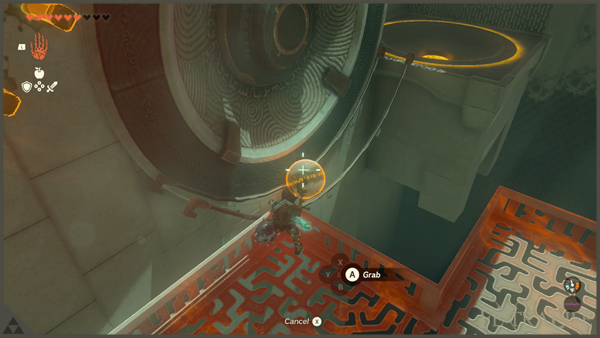
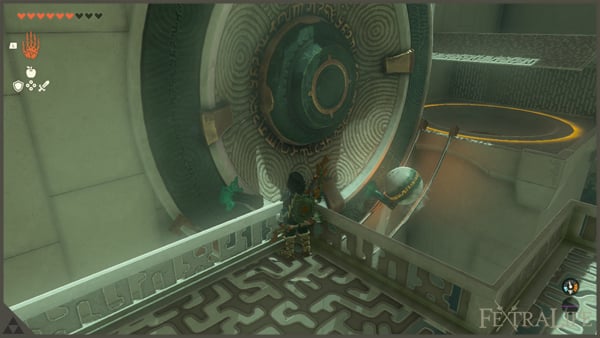
Post Tsutsu-Um Shrine
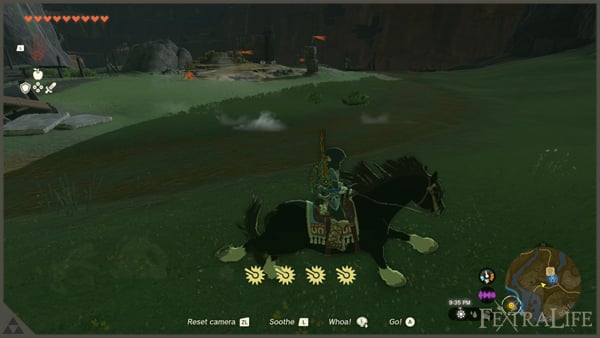
After clearing the shrine, get a horse from Outskirts Stable. Go check the map image I posted here and be reminded that we will travel on foot to the Gerudo region from Outskirts Table. Follow the main road here and come across a constructs camp. Prepare for battle as we need to deal with at least five constructs in this battle. Beat the ones that wield arrows and go for the rest. Use the sages to your advantage. After the battle, the chest in this camp will be unlocked. Receive x5 Portable Pot as a reward. Next up you will be passing the nearby bridge which is the Digdogg Suspension Bridge. There's Mini Stable nearby, talk to the clerk to activate the stable. You will receive a point for doing so. You can take and board horses as well here.
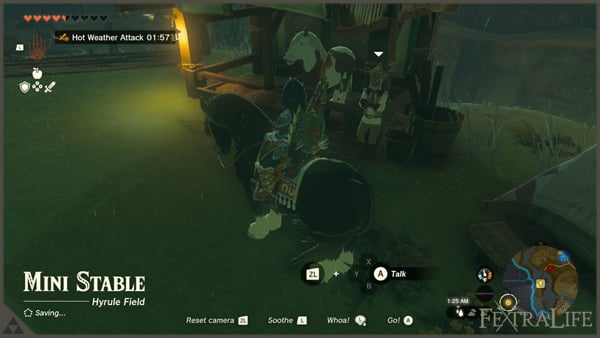
Follow the path and there will be a series of camps here. Make sure to get all the raw materials that you can find like sets of Wood, or Flints. You can restock dishes as well since there is an available active Cooking Pot. This a reminder to stock up on Cold Resistance dishes. As you move forward, observe the platform with a Zonai Device Dispenser near the bridges. Drop at least x5 Zonai Chargers since you do have a surplus. So you have Zonai Devices available for later use. Crossing over, you will reach Gerudo Canyon Pass. You can't use your horse starting at this point due to harsh weather conditions. Get the raw materials around and talk to the Gerudo here named Naia for an easy quiz and for you to pass the canyon.
Here are the answers for her quiz. 1. How can you best warm up when it's cold? Answer: Stay near a fire! 2. When it is very hot out, where should you go to cool off? Answer: A nice, shady spot! 3. What cooking ingredient is effective at fending off high temperatures? Answer: Chillshroom. 4. Where in Gerudo Canyon could you go to avoid being affected by the extreme temperatures, day or night? Answer: Into a cave. She will let you pass now into the canyon.
I suggest accessing the upper parts of the canyon to easily cover the grounds here. Rather than traversing the land following the main road. Notice the planks nearby leading to the top of the ruins. Use the Ascend ability to quickly gain height.
Activate Gerudo Canyon Skyview Tower
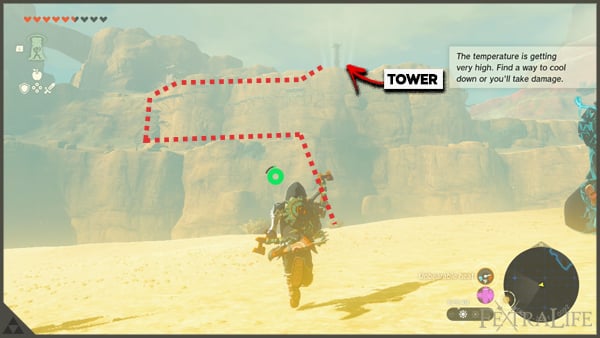
Upon reaching the top of the ruins, soon you will be traversing the upper parts of the canyon. Our next goal is to activate and reach Gerudo Canyon Skyview Tower and you can already see it from your current location. Follow the path that I laid here for ease of travel. Be reminded that it is advisable to travel to this region at night. So if it's already time and Link is already suffering from extreme heat, pop an x1 Wood and an x1 Flint to create a bonfire and wait for the night. At night extreme cold kicks in. Now, you should be able to travel without issues now. Follow the suggested path in the image this, requires intense mountain climbing so make sure to budget your stamina. You will notice a Lizalfoz camp nearby, deal with them and get their materials. Pass the river, climb your way up, and eventually find more planks that you can Ascend to. Once you reach the top, a group of x3 Ice-Breath Lizalfos is camping here. Outsmart them one at a time.
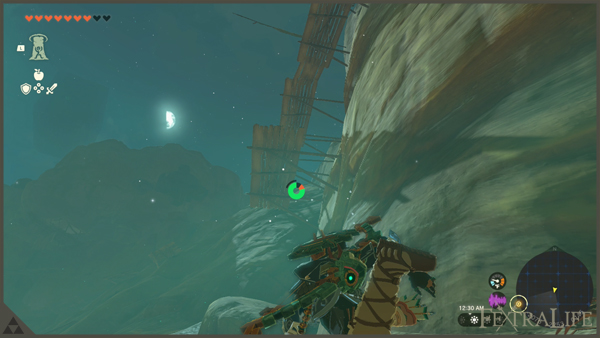
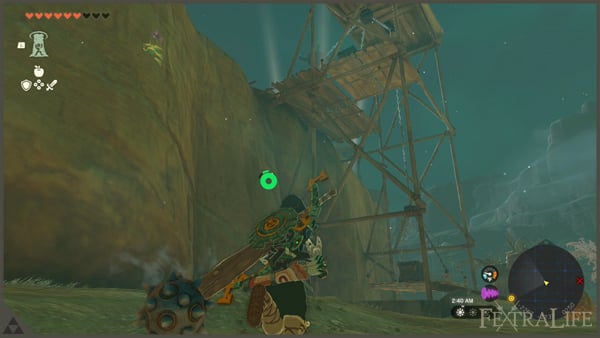
After the battle, you will notice the tower is not far from your location. Ride the nearest lift in here. It can't operate due to metal crates placed on the lift, use the Ultrahand to remove them from the lift and it will start to move. Another lift is waiting for us at the top and it will lead us straight to the tower. But we need help with fixing the tower since it is busted. Notice a guy named Sawson? He helped you in fixing one of the towers you activated before. He needs to use the lift but it is out of order as well.
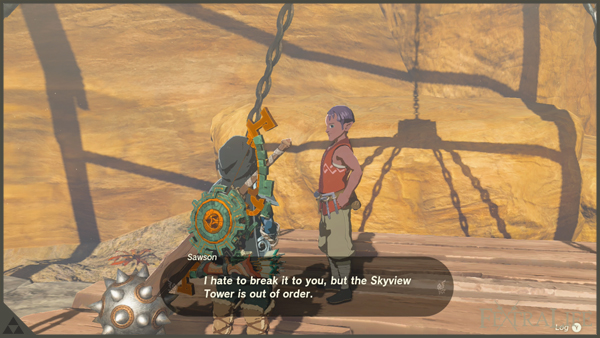
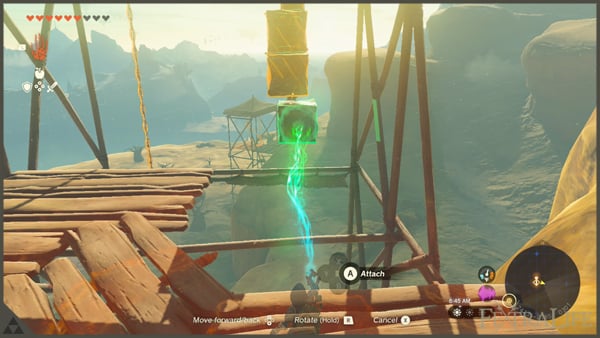
To solve this, climb your way up and notice the other side of the lift where it lacks the necessary counterweights for the lift to move. Attach three metal crates on the chain and this will solve it. Sawson will fix the tower right away for you. Before you activate the tower, there is an active Cooking Pot in a tent nearby that you can use to restock your dishes. If you are ready to go, activate Gerudo Canyon Skyview Tower to update your map. While skydiving you will notice the nearest shrine located in Gerudo Canyon's channels. The shrine is situated nearby Gerudo Canyon Stable which we will be visiting next after the Shrine.
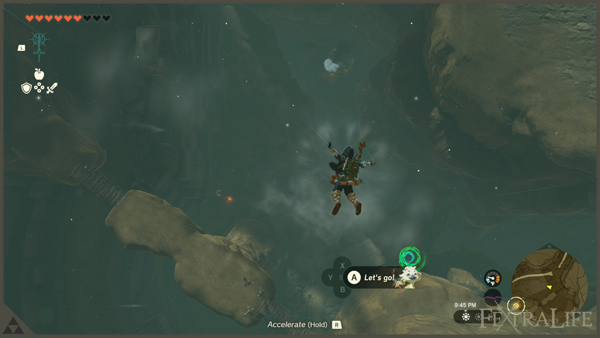
Clear Turakamik Shrine
Time for another shrine and this shrine focuses on the power of lightning. Compared to our last shrine, this is much easier and takes little time to complete.
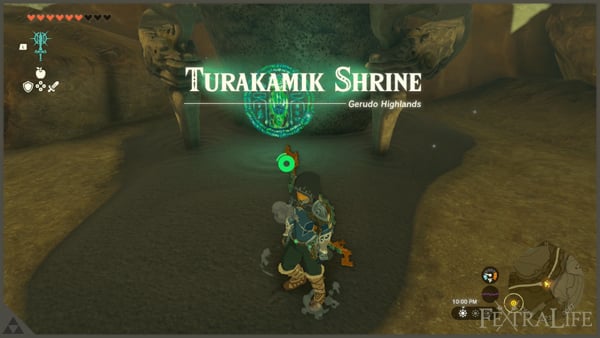
Turakamik Shrine Puzzle #1
Upon entering the area, you will notice two iron balls, both chained up to the wall. Our goal is we need to connect the iron balls together so the electricity will flow thus, powering the other mechanism here. The chains are a little bit too short if you try connecting an iron ball to the other. So, you need to do it simultaneously. To do this, hold the iron ball on your left side and extend it directly to the right side. Wait for five seconds and cancel the Ultrahand. Use Recall on the iron ball you previously used your Ultrahand and it should now float on its own. Quickly use Ultrahand to the iron ball on the right side and connect the two. It should attach without issues. Now the power is running and you are ready to proceed.
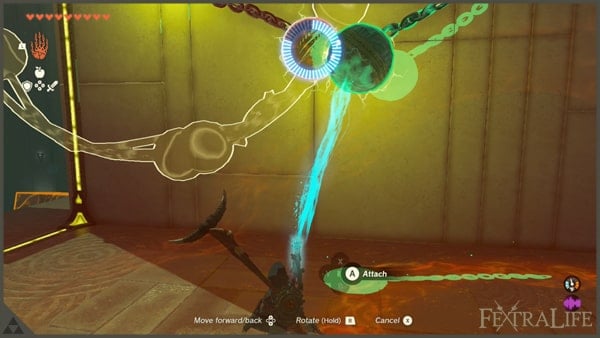
Turakamik Shrine Puzzle #2
Puzzle number two is a cakewalk. There's an iron ball chained on the ground and there are two metal poles installed on the wall. Use the Ultrahand to pick up the iron ball and hang it to the nearest pole to make contact. The last piece of the puzzle is the metal bar that operates the cogwheels behind you. Use the Ultrahand to detach it from the wheels and put the metal bar to connect the metal poles on the wall. This will let the electricity flow since these are all conductors. The shutter door opens and get your x1 Light of Blessing as a reward.
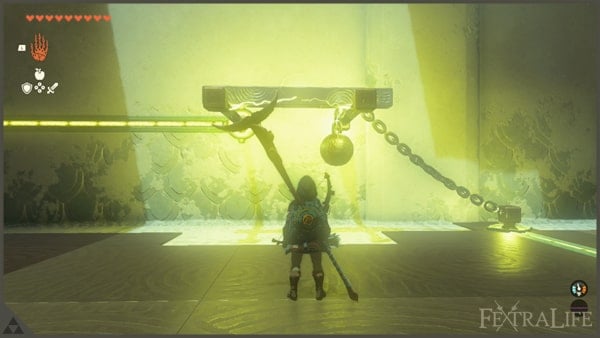
Unlock The Demon Statue
Side quest time and note that the one we will be doing our side quests that will help you tremendously. Before we go and unlock Gerudo Canyon Stable, go back to Lookout Landing and access the Emergency Shelter and trade your Light of Blessings for x1 Heart Container. You need all the upgrades you can get especially if you are following this guide rigorously. Since we are already here, Notice the hole in the wall. We will be unlocking a side quest here so we can access it later on. Talk to Jerrin, the Hylian holding a broom, and she will give you one of the Side Quests to complete which is Who Goes There? Enter the hole and discover that it is the Royal Hidden Passage. Destroy the stone blockades in here and follow the mysterious voice. Eventually, you will reach the demon statue it will play a part in the end-game later on. Talk to the demon statue for a little bit of lore and activate the side quest, A Deal With The Statue. It will get one Heart Container from you, but don't be alarmed, you can get it later.
Essentially, the statue is useful if you want to trade your current Heart Containers for Stamina Vessels or vice versa. You will offer one essence, it could be a Heart Container or Stamina Vessel and it will give 100 Rupees in the process. If you decide to exchange one essence for a different one, you will pay 120 Rupees. So in the process, you only need 20 rupees per exchange. Quite handy. Talk to it and state that you want to get your Heart Container back and it will finish the statue's quest. Now head back to Jerrin to complete the side quest she gave.
Unlock The First Fairy
We need to do this now for you to have at least a little bit of leeway in combat. Since the events of the Gerudo region, involves a series of fights so it is better to come prepared. After unlocking the fairy side quests, we will be able to upgrade our Hylian Set. The first thing that we need to do is to unlock a side quest in Lucky Clover Gazette. Do you remember its location? It is near the broken bridge that we needed to cross when we were locating Rito Village. Teleport to Gatakis Shrine and head over to the Gazette. Talk to Penn and Traysi, our point persons in the Gazette. Traysi will give you a side quest known as Potential Princess Sightings. Now, travel back to Ekochiu Shrine and head to Woodland Stable. You will see Penn talking to the musicians who will play a huge role in the series of quests that we will be completing. xxxx
The musicians will tell you their stories of how they got into the current situation and what they need to help you awaken these faries. They will also point you in the direction that you need to go. The side quest Serenade To A Great Fairy will now start. We need to repair their breezer first. Notice the shed nearby with extra wooden wheels in them? Go get at least x2 wooden wheels. Attach it to the breezer so it will be functional again. The next step is to head inside the Woodland Stable and examine the opened book near the store manager. This is where you claim your horse's item rewards by accumulating Pony Points. Pony Points can be accumulated by visiting stables across the world and you should have a total of 7 points now.
But no worries what we only need here is the Towing Harness. Select " Receive Reward " and he will give you the following rewards, Towing Harness, Horse-God Fabric, and A chance to take advantage of a Malanya Bed. Now take one of your Horses out and the store manager if you want to attach a Towing Harness. Proceed and your horse will have the harness. Bring your horse near the breezer and connect the harness to it by using the Ultrahand. You should be able to tow the breezer without issues. After the transportation has been prepared, talk to the musicians and they will accompany you by hopping onto the breezer. Always remember that the Fairy's location is always near a stable, in this case, it is located north of Woodland Stable and the giant flower bud is where we need to be. As soon as you reach the desired location, musicians will do their thing.
The Great Fairy Tera will be awoken and will be happy to see our musicians. The Stable Trotters will give you 50 Rupees for completing the quest. But the real reward here is unlocking the first tier of armor upgrades. In this scenario, you will notice that upgrades require materials for you to be able to do so. Hylian Set is pretty easy to upgrade and requires Bokoblin Horns.
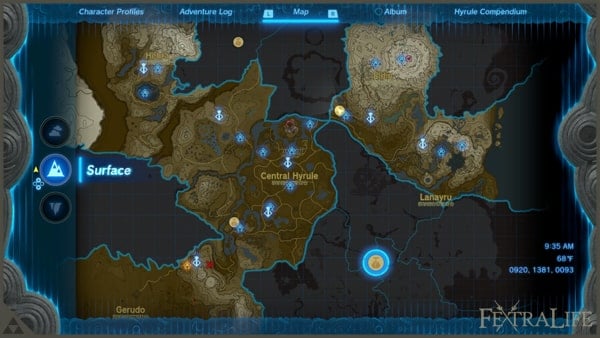
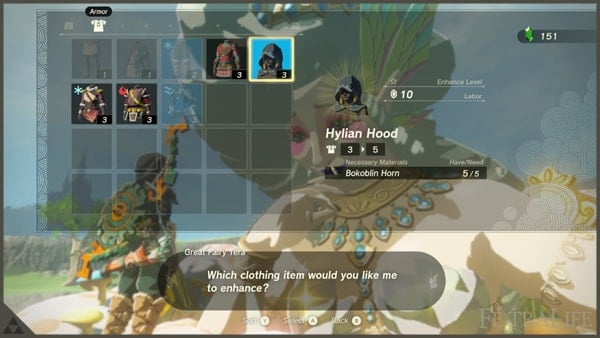
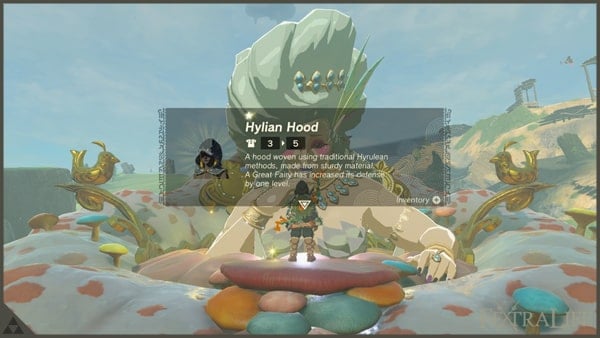
At this point, before following this guide, You have the option to hunt Bokoblin Horns and Bokoblins can be found mostly in Central Hyrule Region. While the great fairy Tera also provided the locations of her sister, we will stop at the next fairy.
Unlocking the Second Fairy Kaysa
Now that we already unlocked the first fairy, it is time to unlock the second one. Fast travel to Tsutsu-Um Shrine and head to Outskirt Stable's performance stage, you will find the Stable Trotters that will give you a new side quest to fulfill. they are looking for Pyper who's a flutist. The second fairy loves the sounds of flute thus our musician friends are in trouble once again. To find Pyper, we will be doing a series of added objectives to make use of our time while completing this side quest Serenade To Kaysa.
Clear Kamizun Shrine
Unlocking the second fairy requires us to visit Faron Region. You already have an idea by now that it is a must for us to unlock the Skyview Tower there and clear the shrines along the way. This is all about Gerudo Region, yes. However, I decided to incorporate the Faron region in this section since this is the best time to reach the second tier of armor upgrades. As mentioned the Gerudo Region Main Quest is packed with battles so better come prepared. While the fairy side quest requires it as well.
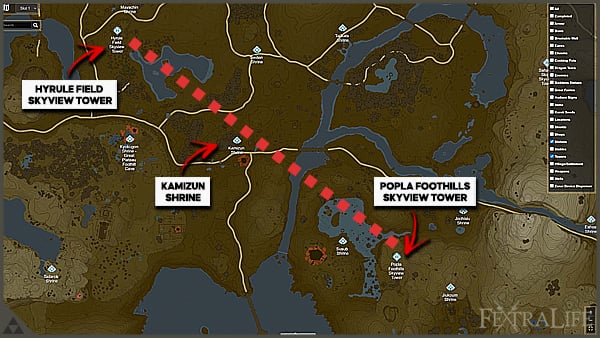
Now that it is out of the way, teleport to Hyrule Field Skyview Tower and launch Link into the sky, and head to the southwest section of the map. If you are following this guide, this is our first time visiting this region. Glide your way not for long you will soon land due to not having stamina. Kamizun Shrine is not that far from the tower and it is situated along in the direction that we are deading. See the map here to locate the shrine with ease. Enter the forest where the shrine is let's clear it real quick.
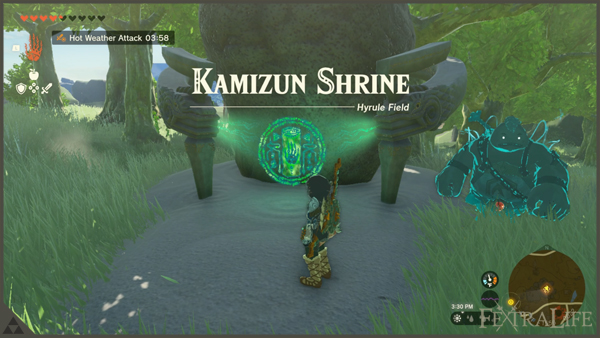
This dungeon does not have any puzzles rather you need to defeat all enemies with the provided weapons and materials in the Shrine. Using your current gear will not be possible. The construct here is pretty basic. I suggest taking out all of the constructs one by one and dealing with the range-type ones. While the melee constructs, use the platforms here as covers from the incoming projectiles. To make things quicker, notice the morning star weapon available in the middle of the area. Get it and quickly take out the melee constructs. There is a high chance that they will gank you and the key here is to concentrate your attacks on an enemy one at a time and use Flurry rush to instantly get rid of them. After all of the melee types, time in your way and reach the range type constructs. Another tip is while climbing the ladder to get to these constructs, wait for them to fire their arrows first so you can safely get off the ladder without receiving damage. Once all enemies are down, the shutter door opens leading to the altar. Take your x1 Light of Blessing as a reward and also x1 Spring Shield from a treasure chest near the altar.
Activate Popla Foothills Skyview Tower
After Kamizun Shrine you can see the tower that we will be heading next. Head in the southeast direction and pass the East Post Ruins, notice the falling rocks from the sky. They usually fall around the vicinity of East Post Ruins near the bridge. Once you find these falling rocks, use Recall and ascend to the sky.
When the stone reached its original position it will stop and falls again. Quickly dive into the direction we are heading which is southeast to cover as much ground as we can while in midair. After reaching Popla Foothills Skyview Tower, head to the nearest well and find out that Elmerson is trapped there.
We need this guy for the tower to run. For us to help him, we need to circle back to the ruins entrance which is not far from the tower. At the south of the tower, there's a ruined settlement nearby, and near the settlement is the entrance to Popla Foothills Excavation Site. You will know the settlement that I am referring to if you see groups of Keeses roaming around, indicating there's a cave nearby. Head to the inner section and you will notice the switch that will free Elmerson. Hop on the switch and free him from getting trapped. After setting him free, head to the surface, and the tower will be up and running. Activate the tower and update your map. Skydive and glide to the south. Eventually, you will stumble upon Highland Stable but first, let's clear Utsushok Shrine so we can fast travel back to this stable anytime.
Clear Utsushok Shrine
This dungeon relies on the available materials provided to create clever tools that will help solve the majority of the puzzles. Like reinforcing an existing mechanism to further improve its efficacy.
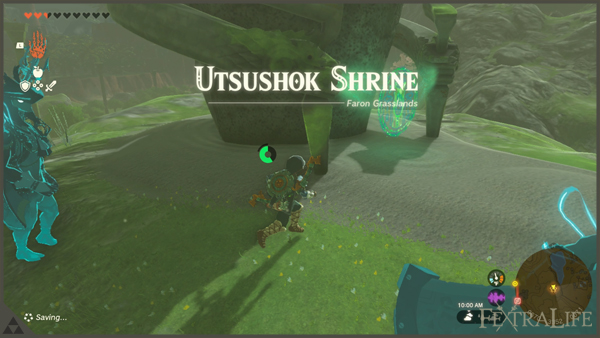
Utsushok Shrine Puzzle #1
The goal here is to make the iron ball reached its slot. Notice the stone paddle in here, Use the Ultrahand to lift the paddle and hit the iron ball to reach its desired location.
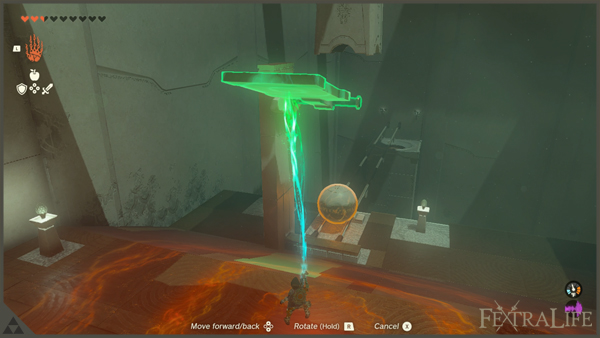
Utsushok Shrine Puzzle #2
Using the paddle alone is not enough to overcome the curved railway's climb. To solve this, attach the metal crate available in this area and attach it to the back stone paddle. It will give it extra weight resulting in more force. After the shutter door opens, detach the metal crate and bring it to the next area.
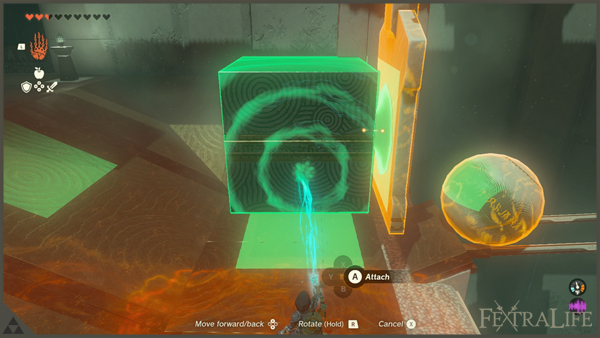
Utsushok Shrine Puzzle #3
The third puzzle is straightforward. Attach the long metal board here to extend the paddle. Lift the paddle with the Ultrahand and you are done. Solving this puzzle will unlock the mine cart that you will be using in the next puzzle.
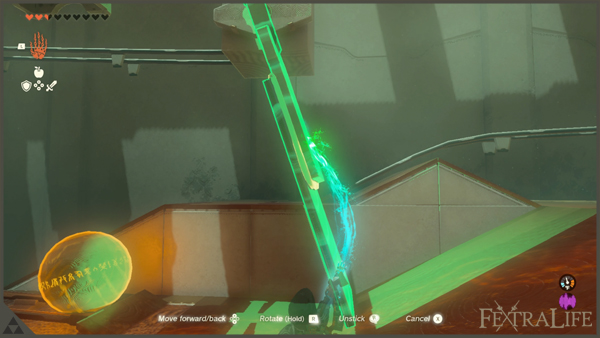
Utsushok Shrine Puzzle #4
Indeed, we have four puzzles to solve here. Move the mine cart to the railway. Make sure the cart is placed near the paddle. Detach the long metal board and from its original position rotate it clockwise. It will serve as an extender to reach the backside of the card. Attach the metal crate that we previously used for the paddle to have extra weight. Lift the paddle with the Ultrahand and the cart should receive enough force to reach the altar. Notice the treasure placed on a platform near the wall? You can grab it by using your Ultrahand. Get x1 Sneaky Elixir. Approach the altar and get your x1 Light of Blessing as a reward.
Visit Highland Stable
After the shrine visit the Highland Stable and talk to the manager to activate the stable and also get x1 Pony Point. After activating the stable, we need to find an NPC to continue the quest.
Find Pyper's Friend Haite
Pyper's Friend should be at the back of Highland Stable. There's a little animal shed in here and you will find her tending to the animals by giving them food. Talk to her and she will lead you to Pyper as she will state that Pyper loves to hang out on trees. One thing to note here is you need to ensure it's daytime or else, Haite will not appear.
Finding Pyper
Pyper's location is near where the Highland Stable is situated. Head to the entrance of the stable and notice the set of trees nearby, inspect and you will find Pyper on one of the trees. Speak to him and he will ask you to gather x10 Fireflies before he can move on and join the Stable Trotters. Getting the said bugs is not that complicated, we just need to visit a certain location near here. This officially commences the Side Quest The Flute Player's Plan.
Collecting The Fireflies
North of Highland Stable, a forest is located and this is where we can find the bugs that Pyper is looking for. Before you travel to the location, make sure to rest first in the nearest bonfire here and rest until nightfall. When it is already nighttime, proceed to the destination by following the path main road here that leads to the north. After you arrived at the location, you will see the Fireflies that reside in this forest. Sneak to them and take at least x10 Fireflies to complete the mission. Travel back to Utsushok Shrine and return to Pyper and give his precious Fireflies. Now he will instruct you to bring Haite near the foot of the tree where he is. Return to the Highland Stable and find Haite inside. Ask her to come with you and guide her to the location. After Haite reached Pyper's Location, Pyper will play his flute and make the tree glow with the fireflies he just received. This completes the quest The Flute Player's Plan. Travel back to Tsutsu-Um Shrine and to Outskirt Stable to continue the quest.
Bring The Trotters To Kaysa
Pyper will join the team and there will be one problem to solve. You need to accompany them where Kaysa is located not far from Outskirts Stable. To do this, notice the stone slab here where Big Wheels are attached, complete the vehicle by attaching the missing Big Wheel and the Steering Stick. Then attach the Trotters' wagon to it. Pull the wagon where the great bud is and complete the quest Serenade To Kaysa.
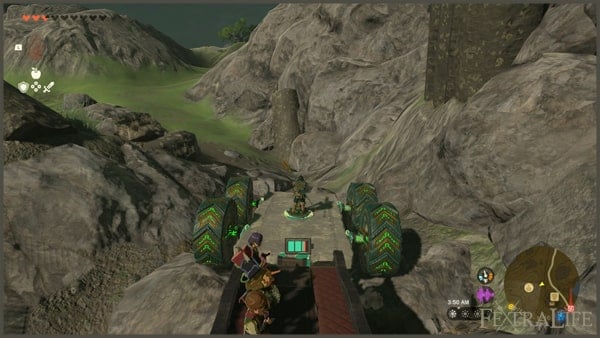
The Trotters will reward with 100 Rupees. However, the main prize here is you being able to upgrade your set to 2 stars or plus 2. This will be unlocked permanently. Gather the materials required for you to fully upgrade your Hylian Set to 2 stars. And after doing so, we can now continue our Main Quest.
Visit Gerudo Canyon Stable
Before we go to Gerudo Canyon Stable, head back to Lookout Landing and exchange your current Light of Blessings for an x1 Heart Container. You should have x5 of the said blessing if you are following this guide. After exchanging the Blessings, teleport your way to Turakamik Shrine. The Stable is just near the area and you can Paraglide your way through it. You will notice right away that there were a lot of crates inside the Stable. Clear all of it and talk to the Stable Manager. He will give you x1 Pony Point for visiting the Stable for the first time. While also completing the Side Quest Piaffe Packed Away.
Visit Kara Kara Bazaar
Head out from the stable and follow the main path here. Notice a small settlement along the road. You can rent a Sand Seal here just to experience it. Kara Kara Bazaar is not too far and you can see the bazaar by just locating the nearest Shrine. After arriving in Kara Kara Bazaar, go ahead and resupply here if you need to. I suggest getting the Desert Voe Headband Gear for later use that cost 450 Rupees.
Clear Mayatat Shrine
Clearing the next Shrine is our next objective to unlock the teleporter as well. Mayatata Shrine is all about traversing in the sand and it will teach you how you can take advantage of your Zonai Devices in this terrain.
Mayatat Shrine Puzzle #1
Notice the Sleds that slide on the sands here and, to access the upper section, use the Recall Ability to rewind a specific Sled. Hop on to the Sled and reach the next area.
Mayatat Shrine Puzzle #2
We only have two puzzles to solve in this Shrine. To solve the second one, the objective is to reach the other side of the area where the Shrine is located. Notice the available Sled here, x1 Steering Stick, and x2 Fans. Combine all of them to make a vehicle that can traverse the sand. After creating the said vehicle, head to the western part of the area and get the treasure chest containing x10 Arrows. You can Paraglide the reach the nearest platform where you can build another sand vehicle and finally reach the area. Get your X1 Light of Blessing as a reward.
Reached Gerudo Town
Gerudo Town is a bit hard to track since the next area to Kara Kara Bazaar is a huge Rift where players will have poor visibility and are unable to check the map due to a certain disturbance in the area. Your best guide to reach the said town is through visuals. In Kara Kara Bazaar notice the sand stream just in the outskirts of the bazaar. Link can ride the stream and reach a certain altitude where you can see Gerudo Town's upper levels or section. It is easy to notice due to a shrine sticking out to it. Since you do not have a map, the main strategy here is after you tracked the direction where Gerudo Town is located, head straight to the location and religiously follow it.
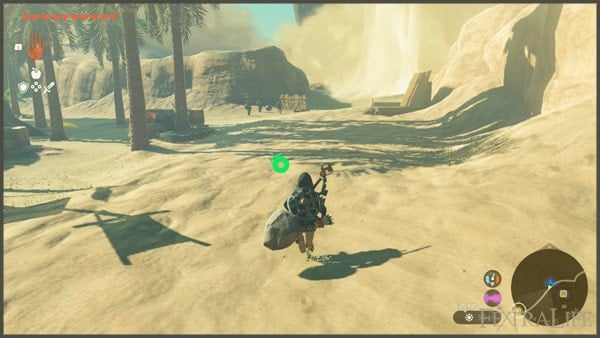
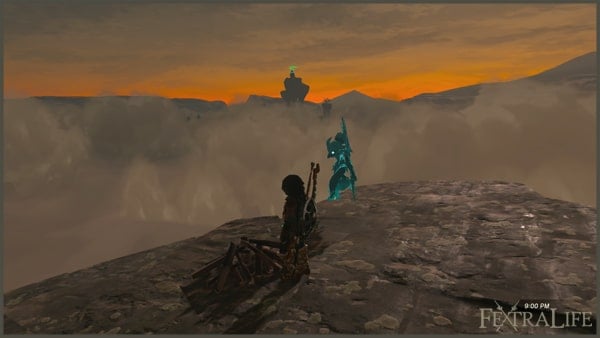
Ride the sand stream that you can find to check if you are following the correct direction. Until you reach the town. It is worth noting that to be able to kill a Gibdo, one of the common enemies in here, is to fire a fire-infused arrow that will damage their outer shell or hit them with any kind of thunder element type of damage. After the outer shell or skin has been damaged, players will now be able to damage them normally. To proceed, head to the throne room and use the Ascend Ability to access the peak of Gerudo Town. After doing so, clearing the next Shrine should be the next objective.
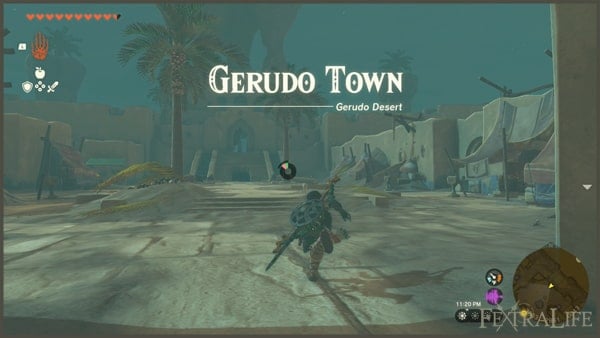
Clear Soryotanog Shrine
Starting from this section, we have dedicated a certain page for Shrines. It is advisable to check the page to have the knowledge of clearing the Shrine. Please visit the Shrine Page to complete Soryotanog Shrine. Shrines that do not have information on our Shrine Page will be tackled in this walkthrough like in the previous section. After clearing Soryotanog Shrine, get x1 Light of Blessing as a reward.\
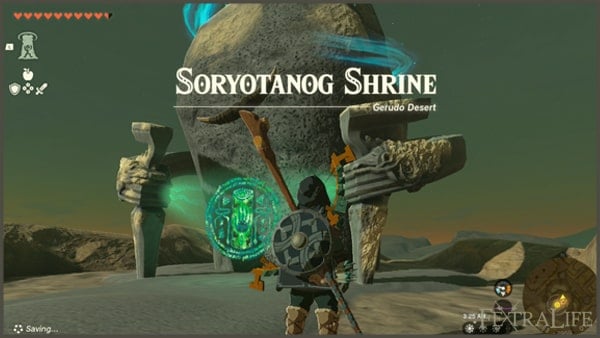
Infiltrate The Lower Chambers of Gerudo Town
To continue, go to the town proper and notice the well that can lead to the lower areas and tunnels of Gerudo Town. You can enter via the main gate since you are a stranger to the people of Gerudo at this moment. Head to the west section of the area and notice a rope tied into a pot, this is where you can use the Ascend Ability to reach the inner section of Gerudo Town. The people will be surprised that you managed to enter the area and will tell you to leave at once until Buliara shows up and recognize Link. She will order her troops to stand down and direct you to Riju's location
Track Riju in North Gerudo Ruins
Fast travel to Soryotanog Shrine and North Gerudo Ruins is not far from here. Paragliding to its location from the Shrine where is the best bet here. Follow the marker and you will reach the destination in no time. Before approaching Riju, get the x1 Knight's Bow near Riju. Talk to her to proceed and she will ask you to help her train for the upcoming battles. Simply follow the provided objectives here like guiding her lightning in hitting the dummies and you are good to go. Master these techniques as you will use this ability a lot when dealing with Gidbos later on. Now that the training is done, ready for a string of battles with Riju.
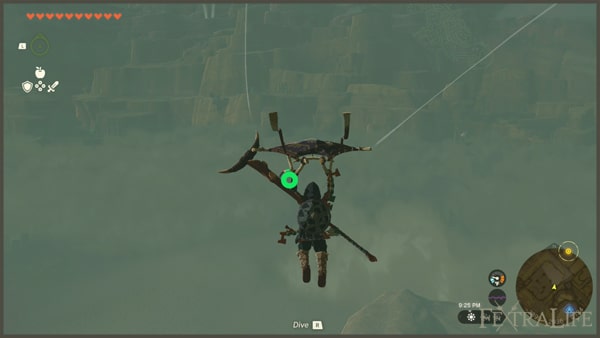
Secure Kara Kara Bazaar
Riju and Link will receive word that Kara Kara Bazaar is being attacked by a group of Gibdos. Fast travel to Mayatat Shrine to start the sequence. Watch how Riju charge and release an energy field where you can fire your arrows and guide Riju's lightning to strike targets. This can 1 shot all of the Gibdos that will be caught in the explosion. Thus, a lot of arrows are needed starting from this point. Clear the waves of Gibdos by repeating the same strategy until the party notices the source of the Gibdos and asks Link to destroy it. It is the sand pillar that emits a purple aura and spawns Gibdos. Link can destroy this once the pillar glows by striking it with Riju's Lightning. When the sand pillar collapse, it will complete the mission. Leading the party to their next battle.
Defend Gerudo Town
A horde of Gibdos will try to overrun the town thus the party decided to prepare to defend the town. Link will be asked to coordinate with the troops on how they will defend the town. Visit the northeastern section of the town where provisions are being kept. Take advantage of all the items here like Rupees, weapons, Zonai Devices, and raw Materials. After getting the available materials, talk to Padda and set the Barricades in the North Gate. After setting the barricade, go to the other side of the town, which is the northwestern section, and talk to Teake to deploy troops at their designated location.
Deploy the Spear Troops to the West Gate, Sword Troops to the East Gate, and Cannoneer to the north gate. The objectives of the mission are simple. Clear the waves of incoming Gibdos, especially the ones that penetrated the city defense, and destroy all the sand pillars that spawn the Gibdos while protecting Riju in the process. When the battle starts, head to the east gate as fast as you can and clear the Gibdos on this side and destroy the Sand Pillars. After doing so, head to the north gate and clear any possible Gibdos that infiltrated the town. Note that there are flying Gibdos as well that you need to take care of they can easily get passed the defenses that the party set up. Clear the north gate and head to the east gate to do the same thing. Not for long, the party will be able to clear all the invading Gibdos and wins the fight.
Solve The Riddle of the Sands
We need to solve a series of puzzles for us to proceed. The quest marker will lead you to the area past Gerudo Town. Notice the three Stone Structures in the middle of the Sand Storm? It is our next destination. Teleport to Soryotanog Shrine and Paraglide to the nearest Stone Structure.
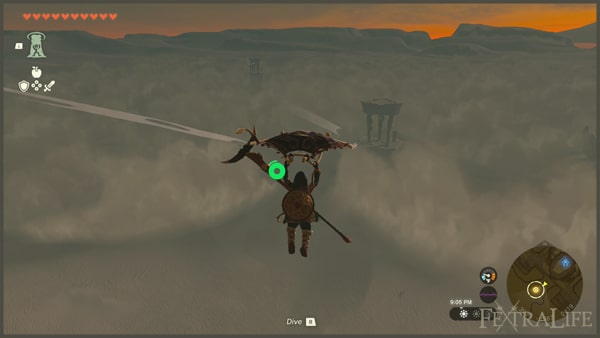
First Stone Structure Puzzle
Upon reaching the first Stone Structure, notice that you can destroy its flooring and unveil the light source that leads to the next structure. Destroy the stone flooring and follow the light.
Second Stone Structure Puzzle
When Link reaches the second structure, you can use the Ascend Ability to access the upper section of the structure. Observe the surroundings and notice another structure nearby with a cross lever on it. Use the Paraglide to reach the second platform and turn the cross lever to increase the height of the Second Stone Structure to properly reflect the light source and make a triangular shape light path. Head to the last stone structure to solve the last puzzle.
Third Stone Structure Puzzle
When reaching the third Stone Structure, notice that you can destroy the flooring in here. Destroy it and discover the materials that you need to use for the puzzle. The main goal of this puzzle is to bring the wooden levers to the top of the structure so Link can turn the machine using at least one level. As easy as it may sound, this puzzle is tricky. What you can do is Save your progress first before solving the puzzle just in case you messed it up, you can load your progress. The key to solving this puzzle is aiming to bring at least x1 wooden lever on top of the structure so Link can interact with the machine. Use the two Hover Stones provided here to slowly work your way up while transferring the said materials. My advice is to place the Hover Stones as high as you can and use the Ascend Ability to access the upper parts of the Stone Structure and manipulate the Hover Stones on a higher position. Ultrahand has a decent range thus you will be able to snag the stones and transfer them to where you are. Connect at least one wooden lever to the machine and turn it to solve the puzzle. This will activate the Lightning Temple switch mechanism in the middle of the Stone Structures. Head to the center and hit the mechanism with Riju's Lightning and activate Lightning Temple.
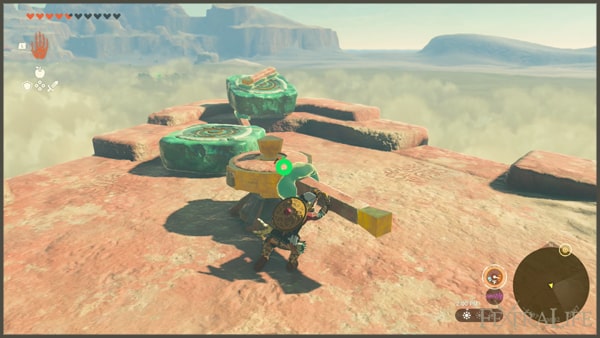
Clear Lightning Temple
It is time for the exciting Lightning Temple and be reminded that we have dedicated a separate page for each temple. Provided with intricate steps to complete the said temple. Visit the Lightning Temple Page for the full guide. After completing Lightning Temple and defeating Queen Gibdo, receive an x1 Heart Container and receive the Vow of Riju, Sage of Lightning.
This whole main quest is indeed a long journey and congratulations on clearing the Riju of Gerudo Town Main Quest. Now you can relax a bit and return to Lookout Landing to resupply.
